TL;DR

Get coffee and tea gear delivered free with Prime
- Fast, free delivery on millions of items
- Prime Video, Amazon Music and more included
- Member-only deals all year
A portafilter basket can change how much coffee fits comfortably because its capacity and shape affect the grounds’ volume and the puck’s clearance beneath the shower screen. Start near the basket’s stated range, weigh your dose and yield, and adjust only when the puck fit or taste gives you a reason.
Your usual 18 grams can sit neatly in one basket and spill over the rim of another. The scale says the same thing; the coffee in the basket tells a different story. That difference comes down to capacity, shape, and the room above the puck.
This guide explains why portafilter baskets change your dose, how to spot a dose that does not fit, and what to change when you swap baskets. You’ll get a practical way to test the fit without losing track of your espresso recipe. The aim is simple: a puck you can prepare consistently and a shot that tastes good.
Treat the basket’s gram rating as a starting range, since shape and coffee density change how much room the grounds occupy.
Check that the puck has clearance from the shower screen; repeated contact clues are a reason to test a slightly lower dose.
A shallower puck can be harder to prepare consistently, but it does not prove the espresso will taste bad.
Changing dose while holding espresso yield fixed also changes the brew ratio, so track both weights and taste the result.
Keep the coffee and grind steady while testing a new basket, then adjust one variable at a time.
Espresso field guide · Basket fit
Why Portafilter Baskets Change Your Dose
The scale measures weight. The basket has to hold volume. Capacity, shape, coffee density, and headspace explain why your familiar dose can fit neatly in one basket and crowd another.
Same grams, different space
A dose is dry coffee measured by weight. But grounds can occupy different volumes, even when the scale shows the same number.
Capacity is a range
A basket’s gram rating gives you a useful starting point. Its width, depth, and wall shape affect how that dose sits.
Density changes volume
Darker roasts are often less dense and can take up more room per gram. Bean type, freshness, and grind also affect settling.
Room makes a difference
A mound above the rim can scatter grounds and complicate distribution or tamping. A neat fit is easier to repeat.
Comfortable fit
Grounds distribute and tamp neatly, with some clearance under the shower screen. Keep your usual dose if the cup also tastes good.
Possible crowding
A mound, messy preparation, or a repeated screen impression can be a clue to test a slightly lower dose. These signs are not definitive alone.
Read the fit from rim to screen
Headspace is the clearance between the puck and shower screen. Basket geometry and machine design both shape the fit.
Look for contact clues
Dry grounds above the rim or a repeated screen or screw imprint after brewing can suggest limited clearance. Check the pattern across several shots.
Check preparation
A shallow puck may be harder to prepare consistently. It does not automatically mean the espresso will taste bad; judge the cup too.
Try your dose first
An 18 g dose may work in a basket rated for 20 g. Start with the coffee and grind steady, then adjust only if fit or taste calls for it.
A dose change also changes the recipe
Brew ratio compares dry coffee dose with the liquid espresso collected. Track both weights when comparing baskets.
Illustrative fit only. Actual fill varies with basket geometry, coffee, roast, and grind; basket ratings are not precise volume measurements.
A familiar starting recipe.
Same yield, changed ratio and potentially changed taste.
A simple process for finding a dose that fits
Keep comparisons clear: steady coffee and grind, consistent puck preparation, and one measured change at a time.
Use the range
Begin near the basket maker’s stated capacity.
Distribute & tamp
Use your normal routine and notice whether grounds spill or mound.
Assess clearance
Look for repeated contact clues and consistent puck preparation.
Weigh & taste
Record dose and yield. Adjust a small amount, then compare the cup.
If you change dose while holding yield fixed, brew ratio changes too. Keep notes on both weights and taste before changing grind, roast, or another variable.
Why the same dose can fit one basket and crowd another
A portafilter basket changes your dose because it determines how much space your dry grounds have to occupy and how much room remains above the puck. Its gram rating gives you a starting range, while its shape, your coffee, and your grind affect the actual fit. That is why an 18 g dose can look comfortable in one basket and crowded in another.
The word “dose” means the dry coffee grounds you put into the basket, usually measured in grams. A scale measures weight, but the basket has to hold volume. Two portions with the same weight can take up different amounts of space, much like 100 grams of feathers and 100 grams of rice fill different containers.
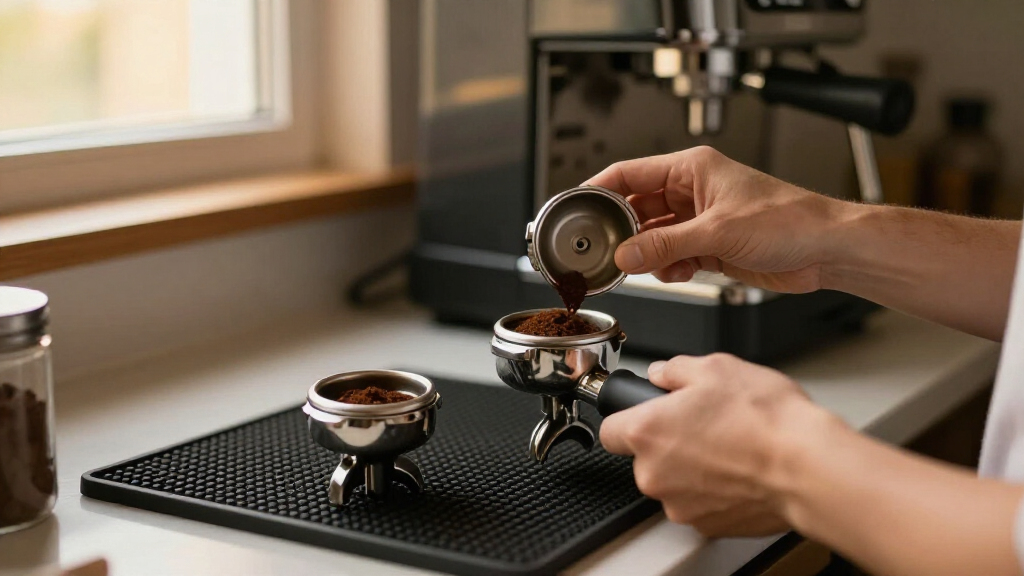
Imagine moving your regular beans from a deep basket into a wider, shallower one. Your 18 g dose still weighs 18 g, but the surface may sit closer to the rim, making distribution and tamping awkward. A few grounds may scatter across the counter before you even lock in the portafilter. The basket’s capacity can change how much coffee you should use, especially when the fit makes preparation less repeatable.
Basket labels are guides rather than strict limits. An 18 g label suggests a useful starting range around 18 grams, but the best dose depends on the coffee, grind, roast, and desired headspace—the space between the puck and shower screen. Start with the number on the basket, then let the fit and the cup guide any adjustment.
Example: if your old basket holds 18 g without spilling and a new one has a stated capacity of 20 g, you can try the same dose first. You may not need a change at all. If the puck sits unusually shallow or your preparation becomes inconsistent, then test a small adjustment rather than changing several recipe variables at once.
As an affiliate, we earn on qualifying purchases.
How basket shape and coffee density change the fit
Basket shape and coffee density change the fit because grams do not translate into a fixed volume of grounds. A wider or deeper basket can hold a different volume at the same weight, and two baskets labeled for the same dose can behave differently. The shape is the cup; the grounds are not always the same size or packing texture.
Different coffees can look surprisingly unlike each other after grinding. Darker roasts are often less dense and can occupy more basket volume per gram than lighter roasts. Grind size, bean type, and freshness also affect how the grounds settle. So a dose that leaves plenty of room with one coffee may rise toward the rim with another.
For a familiar example, picture 18 g of a lighter roast sitting below the rim. You switch to a darker roast at the same grind setting, and suddenly the basket looks fuller, almost like someone added an invisible scoop. The scale is doing its job: the change comes from how much space those grounds take up, not from extra coffee sneaking into the basket.
Precision baskets, straighter walls, and different hole patterns have become more common in specialty espresso. These designs can affect how grounds fit and how water flows through the puck, but the word “precision” does not make one dose universally right. A basket’s geometry and your machine’s shower screen both matter, so manufacturer guidance is a useful place to begin rather than a guarantee.
When you compare baskets, keep the coffee and grinder setting as steady as you can. If you change your dose, roast, grind, and basket all at once, a different tasting shot will leave you guessing which change caused it. Weigh the grounds and the espresso, and write down what you changed. Those small numbers make a subtle difference easier to understand.
adjustable coffee basket for espresso machine
As an affiliate, we earn on qualifying purchases.
As an affiliate, we earn on qualifying purchases.
How much headspace your puck needs
Headspace is the clearance between the top of the coffee puck and the shower screen, and a dose needs enough of it to avoid pressing the puck against the screen. Too little room can leave a screen or screw impression in the dry puck; too much can leave a shallow puck that is harder to prepare consistently. The right fit depends on both the basket and your machine.
When you lock in the portafilter, the shower screen sits above the coffee and spreads water across it. If an overfilled basket pushes the puck into that screen, your tamp may become awkward and the puck can pick up a visible imprint. After brewing, a screen mark on the puck can offer a clue that it was crowded. It is a clue, not a perfect diagnosis: machine design and basket geometry vary.
Say you dose 20 g into a basket rated for 18 g, and the dry grounds mound above the rim. Even if you manage to tamp them in, you may have little clearance under the screen. A dose that fits just below the rim and leaves some room is easier to distribute and tamp without scattering grounds across the counter.
An underfilled basket can bring its own challenge. With 16 g in a basket designed around 20 g, the puck may be shallow and harder to prepare evenly. That does not automatically mean the espresso will taste bad. It means the same grind and recipe may behave differently, so pay attention to consistency and the cup instead of treating a shallow puck as a verdict.
Practical check: distribute the grounds, tamp as usual, and inspect whether the puck appears to contact the shower screen when you lock in. If you see an imprint or repeatedly struggle to prepare the dose neatly, reduce the dose slightly and compare. A few tenths of a gram at a time is easier to assess than a large jump.
As an affiliate, we earn on qualifying purchases.
What a dose change does to your espresso recipe
A dose change affects the brew ratio, so changing the amount of dry coffee while holding the espresso yield fixed can change the taste and strength. Brew ratio compares the dry coffee dose with the liquid espresso you collect. The basket may prompt an adjustment, but the dose is part of a recipe, not an isolated number.
For instance, brewing 18 g of coffee to 36 g of espresso gives a 1:2 ratio. If you drop to 16 g and still collect 36 g, the ratio becomes 1:2.25. That change may taste different even if your brew time stays close to the same. Your shot could feel thinner or show more bitterness, depending on the coffee and how it extracts.
Here is a simple comparison to keep the numbers visible:
| Dry dose | Espresso yield | Ratio | What to watch |
|---|---|---|---|
| 18 g | 36 g | 1:2 | Starting point for a balanced recipe |
| 16 g | 36 g | 1:2.25 | More yield for each gram of coffee |
| 20 g | 40 g | 1:2 | Same ratio with a larger dose and yield |
These ratios describe the arithmetic, not a promise about flavor. A lively, light roast may taste good with a different ratio from a rich, darker one. If you lower the dose to make the puck fit, consider changing the yield too, then taste before deciding whether the grind needs work.
To keep your comparison useful, change one variable at a time. You might first test whether 18 g fits the new basket, then decide whether to keep the same ratio by adjusting the yield. If the basket is already comfortably filled, keep the dose stable while you dial in grind and output. Otherwise, changing the dose and grind together makes it hard to tell what improved the shot.
As an affiliate, we earn on qualifying purchases.
A simple process for finding a dose that fits
You can find a workable dose by starting within the basket’s stated range, checking the puck’s fit, and changing one variable at a time. This gives you a repeatable baseline before you adjust the espresso recipe. You do not need to guess from a basket label alone or change every setting after a new basket arrives.
- Read the basket rating. Use its stated capacity as a starting point, such as 18 g for a basket labeled 18 g.
- Weigh your usual dose. Keep the coffee, grinder, and grind setting steady for the first trial.
- Prepare the puck consistently. Distribute the grounds and tamp as you normally would. Note whether they mound over the rim or seem unusually shallow.
- Check clearance. Lock in the portafilter and look for signs of contact, including a screen or screw impression after brewing. Treat these as clues, since machines differ.
- Pull and taste the shot. Weigh your espresso yield and record the dose, yield, and result. Adjust the dose only if the fit or cup gives you a reason.
For example, if your new 18 g basket handles your usual 18 g neatly and the espresso tastes good, there is no rule that says you must change your dose. If the grounds mound above the rim, try reducing the dose slightly and repeat with the same coffee and grind. If the puck becomes shallow and preparation is difficult, move back toward the basket’s suggested range.
Keep a short note beside your machine: “18 g in, 36 g out, new basket, balanced.” That record gives tomorrow’s shot a clear starting point, even if the kitchen is busy and the grinder is making its familiar little storm of coffee dust. Consistency makes small differences easier to taste.
Which basket clues should make you adjust your dose?
Adjust your dose when the grounds clearly do not fit the basket or the cup repeatedly points to a change—not just because a basket has a new label. A dose may be too high when dry grounds mound above the rim, puck preparation becomes messy, or the puck shows contact marks. A shallow puck or inconsistent preparation can suggest a dose that is too low.
None of these signs should make the decision for you on its own. A screen imprint can depend on the machine, and a puck can look untidy while the espresso still tastes pleasant. The useful question is whether the same problem repeats when you prepare the shot the same way.
Imagine one morning shot leaves a screw mark, but the next does not. That single mark may not tell you much. If three shots in a row show contact and locking in the portafilter feels tight, reducing the dose a little is a reasonable test. Then compare the espresso yield and taste before making another adjustment.
If the basket looks comfortable but the espresso tastes sharp, you may need to work on grind or yield instead of dose. If you change the dose while keeping yield and brew time fixed, you change the ratio and may create a new taste problem. Keep your notes simple: dose in, yield out, and one short taste description such as “sour,” “dry,” or “sweet.”
Try this: make two shots with the same dose and preparation. If they look and taste similar, then change only the dose slightly and repeat. Your own machine and coffee give you better guidance than a universal gram number printed on a basket.
When a precision basket helps—and when it does not
A precision basket can change how the puck fits and how water passes through it, but it does not automatically make espresso better or require a new dose. Its shape and hole pattern may suit a particular recipe, grinder, or preference. The best test is whether it works well with your dose, preparation, machine, and taste.
Basket designs vary. Some have straighter walls; others use different hole patterns or shapes. Those differences can affect the grounds’ space and the way water moves through the puck. If you switch from a conventional basket to one with different geometry, your usual dose may still work—or it may sit too high or too low. The label is a starting point for testing.
Consider a home barista who buys a precision basket hoping to make a sweet, clear shot. The new basket makes the grounds sit differently, so the old dose becomes awkward to distribute. A small dose adjustment could improve the fit, but the basket alone cannot promise a better cup. The grind, yield, coffee, and consistency still matter.
A larger basket follows the same logic. It helps only when its capacity suits the amount of coffee and the recipe you want to brew. If you usually make a single espresso with a smaller dose, a larger basket might leave a puck that is too shallow for your preferred preparation. More capacity is not automatically more flavor.
Before buying into a new basket’s reputation, check its stated dose range and compatibility with your portafilter and machine. Try your current dose first if it fits comfortably. If the fit or taste calls for a change, adjust gradually and record what happens. Your palate gets the final vote.
Frequently Asked Questions
Does changing baskets mean I must change my dose?
No. Try your existing dose first if the grounds fit comfortably and the espresso tastes good. Adjust when the puck is clearly too full or too shallow, preparation becomes inconsistent, or repeated shots give you a reason to change.
How do I know the right dose for my basket?
Start near the basket maker’s stated range, then check the grounds’ fit and puck clearance. Weigh your dose and espresso yield, prepare the puck consistently, and refine the dose based on repeatable results and taste.
Can I use an 18 g dose in a 20 g basket?
Usually, yes, if the grounds fit and you can prepare the puck consistently. The puck will be shallower than with a 20 g dose, so you may need to adjust your grind or yield to get the result you want.
What happens if I overfill the basket?
An overfilled basket can press the puck against the shower screen, making preparation and extraction less consistent. Look for grounds mounding above the rim or repeated screen or screw marks after brewing, then test a slightly smaller dose.
Why does the same dose look different with different beans?
The scale measures weight, but coffee’s volume changes with density, roast, grind, and freshness. Darker roasts are often less dense and can take up more basket space per gram than lighter roasts.
Should I change grind size or dose first?
If the basket is clearly overfilled or underfilled, adjust the dose so the puck fits comfortably. Otherwise, keep the dose stable while you dial in grind and yield; changing one variable at a time makes the result easier to read.
Conclusion
Start with the dose you already use if it fits the new basket comfortably. Then check the puck’s clearance, weigh the espresso you collect, and let repeatable preparation and taste tell you whether to adjust.
A basket is a small metal cup, but it sets the stage for every shot. Give the grounds room to sit well, and your morning espresso has a steadier place to begin.
Halloween Picks
halloween
As an affiliate, we earn on qualifying purchases.