
TL;DR

Get coffee and tea gear delivered free with Prime
- Fast, free delivery on millions of items
- Prime Video, Amazon Music and more included
- Member-only deals all year
Automatic milk systems draw milk from a container and route it through tubes or removable parts, where residue can linger after a drink. Rinse and wash milk-contact components at the intervals in your machine’s manual, keep milk refrigerated, and remember that an automatic rinse and a descaling cycle do different jobs.
Follow your machine’s manual for both rinse timing and thorough washing; the schedule varies by model.
An automatic rinse may flush internal passages but may not wash a removable container, tube, nozzle, or frother.
Keep milk refrigerated and limit time outside refrigeration; overnight storage depends on the machine’s stated conditions.
Descaling removes mineral deposits from water pathways and does not clean milk-contact parts.
Compare detachable components, tubing access, prompts, storage instructions, and approved cleaner requirements before buying.
Automatic Milk Systems: Convenience Comes With Cleaning Rules
One-touch lattes are easy. Keeping the milk path fresh takes a little routine. Learn what to rinse, what to wash, how to store milk, and why descaling cannot replace milk-system cleaning.
Milk takes a route. Residue can stay behind.
An automatic system draws milk from a container, heats and froths it, then sends it through connected parts into your cup. Hidden bends and connectors can hold residue even when the outside looks clean.
Container
Carafe, jug, or carton holds the milk.
Intake tube
A hose and couplings draw milk into the machine.
Frothing chamber
Milk is heated and aerated for texture.
Nozzle & cup
The finished foam and milk reach your drink.
Think of the pathway like a bent drinking straw: its exterior may look spotless while a little milk still clings inside. Removable parts are often easier to inspect, but design alone does not determine cleaning effort.
A quick rinse helps. Thorough washing does the deeper work.
Build a repeatable habit around the machine’s cleaning instructions. Fresh residue is easier to remove, while disassembly and washing reach places a quick rinse may miss.
Run the specified rinse
Use the milk rinse or cleaning program at the time and in the way the manual directs.
Remove and wash
Clean the container, hose, nozzle, or frother that the manual identifies for manual washing.
Inspect and reassemble
Rinse fully, check the parts, then put the milk pathway back together as instructed.
Do not assume every machine needs the same schedule or that a component is dishwasher-safe. Check the manual for frequency, approved products, and permitted cleaning methods.
Keep milk cold between drinks.
Milk is perishable. Time in a warm container or tube can compromise freshness, and residue can support microbial growth. Some systems chill an attached container; others do not.
Check the stated conditions
Leave milk connected only when the manufacturer’s instructions permit it and the system meets the required storage conditions.
Put milk back in refrigeration
Remove and refrigerate milk as directed. Clean the container and intake tube on the machine’s schedule.
Overnight storage depends on your machine’s explicit guidance. When instructions are unclear, consult the manufacturer; a power light alone does not prove milk is chilled safely.
Clean the right pathway with the right method.
Milk circuits and water circuits collect different kinds of residue. A cycle for one cannot stand in for care of the other.
| Task | Targets | Does not replace | What to follow |
|---|---|---|---|
| Milk rinse / milk cleaning | Milk-contact passages and components | Water-circuit descaling | Milk cleaning schedule and approved products |
| Descaling | Mineral deposits in water pathways | Milk-part washing | Machine’s descaling instructions |
| Manual washing | Specified removable parts, such as carafe or tube | Any internal cycle the manual requires | Approved detergent, rinsing, and drying method |
A descaling light reports on mineral buildup, not the condition of a milk nozzle. Use only cleaners and methods approved for your exact machine; household products, heat, or unsuitable detergents may damage parts.
Weak foam, clogs, or a sour smell? Check the milk path.
Residue can affect taste and foam consistency. Use these symptoms as a prompt to inspect and clean according to your manual.
Odd or sour taste
Old milk residue may linger in a warm tube, connector, or container.
Weak or uneven foam
A dirty milk path can interfere with the system’s normal frothing performance.
Odor or clogging
Inspect milk-contact parts and follow the specified rinse and washing steps.
These bars show practical priorities, not measured performance scores. Cleaning frequency and exact steps vary with the machine and its instructions.
Choose a system you will maintain.
Ease of cleaning is part of ownership. Compare the hands-on routine alongside drink quality and convenience.
Can you reach the milk path?
Check how many parts detach and whether tubes and connectors are easy to inspect and wash.
Will reminders help?
Look for clear prompts and rinse programs, while confirming what still needs manual washing.
Can you store and clean it?
Verify refrigeration guidance, approved cleaners, dishwasher-safe parts, and supply availability.
Detachable parts, guided maintenance, attached milk refrigeration, and adjustable foam settings appear across the market, but features vary by model. Check the product’s manual and specifications.
How an Automatic Milk System Gets Milk Into Your Cup
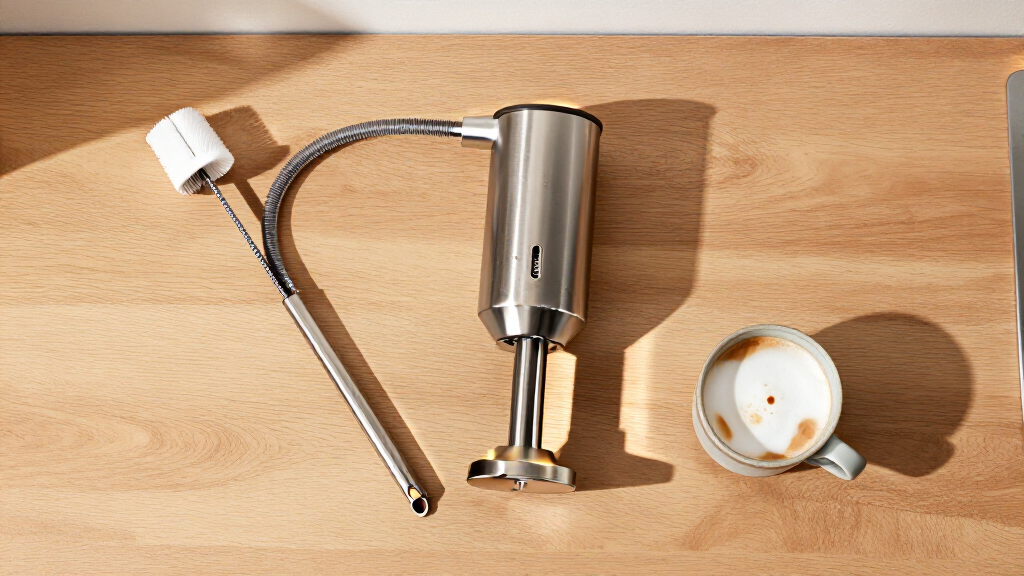
An automatic milk system draws milk from a container, heats and froths it, then sends it through a tube, connector, chamber, or nozzle into your cup. That pathway is what makes a latte button feel effortless: press once, hear the pump, and watch pale foam settle over dark espresso. It also creates several surfaces where milk can remain after the drink is gone. Some machines use a detachable carafe; others use a hose that reaches into a separate jug or carton. With either design, milk-contact parts may include the container, intake tube, couplings, frothing chamber, outlet, and small seals. Think of the pathway like a drinking straw with bends: the outside can look spotless while a little milk still clings inside. A removable tube is often easier to inspect than a hidden channel, but the design alone does not tell you how simple cleaning will be. For example, imagine making two flat whites before a morning meeting. You rinse the visible spout, but the intake tube stays connected to milk. The machine has done its coffeehouse trick; your next task is to follow its instructions for rinsing or cleaning every milk-contact part. Some models add prompts and rinse programs, yet those features do not automatically wash every removable piece.automatic milk frother cleaning kit
As an affiliate, we earn on qualifying purchases.
As an affiliate, we earn on qualifying purchases.
A Quick Rinse Helps, but Washing Does the Deeper Work
Automatic milk systems need cleaning at the intervals in their manuals because a quick rinse may flush passages without removing residue from every removable part. Many routines include a rinse after use and a more thorough wash daily or at another specified interval. Your machine’s instructions set the exact schedule. A useful routine has three checkpoints. First, after preparing a drink, run the rinse or cleaning program the manual specifies. Second, remove and wash parts that the manual says need manual cleaning, such as the milk container or hose. Third, check that parts are fully rinsed, reassembled correctly, and stored as directed. A machine prompt can make the first step easy to remember; it cannot confirm that you washed the detached carafe. For instance, if you make a cappuccino before leaving for work, a prompt may ask you to run a milk rinse. You can do that immediately, then wash the container and tube at the specified time. The sequence matters because fresh residue is easier to remove than dried milk. Do not guess that every machine needs the same schedule, and do not put parts in a dishwasher unless the manual says they are dishwasher-safe.- Check the manual for the cleaning frequency and approved cycle.
- Run the rinse promptly when the instructions call for it.
- Remove and wash the parts identified for manual cleaning.
- Inspect and reassemble the pathway as directed before making another drink.
As an affiliate, we earn on qualifying purchases.
Keep Milk Cold While You Keep the Routine Simple
Keep milk refrigerated, limit the time it spends outside the refrigerator, and clean its container and intake tube regularly. Some automatic systems chill an attached container; others leave milk at room temperature unless you remove it. Check your manual for the storage rules that apply to your design, and do not assume a connected container stays cold. Milk is perishable, and residue in a warm tube or container can spoil and support microbial growth. If your system does not provide the storage conditions required by its instructions, remove the milk and return it to refrigeration after use. Whether you can leave milk in the system overnight depends on the machine’s stated storage guidance. When that guidance is unclear, consult the manufacturer’s manual rather than treating the machine’s power light as proof that milk is safely chilled. Consider a shared office machine used at 9 a.m. and then left idle until the next morning. If the attached container is not designed to keep milk chilled under the manufacturer’s conditions, leaving it connected could compromise freshness. Remove and refrigerate the milk as directed, then clean the milk-contact parts on schedule. A small label beside the machine can remind the last user to put milk away, just as a note on a communal fridge shelf can prevent a forgotten carton from becoming a mystery.As an affiliate, we earn on qualifying purchases.
Use the Right Cleaner for the Right Milk Path
Clean milk-contact parts with the products and methods approved for your exact machine, because heat, detergent, or an unsuitable cleaner can damage some tubes, seals, or internal components. Consult the manual before using dish soap, vinegar, household spray, or a dishwasher. A cleaner suitable for a removable carafe may not be suitable for an internal circuit. Milk systems and water systems have different jobs, so their cleaning cycles differ. A milk rinse or milk-system cleaner targets the path that carries milk. Descaling targets mineral deposits in water pathways. One cannot stand in for the other. If you descale after several months and skip milk cleaning, the milk tube still needs its own routine; if you wash the frother thoroughly, limescale in a water circuit still calls for the machine’s descaling schedule. Picture a machine that flashes a descaling light while its milk nozzle smells stale. The light is telling you about mineral buildup, not the condition of the milk path. Follow the descaling directions for the water circuit and the separate cleaning directions for the milk parts. This distinction saves time and prevents a familiar mistake: running a cycle that feels thorough but leaves the relevant residue untouched. If the manual lists approved detergent or a specific cleaning program, use that guidance. Confirm whether each removable part is dishwasher-safe, and avoid improvising with products the manufacturer has not approved. The safest practical rule is straightforward: match the cleaner and process to the pathway being cleaned.automatic coffee machine milk system cleaner
As an affiliate, we earn on qualifying purchases.
As an affiliate, we earn on qualifying purchases.
Fix Weak Foam by Checking the Milk Path First
Weak or uneven foam can point to residue or a partial blockage in the milk path, though milk type, temperature, and freshness can also affect the result. Check the assembly and clean the pathway according to your manual before changing several settings at once. A clean system gives you a clearer starting point for troubleshooting. Suppose your morning cappuccino used to produce thick, glossy foam, but today it pours like warm milk with a thin cap of bubbles. Check that the hose is connected properly and that the nozzle or frothing parts are assembled as the manual shows. Then run the recommended cleaning steps. A tiny dried deposit can interrupt the flow, much like a kink in a garden hose changes the spray. If cleaning and correct assembly do not help, consider whether the milk is fresh and whether its temperature or type suits the machine. Keep a simple note if the problem returns: when you last cleaned the system, what milk you used, and whether the machine completed its rinse. That record can reveal a pattern without guesswork. For example, if foam weakens after the office machine sits idle overnight, storage and the overnight cleaning routine deserve attention. If it fails immediately after a full cleaning, check for a loose connector or incorrectly fitted part. Persistent problems may need the manufacturer’s troubleshooting steps or service.Compare Cleaning Steps Before You Buy a Milk Machine
The easiest automatic milk system to maintain is the one whose required cleaning steps you will actually do. Compare the parts that detach, how much of the milk path you can inspect, whether the machine prompts you, and what the manual requires after use. A carafe is not automatically simpler than a tube; its shape and removable components matter. Say you are choosing a machine for a small kitchen and make one latte each morning. You may prefer a detachable container that fits neatly in your refrigerator, provided its parts are easy to wash and the storage instructions suit your routine. In a busy shared kitchen, clear prompts and accessible tubing could matter more because several people need to remember the same steps. Some current designs offer guided cleaning, detachable containers, integrated refrigeration, or adjustable milk settings, but these broad features do not describe every model. Check the specific manual rather than relying on a “self-cleaning” label.| Design detail | What to check | Why it matters |
|---|---|---|
| Detachable carafe | Whether the container and lid come apart for washing | Milk can linger around joins and corners |
| External tube | Whether the hose detaches and how it should be cleaned | You can inspect accessible tubing more easily |
| Automatic rinse | Which passages the program flushes | A rinse may not wash removable parts |
| Chilled container | How the system maintains milk storage conditions | Attached milk still needs correct handling |
| Approved supplies | Which cleaners are required and how to obtain them | Cost and availability affect routine upkeep |
Build a Two-Minute Habit That Protects Tomorrow’s Coffee
A dependable milk-system routine is a short sequence tied to your drinking habits: follow the machine’s rinse instructions after use, put milk away as directed, and complete the prescribed wash at the stated interval. The exact tasks vary by model, so use this as a planning pattern rather than a substitute for the manual. Attach each step to something you already do. After your last latte, run the prompted rinse while you rinse your cup. If the manual calls for a daily wash, make it part of wiping the counter before bed. In an office, put a short reminder next to the controls so the person making the final drink knows whether milk needs refrigeration or a cleaning cycle. These small cues work like putting keys in the same bowl: they make the desired action easier to remember. A practical checklist can keep your routine clear without turning coffee into a maintenance project:- After use: Run the instructed rinse or cleaning cycle.
- Between sessions: Store milk as the manual directs; do not assume an attached container stays cold.
- At the scheduled interval: Wash the removable parts specified by the manufacturer.
- When foam changes: Inspect assembly and clean the pathway before changing several settings.
- On the machine’s schedule: Descale the water circuit separately from milk cleaning.
Frequently Asked Questions
How often should I clean an automatic milk system?
Follow the schedule in your machine’s manual. Many systems call for a rinse after use and a more thorough wash daily or at another specified interval; the exact routine varies by model and use.
Is the automatic rinse cycle enough?
Not always. A rinse may flush internal passages, while the milk container, hose, nozzle, or removable frother may still need washing by hand or in a dishwasher if the manual permits it.
Can I leave milk in the system overnight?
Only if the manufacturer’s instructions permit it and the system keeps milk within the required storage conditions. Otherwise, remove and refrigerate the milk as directed, then clean the milk-contact parts on schedule.
Can the milk tube go in the dishwasher?
It depends on the tube and machine. Check the manual before using a dishwasher, because heat and detergents can damage some tubing or seals.
Does descaling clean the milk system?
No. Descaling addresses mineral deposits in water pathways. Milk-contact parts need their own rinse and washing routine.
Why has my milk stopped frothing properly?
Residue or a partial blockage can weaken foam, and incorrect assembly can affect milk flow. Clean and inspect the path according to the manual; milk freshness, type, and temperature can also influence the result.
Conclusion
Automatic milk systems make a latte or cappuccino easy to prepare, but they do not make milk residue disappear. Follow your model’s cleaning instructions, store milk as directed, and treat the milk path and water circuit as separate jobs. Before you buy, read the cleaning steps in the manual and picture yourself doing them on an ordinary weekday. Choose a system whose routine fits your kitchen, then give tomorrow’s coffee the clean start it deserves: cold milk, a clear path, and foam that settles softly over the espresso.Halloween Picks
halloween
As an affiliate, we earn on qualifying purchases.