TL;DR

Get coffee and tea gear delivered free — and shop member deals
- Fast, free delivery on millions of items
- Access to Prime Big Deal Days deals on October 6–7
- Prime Video, Amazon Music and more included
A weekend espresso practice plan improves shots by giving you one clear goal each day: calibrate and test a single variable on Saturday, then repeat the best recipe and check consistency on Sunday. Keep dose and yield steady, adjust grind in small steps, taste every shot, and record what you changed so each pull teaches you something.
A great espresso shot is rarely the result of one lucky pull. It is usually the result of a small adjustment you can repeat: a slightly finer grind, a measured dose, or a better-prepared puck. The challenge is that espresso gives you several knobs to turn, and changing them all at once makes every shot harder to understand.
This weekend espresso practice plan gives you a clear job for each session. You’ll set a repeatable baseline, learn how grind and yield affect taste, and use Sunday to check whether your best shot was a fluke or a recipe you can reproduce. You do not need a refractometer or a café’s worth of equipment. A scale, timer, notebook, and willingness to taste will take you a long way.
The goal is not to hit a magic number every time. It is to make a shot, notice what it tastes like, and make the next one more informed. By the end of the weekend, you should have a recipe you can explain—and a practical way to keep improving it.
Keep the coffee, dose, and target yield steady while you test grind size.
Use 18 grams in and 36 grams out as a starting recipe, not a rule; taste decides whether it works.
Record time, dose, yield, grind setting, and plain-language flavor notes for each useful test.
Use Sunday to repeat Saturday’s best shot before changing another variable.
Start with a scale, timer, and notebook; add advanced measurement tools only when they answer a question you have.
Set up a baseline that makes every shot easier to read
The Weekend Espresso Practice Plan starts with a steady baseline: use the same coffee, basket, dose, and target yield before you begin experimenting. A stable starting point lets you connect a change in taste to a change you actually made. Without it, a new bag, a different dose, and a finer grind can all muddy the result.
Choose beans with a roast date if you can, and use a consistent supply for the weekend. Beans are often easiest to work with after a short rest; the supplied guidance recommends aiming for roughly two to four weeks from roast, though roast style and storage affect how they behave. Keep the bag sealed between sessions, away from heat, sunlight, and moisture. Don’t leave beans in a warm, sunny spot beside the machine.
Before the first shot, write down your basket’s dose, the grinder setting, and the coffee’s roast date. Pick a starting ratio, such as 18 grams of dry coffee to 36 grams of espresso, and keep that dose and yield fixed while you calibrate the grind. A shot around 25–30 seconds can be a useful starting reference, not a law; a different coffee or machine may taste better outside that range.
For example, if you pull 18 grams in and 36 grams out in 27 seconds, record those figures even if the shot tastes sharp. That simple baseline tells you what “before” means. A basic scale and timer are enough to get started; they turn “that one seemed fast” into a result you can compare tomorrow.
- Keep one coffee in play through both practice days.
- Measure dose and yield rather than relying on a basket or cup line.
- Record temperature or machine settings if your setup lets you change them, but leave them alone during the first grind test.
As an affiliate, we earn on qualifying purchases.
Use Saturday to change one variable at a time
The Weekend Espresso Practice Plan works best when Saturday answers one question: what happens when you make the grind slightly finer or coarser? Hold your dose and yield steady, then change only the grinder setting. This turns a string of espresso pulls into a useful test rather than a collection of unrelated guesses.
Start with a calibration shot and taste it. If it gushes into the cup and tastes thin or sharply sour, try a slightly finer grind; if it drips very slowly and tastes harsh or drying, try a slightly coarser grind. Those clues are not perfect diagnoses—channeling and puck preparation can also produce uneven or sour flavors—but they give you a sensible next test. Make small adjustments. A large grinder jump can send you past the useful range.
Here’s a practical 45-minute session. Keep your dose at 18 grams and target 36 grams out. Pull one shot at your starting setting, then make one small grind adjustment for the next. Taste both after they cool enough to sip comfortably, and write down time, yield, and a few plain-language notes: “lemony, watery,” “syrupy, sweet,” or “dry finish.” If the second shot tastes better, repeat that setting once before you call it a win.
Do not chase a precise 30-pound tamp as though it were a flavor switch. A level, repeatable tamp matters more than forcing a particular pressure. Once the coffee bed is evenly distributed and firmly compressed, extra force generally does not fix a poor grind or uneven puck. Your real aim is repeatability: the same dose, a level bed, a straight tamp, and a clean basket.
- Pull a baseline shot and record dose, yield, time, and taste.
- Adjust grind once in a small step, leaving other settings unchanged.
- Pull and taste again, using the same dose and target yield.
- Repeat the better setting to check that the result holds.
Each shot uses coffee and time, so avoid making changes just to keep busy. If you cannot tell which shot tastes better, pause, rinse your palate with water, and taste again. A short, focused set of three or four pulls usually teaches more than ten rushed shots.
As an affiliate, we earn on qualifying purchases.
Learn what grind, yield, and shot time tell you
The Weekend Espresso Practice Plan treats time as a clue, not a score: grind changes flow, yield changes how much you draw into the cup, and taste tells you whether the result works for you. Shot time can help you spot a change, but it cannot declare a shot delicious or balanced on its own.
Think of grind size like the width of a garden hose. A finer grind slows the water’s path through the coffee bed; a coarser grind lets water pass more quickly. That analogy is useful, but espresso is more complicated than a hose: puck preparation, the beans, and the machine also affect flow. If a shot is fast and tastes hollow, a modest move finer may help. If it is slow and tastes intensely bitter or dry, try a modest move coarser, then taste before making another adjustment.
Yield gives you another useful lever. If your 18-gram dose produces 36 grams in the cup, you have a 1:2 brew ratio. Pulling a little more liquid may soften a dense or sharp shot, while stopping earlier can make a thin shot feel more concentrated. Yet a higher yield can also increase bitterness or dryness. Treat ratio as a test, not a universal recipe.
For example, imagine your 18-in, 36-out shot tastes sour but runs in a reasonable time. First check whether the puck looks evenly prepared and whether water escaped around the basket edge. If preparation looks consistent, compare a slightly finer grind while keeping the yield fixed. Only after that should you test a longer yield. Changing grind and yield together makes it hard to learn which helped.
Use numbers to make your notes comparable, then trust your senses to choose between them. A timer can tell you that a shot ran in 22 seconds; it cannot tell you whether its sweetness, acidity, body, and finish make you want another sip. Some coffees taste lively and sweet at times outside the common 25–30-second starting range. The cup gets the final vote.
As an affiliate, we earn on qualifying purchases.
Use taste notes to turn each pull into a useful lesson
The Weekend Espresso Practice Plan improves faster when you describe what you taste in simple, repeatable language. A note like “bad” gives you nowhere to go; “thin, sharp, and gone quickly” points toward a different next test. You do not need professional tasting vocabulary. You need notes specific enough to compare one cup with another.
Let each shot cool briefly before judging it, since very hot espresso can hide detail. Take a small sip, then ask three questions: does it taste sweet or mostly sour and bitter; does it feel watery, balanced, or heavy; and does the flavor finish cleanly or leave a dry coating? Write down the first clear impressions. If you add an aroma note—such as cocoa, toasted nuts, or citrus—keep it tied to what you genuinely taste rather than what the bag promises.
Suppose shot A is “bright, thin, lemony” and shot B is “rounder, sweeter, cocoa finish.” Even if B took 32 seconds and A took 27, you may prefer B. That is a meaningful result, not a failure to hit a target. If the difference feels uncertain, taste both again with water between sips, or ask another adult in your household to taste without telling them which recipe you prefer.
Keep a simple log with date, coffee, dose, yield, time, grind setting, and taste. Add one sentence about puck preparation if something went wrong, such as a clump, tilted tamp, or visible spray. After a few sessions, the notes can reveal patterns: perhaps your grinder needs a small adjustment as the beans age, or perhaps you enjoy a slightly longer yield with that particular coffee.
A refractometer can measure dissolved coffee solids and help estimate extraction yield, but it is optional and does not replace tasting. For most home baristas, a scale, timer, and notebook offer a better early return. The point of tracking data is not to turn breakfast into a laboratory. It is to remember what you did when a shot finally tastes right.
espresso grind size adjustment tool
As an affiliate, we earn on qualifying purchases.
As an affiliate, we earn on qualifying purchases.
Make Sunday a repeatability test, not another guessing session
The Weekend Espresso Practice Plan uses Sunday to answer a different question: can you make Saturday’s best shot again? Repeatability matters because one delicious pull can come from luck. If you reproduce it with the same coffee, dose, yield, and preparation, you have a recipe worth keeping.
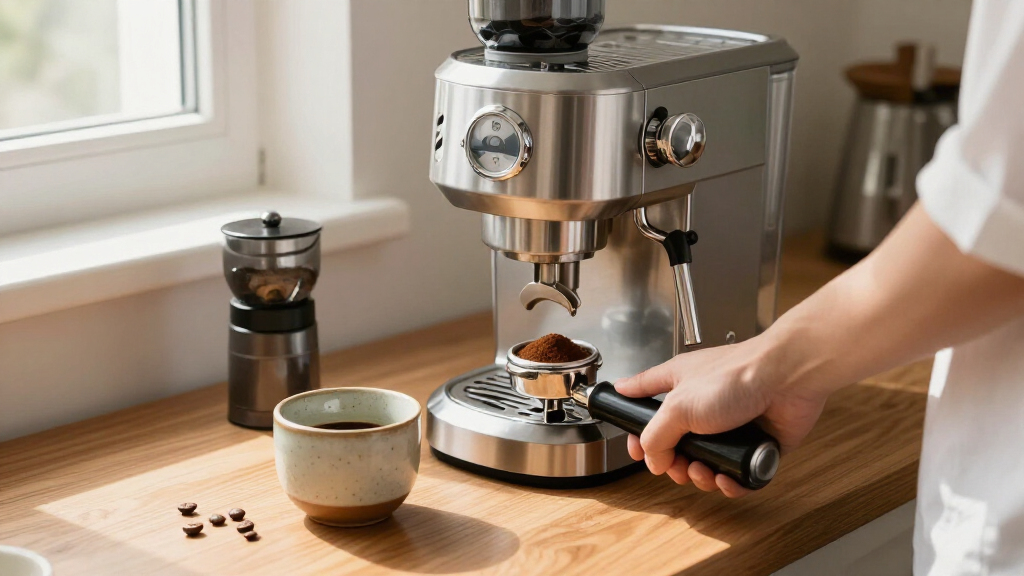
Begin with a clean, dry basket and your notes from Saturday. Set the grinder to the most promising setting, weigh the same dose, distribute the grounds the same way, and tamp level. Pull two shots at the same target yield. If they taste close, your routine is becoming reliable. If the first runs much faster, check whether the grinder retained old grounds, whether you changed the dose by a fraction of a gram, or whether the puck was uneven.
For a concrete Sunday test, aim for 18 grams in and 36 grams out for both shots. If one takes 27 seconds and the next takes 31, do not immediately adjust the grinder. First compare the cups and inspect your workflow: did you weigh the dose, clear the basket, and start the shot the same way? A few seconds of variation can come from preparation or the coffee itself. Correct the repeatable process before reaching for another setting.
Once your baseline repeats, test one small change if you still want to improve the flavor. For instance, keep the grind and dose fixed, then stop the shot at 34 grams instead of 36. Taste the two cups side by side. If the shorter shot is sweeter and less drying, record that as your preferred recipe; if it tastes too concentrated, return to the longer yield.
Clean the portafilter and basket after practice, and wipe down the machine so old coffee oils do not taint tomorrow’s espresso. Let hot parts cool before handling or cleaning, follow your machine’s instructions, and keep water away from electrical components. A tidy setup makes the next session faster—and keeps yesterday’s burnt, stale residue out of your cup.
Choose simple tools and habits that give you better feedback
The Weekend Espresso Practice Plan does not require expensive gadgets: a reliable scale, a timer, a notebook, and a consistent grinder give you the feedback that matters most. More advanced tools can answer narrower questions, but they cannot rescue a routine that changes five things at once or skips tasting.
A scale helps you measure coffee in and espresso out, while a timer shows how flow changes from shot to shot. A notebook—or a notes app—keeps the results where you can find them next weekend. A tamping mat protects your counter and gives you a stable place to work. These practical basics are enough for a useful practice plan that actually improves shots, especially when you use the same steps each time.
Tools have tradeoffs. A smart scale may display time and weight together, which is convenient, but a plain scale and phone timer can do the job. A refractometer offers a number for coffee strength and estimated extraction, but readings require careful preparation and do not tell you whether the cup tastes balanced. Buy a tool because it answers a question you regularly have, not because another number seems automatically better.
| Tool | What it helps you learn | Good reason to use it |
|---|---|---|
| Scale | Dose and beverage yield | You want repeatable coffee-to-water ratios |
| Timer | How quickly the shot flows | You need to compare grind changes |
| Notebook or app | What changed and how it tasted | You forget which setting worked |
| Refractometer | Estimated strength and extraction | You already have a consistent process and want deeper measurements |
For example, if your shots vary because you scoop coffee by eye, buy or borrow a scale before worrying about a refractometer. If you already measure dose and yield but cannot recall whether yesterday’s finer setting tasted better, a notebook solves the actual problem. Choose the simplest tool that closes the gap between question and answer.
Avoid the weekend habits that waste coffee without teaching you much
The fastest way to waste a practice session is to change several variables before tasting the result. A new dose, new grind, different tamp, and longer yield may produce a better cup, but you will not know which change helped. Keep each test small enough that the lesson survives into your next session.
Another common trap is treating the timer as a pass-or-fail test. A 25–30-second shot is a familiar starting point, but the number depends on the coffee, machine, dose, and recipe. If a 33-second shot tastes sweet and clean, there is no reason to force it into 28 seconds just to match a rule. Conversely, a 27-second shot can taste rough or thin.
Do not rely on tamp pressure alone to fix channeling. If espresso spurts unevenly or one side of the basket runs faster, check distribution and tamp level, then inspect whether the dose suits the basket. A straight, consistent tamp matters; pressing harder on a lopsided coffee bed does not make the water flow evenly. Make one preparation change and compare again.
Finally, avoid practicing with stale or poorly stored coffee if you want to judge subtle changes. Keep beans sealed and dry, use clean brewing parts, and avoid storing them beside a hot machine or in direct sunlight. If you switch coffees halfway through the weekend, label your notes clearly; a new roast may need a different grind and yield, so it is not a clean comparison with Saturday’s shots.
One shot, one question. If you cannot say what you changed and what you hoped to learn, pause before pulling the next one.
That rule saves both coffee and attention. A home barista who makes four measured shots and learns which setting tastes sweeter has made more progress than someone who pulls twelve shots without a record. Stop when your palate feels tired; coffee fatigue makes small differences blur together.
Turn the weekend routine into progress you can keep
A weekend routine improves espresso when it fits your actual life and gives you a repeatable next step. You do not need hours at the machine every day; a focused 30- to 60-minute block can sharpen one skill, while a quick daily shot gives you a chance to repeat your recipe. The useful pattern is practice, record, repeat—not endless tweaking.
Here is a simple weekly rhythm: Saturday, calibrate grind while holding dose and yield steady. Sunday, repeat the strongest recipe and test one small adjustment only if you can describe what you want to improve. During the week, make your usual espresso and note major changes, such as a new bag or a clear shift in flow. That keeps your practice connected to the coffee you actually drink.
After two or three weekends, review your log. You may notice that your grinder setting needs small changes as a bag ages, or that you consistently prefer a 1:2.2 ratio with one medium roast. Those observations are more useful than copying a recipe designed for another coffee and machine. A good practice plan gives you a personal baseline, not a rigid rulebook.
Keep expectations realistic. You may notice a smoother shot within a few sessions, but mastery takes longer because beans, grinders, machines, and taste preferences all differ. If a particular weekend produces no clear favorite, that is still useful: you may have learned to dose more consistently, spotted a puck-preparation issue, or found that two settings taste nearly identical. Progress is often quieter than a dramatic café-style epiphany.
When you share a drink, describe it honestly and let other adults choose whether they want coffee. Espresso contains caffeine, and people vary in their sensitivity; do not pressure anyone to drink a shot for your tasting exercise. A few deliberate tastes are enough to make a comparison without turning practice into a caffeine marathon.
Frequently Asked Questions
How often should I practice making espresso?
A focused 30- to 60-minute weekend session gives you time to test one variable without rushing. If you make espresso during the week, repeat your current recipe rather than changing settings every morning; short, consistent practice helps you notice when your process drifts.
Do I need expensive equipment to improve my espresso?
No. A scale, timer, and notebook provide the core feedback you need to compare shots. A refractometer can add measurements later, but it cannot tell you whether you enjoy the taste or replace careful puck preparation.
Is a 25- to 30-second espresso shot always the goal?
No. That range is a starting reference, not a universal target. Coffee, grinder, machine, dose, and recipe all affect flow, so judge the shot by its balance and repeatability as well as its time.
How do I know whether to grind finer or coarser?
If a shot runs quickly and tastes thin or sharply sour, try a small move finer. If it runs very slowly and tastes harsh or drying, try a small move coarser. Taste can be affected by channeling and puck preparation too, so keep dose and yield steady while testing.
How long will it take to notice improvement?
You may notice better consistency after a few focused sessions, especially if you begin weighing dose and yield. Your palate and technique develop over time, so measure progress by repeatable shots and clearer decisions, not by expecting every cup to be perfect right away.
Should I change my espresso recipe when I open a new bag?
Start with your familiar baseline, then taste and watch the flow. A new coffee can behave differently, so make small grind or yield adjustments one at a time. Record the new bag’s roast date and keep it sealed in a cool, dry place between sessions.
Conclusion
Remember the simplest rule: change one thing, taste the shot, and write down what happened. Use Saturday to find a promising adjustment and Sunday to prove you can repeat it. Keep the numbers as guides, not judges, and let the cup tell you when the recipe is working.
Next weekend, set out your scale and notebook before you grind. One clear question, a few careful shots, and a clean basket can turn a noisy espresso routine into a small, satisfying craft.
Halloween Picks
halloween
As an affiliate, we earn on qualifying purchases.