
TL;DR

Get coffee and tea gear delivered free — and shop member deals
- Fast, free delivery on millions of items
- Access to Prime Big Deal Days deals on October 6–7
- Prime Video, Amazon Music and more included
Sensory training for espresso means describing a shot’s aroma, flavor, body, and finish, then comparing those observations with a repeatable recipe and brewing details. Taste clues such as sharp sourness, harsh bitterness, or a drying finish can point toward possible problems, but none identifies one fault on its own. Keep the setup steady, change one variable at a time, and record what you taste.
A shot can taste sour and bitter at once, even when your recipe looks perfectly reasonable. That clash does not mean your palate is broken; it means flavor needs context. Espresso packs taste and texture into a small cup, so a modest change in grind, yield, or puck preparation can make a noticeable difference.
Sensory training for espresso gives you a practical way to turn “that tastes weird” into observations you can act on. You’ll learn how to describe a shot before judging it, connect common taste clues to possible brewing causes, and test adjustments without changing five things at once.
You do not need professional tasting gear or a fancy vocabulary. A scale, a timer, the same coffee, and a few honest notes will do. Think of the process like tuning a radio: you listen for what changes, make one small adjustment, and listen again.
Describe aroma, sweetness, acidity, bitterness, body, and finish before you decide what caused a flavor.
Treat sharp sourness, bitterness, astringency, and watery body as clues with several possible causes—not automatic diagnoses.
Compare shots with the same coffee, dose, and yield, and change one variable at a time.
Record dose, beverage weight, time, and sensory notes; shot time alone cannot rate flavor.
Separate what the espresso tastes like from whether you personally enjoy it.
A practical guide to better tasting
Sensory Training for Espresso: Teach Your Palate What Went Wrong
Turn “that tastes weird” into useful observations. Describe aroma, flavor, body, and finish, then compare them with a repeatable recipe. Taste can point toward a problem, but no single flavor proves its cause.
Bright citrus. Low sweetness. Thin body. Short finish.
More useful than “sour”Taste first.
Diagnose second.
Espresso concentrates flavor, so small shifts in grind, yield, water, or puck preparation can stand out. Keep description separate from diagnosis: “sharp and thin” is an observation; “under-extracted” is a hypothesis to check.
Describe aroma, sweetness, acidity, bitterness, body, and finish before deciding what caused a flavor.
Use the same coffee, dose, and yield to compare a change with a stable reference.
Log dose, beverage weight, time, flow, and sensory notes. Time alone cannot rate flavor.
Separate what the espresso tastes like from whether you personally enjoy that profile.
Preference is not a fault.
You can note “sweet, high citrus acidity, light body; not my style” without calling the shot defective. Brightness, roast character, freshness, water, and personal taste all shape the cup.
A six-step palate routine
A simple exercise teaches more than random tweaking. Keep the setup steady, taste each shot under similar conditions, and look for a pattern across attempts rather than trusting one cup.
Choose one coffee
Use the same beans throughout the comparison. Note how long the bag has been open.
Stable referenceMake a reference shot
Record dose, beverage weight, and time. Example: 18 g in, 36 g out, about 29 seconds.
Measure the recipeDescribe before judging
Note aroma, sweetness, acidity, bitterness, body, and finish in plain language.
Observe the cupChange one variable
If flow is fast, try a slightly finer grind while keeping dose and yield steady.
One adjustmentTaste side by side
Let both shots cool briefly. Compare them using the same questions and attention.
Same conditionsRepeat and record
One shot can mislead. Keep short notes and look for changes that repeat.
Find the patternFlavor points to questions
These are starting points, not diagnoses. Coffee variety, roast, freshness, water, puck flow, and personal taste can all change how a shot registers.
| What you notice | Possible clue | What to check next |
|---|---|---|
| Sharp sourness, little sweetness, thin body | Possible under-extraction | Flow speed, grind size, and whether yield is low |
| Harsh bitterness, hollow flavor, dry finish | Possible over-extraction or roast bitterness | Grind, yield, temperature, and puck flow |
| Sour and bitter together | Uneven extraction is one possibility | Distribution, channeling signs, and repeatability |
| Weak, watery taste | Possible dilution or stale coffee | Beverage yield, dose, and bean freshness |
| Rough, mouth-drying astringency | Texture clue; may reflect uneven extraction or coffee | Compare another shot; check grind and puck preparation |
| Muted or flat flavor | Possible freshness, water, or subtle profile issue | Storage, water quality, and a comparison shot |
Taste alone cannot reveal exactly what happened. Read it alongside shot time, beverage weight, flow, puck condition, and whether the result repeats.
Sour and bitter at once?
A clash of flavors does not mean your palate is broken. Different impressions can coexist, and context helps you decide what to inspect before changing the recipe.
Sharp edge + rough finish
Notice where each sensation appears. A bright, lemony edge and drying bitterness are two separate observations, not a complete diagnosis.
Flow + puck preparation
Uneven extraction is one possibility: water may pass through parts of the coffee bed differently. A naturally complex coffee can also combine acidity and bitterness.
Time is context,
not a score.
A familiar shot time can still taste unbalanced, and different coffees behave differently. Consider the recipe, the flow, and the cup together before choosing what to test.
Keep dose and beverage weight beside the time. A 20-second shot at the same recipe may suggest a useful grind check.
A steady stream that gradually lightens differs from spurting or lopsided flow. Watch as well as time.
Astringency feels rough and mouth-drying, like over-steeped black tea. It is distinct from bitterness.
One cup is evidence to investigate, not a verdict. Repeat the comparison before settling on a cause.
Learn to describe the shot before you try to fix it
Sensory training for espresso starts by separating what you notice from what you think caused it. Describe aroma, acidity, sweetness, bitterness, body, and finish before you label the shot “under-extracted” or “bad.” A description gives you something to compare; a diagnosis made too soon can send you chasing the wrong setting.
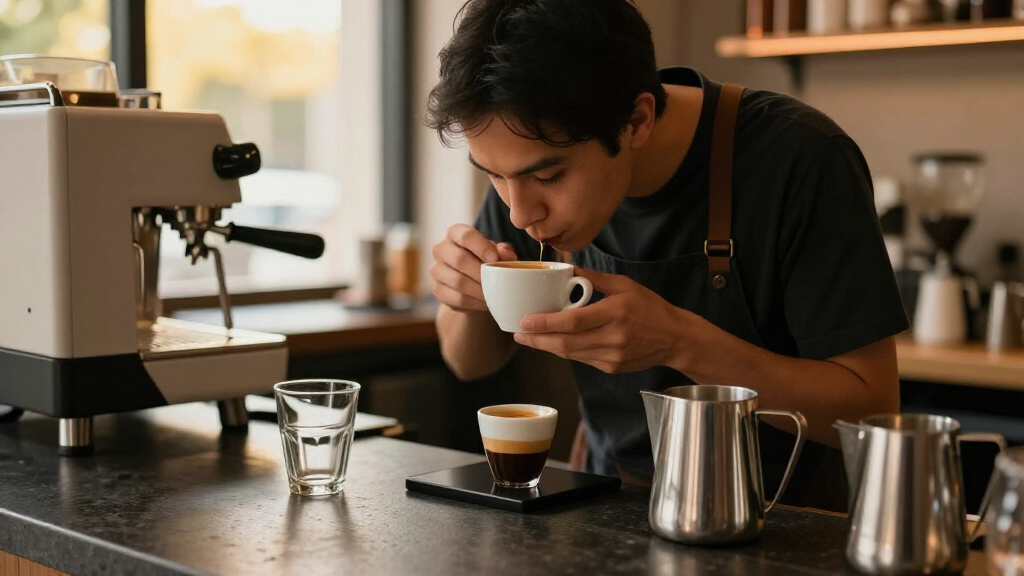
Try a first sip after the espresso cools briefly. Notice whether the aroma smells nutty, floral, chocolaty, or smoky. Then ask whether the flavor feels lively or sharp, whether sweetness appears, and whether the liquid feels silky, watery, or drying across your tongue.
For example, “sharp citrus, little sweetness, thin body, short finish” tells you more than “sour.” It suggests a few questions: Did the shot run quickly? Was the yield unusually low? Is the coffee naturally bright? The tasting note does not solve the puzzle, but it narrows the next check.
Keep preference separate from description. You might dislike a bright, lemony espresso while still recognizing that it is sweet and balanced. Write “pleasantly sweet, high citrus acidity, light body; not my style” rather than calling every flavor you dislike a defect. That distinction helps you make coffee you enjoy instead of chasing someone else’s idea of the perfect shot.
As an affiliate, we earn on qualifying purchases.
Use this six-step tasting routine to train your palate
A repeatable tasting routine teaches your palate faster than random tweaking because you can compare each shot against a stable reference. Keep the coffee, dose, water, and equipment steady where possible. Then change one brewing variable and pay attention to what changed in the cup.
- Choose one coffee. Use the same beans for the whole comparison, and note how long the bag has been open.
- Make a reference shot. Record dose, beverage weight, and shot time. For example, note 18 grams in, 36 grams out, and 29 seconds.
- Describe before judging. Record aroma, sweetness, acidity, bitterness, body, and finish in plain language.
- Change one variable. If the shot rushed through, adjust grind size while keeping the dose and yield the same.
- Taste side by side. Let both shots cool slightly; a very hot sip can hide flavor detail. Compare them using the same questions.
- Repeat and record. One shot can mislead you, so look for a pattern across several attempts.
Imagine your first shot tastes sharp and thin at 18 grams in and 36 grams out. You grind slightly finer, hold everything else steady, and find the next shot tastes sweeter with more body. That comparison gives you useful evidence. If you also double the dose and pull a longer yield, you will not know which change made the difference.
Your notes can be short: “finer grind; time 29 to 33 seconds; more sweetness, less sharpness, finish still dry.” Measured changes beat memory. A small log turns a frustrating morning into a set of observations you can reuse next time.
As an affiliate, we earn on qualifying purchases.
Read sour, bitter, and dry flavors as clues—not verdicts
Sensory training for espresso works best when you treat taste as a clue, not a diagnosis. Sharp sourness with little sweetness and thin body can fit under-extraction, while harsh bitterness and a drying finish may fit over-extraction or a naturally bitter roast. Coffee variety, freshness, water, and personal taste can change those impressions.
| What you notice | Possible clue | What to check |
|---|---|---|
| Sharp sourness, low sweetness, thin body | Possible under-extraction | Fast flow, coarse grind, low yield |
| Harsh bitterness, hollow flavor, dry finish | Possible over-extraction or roast bitterness | Grind, yield, temperature, puck flow |
| Sour and bitter together | Possible uneven extraction | Channeling, distribution, repeatability |
| Weak, watery taste | Possible dilution or stale coffee | Beverage yield, dose, bean freshness |
| Muted, flat flavor | Possible freshness, water, or coffee-profile issue | Storage, water quality, comparison shot |
Say you taste both a sharp, lemony edge and a bitter, rough finish. Uneven extraction is one possibility: water may have moved through some parts of the coffee bed differently from others, leaving mixed impressions. But a naturally complex coffee can also combine acidity and bitterness. Check the stream, puck preparation, and how repeatable the shot is before settling on a cause.
Astringency is a texture clue, not just another word for bitterness. It feels rough or mouth-drying, a little like strong black tea that has steeped too long. That feeling can come from uneven extraction, very fine grinding, or the coffee itself, so compare it with your recipe and another shot rather than changing settings on the taste alone.
As an affiliate, we earn on qualifying purchases.
Check shot time and flow without treating either as a score
Shot time is useful context, but it cannot tell you whether espresso tastes good. A shot reaching a familiar time can still taste unbalanced, and different coffees may behave differently. Read time alongside dose, beverage weight, the flow you saw, and what the shot tasted like.
For example, your usual recipe might use 18 grams of coffee and yield 36 grams of espresso in about 29 seconds. Today, the same dose and yield arrive in 20 seconds, and the cup tastes thin and sharply sour. The quick flow makes grind size a sensible first check, but it does not prove that grind size caused every flavor issue.
Watch how the espresso runs as well as when it stops. A steady stream that gradually lightens looks different from spurting or a lopsided flow. If the shot tastes sour and bitter together and the flow seems erratic, check puck preparation and distribution; channeling can leave different parts of the coffee bed extracting unevenly.
Keep the other measurements fixed while you test your first adjustment. If the coffee tastes overly strong or concentrated, changing yield may make more sense than grinding finer. If it tastes watery, check the beverage weight and freshness. Time is one piece of the story, not a flavor grade stamped on your cup.
As an affiliate, we earn on qualifying purchases.
Make one adjustment at a time and give it a fair test
One measured change at a time lets you connect a brewing choice to a sensory result. When you change grind, dose, temperature, and yield together, even a tastier shot leaves you guessing about what helped. A controlled comparison may feel slower, but it usually saves coffee and frustration.
Suppose your espresso tastes sharp, thin, and short-lived. First, keep the dose and target yield steady and make a small grind adjustment. If the next shot runs more slowly and tastes sweeter, record that. If it turns harsh and drying, you may have moved too far or uncovered another issue; return to the reference and make a smaller test.
Now suppose the shot tastes muted rather than sharp. Making the grind finer might not help if the beans have been open for weeks or your water does not suit coffee brewing. Check the coffee’s age and storage, and compare a fresh reference shot if you can. The same taste word can have several causes. Flavor guides your next question, not a guaranteed fix.
Use a modest log with the date, coffee, dose, yield, time, and two or three sensory notes. Keep the coffee sealed and dry at room temperature; avoid leaving beans exposed to air, heat, or moisture. If you prepare dairy espresso drinks, refrigerate milk at or below 4°C (40°F), and do not leave it out for more than two hours—or one hour above 32°C (90°F). Milk is a common allergen, so identify it clearly when serving others.
Build a useful tasting vocabulary without memorizing a flavor wheel
A small, consistent vocabulary is more useful than a long list of impressive-sounding flavor terms. You do not need to identify a particular fruit to train your palate. Start with broad, repeatable contrasts: sweet or not sweet, bright or dull, smooth or rough, full or thin, clean or lingering.
Try a real comparison: taste two shots from the same coffee, one pulled to a shorter yield and one to a longer yield. Instead of hunting for “red currant,” notice whether the longer shot feels drier, more bitter, or less sweet. If you taste a clear citrus note, write it down, but keep the basic structure too: “citrus, medium sweetness, light body, clean finish.”
Acidity and sourness are not identical. Pleasant acidity can feel lively and integrated, like a squeeze of citrus balanced by sweetness. Sourness often feels sharper and less settled, especially when sweetness is missing. The line varies with the coffee and the taster, so side-by-side comparison teaches more than memorizing a definition.
Make tasting notes readable for another person. “Too sour” may leave a friend wondering whether you mean tart, thin, or unpleasantly sharp. “Sharp citrus, little sweetness, watery body” gives an espresso drinker a clearer picture of what you taste and a better place to start troubleshooting.
Keep your practice honest when coffee and taste keep changing
Palate training is personal and gradual, so a tasting note is evidence about your cup, not a universal ruling. Beans change as they age, roast styles carry different flavors, and people vary in how strongly they notice bitterness or acidity. Even experienced tasters can disagree or find an unfamiliar coffee hard to read.
Picture two friends tasting the same espresso. One calls the finish pleasantly cocoa-like; the other finds it too bitter. They may both describe their experience accurately. Compare the shared details—perhaps both notice a full body and a long finish—then record preference separately instead of forcing a single verdict.
Repeatability matters more than fancy equipment. A consistent cup, a scale, a timer, and clear notes are enough to begin. Use the same coffee and recipe when comparing, and avoid relying on memory across different mornings. A drink that seemed sweet yesterday can be hard to compare today if the beans, recipe, or serving temperature changed.
Keep expectations flexible, too. A naturally bright coffee may stay citrus-forward even after you improve extraction, and the best-tasting recipe is the one that suits your goal. Sensory training helps you understand what the shot offers and whether you like it; it does not require every espresso to taste alike.
Frequently Asked Questions
Does sour espresso always mean it is under-extracted?
No. Some coffees naturally taste bright, and acidity can be pleasant when sweetness balances it. Sharp sourness with little sweetness and a thin body may suggest under-extraction, but compare the shot with a reference and check its flow before changing the recipe.
Does bitterness always mean I pulled the shot too long?
No. Roast character, water, coffee variety, and personal sensitivity can all affect bitterness. A harsh, drying, or hollow finish adds useful context, but check your recipe and shot behavior before deciding that yield or grind caused it.
Why can espresso taste sour and bitter at the same time?
Mixed sour and bitter flavors can point to uneven extraction, including possible channeling, where water does not pass evenly through the coffee bed. Coffee can also have naturally complex flavors. Look at puck preparation, flow, and whether you can repeat the result.
What should I change first when my espresso tastes wrong?
Start by making the recipe repeatable and identifying what the cup tastes and feels like. If the shot runs unusually fast or slowly, grind size is a practical variable to test. Keep dose and yield steady while you compare the next shot.
Do I need special equipment to train my palate?
No. A consistent cup, a scale, a timer, and simple notes are enough to start. Keeping coffee, dose, and yield consistent matters more than using specialized tasting gear.
How long does it take to get better at tasting espresso?
There is no fixed timeline. Regular side-by-side comparisons help you recognize patterns, but unfamiliar coffees can still surprise you. Focus on building clear descriptions and repeatable observations rather than reaching a perfect flavor vocabulary.
Conclusion
Remember the order: describe, compare, then adjust. Start with a repeatable shot, write down what you actually taste, and change one variable while keeping the rest steady. Sourness, bitterness, and a dry finish can point you toward useful checks, but your recipe, flow, coffee, and repeat results complete the picture.
Keep your notes simple and your palate curious. With practice, the cup stops being a mysterious verdict and becomes a trail of clues—one measured shot at a time.
Fall Picks
fall essentials
As an affiliate, we earn on qualifying purchases.