TL;DR

Get coffee and tea gear delivered free — and shop member deals
- Fast, free delivery on millions of items
- Access to Prime Big Deal Days deals on October 6–7
- Prime Video, Amazon Music and more included
To build a calm espresso workflow in a small kitchen, arrange a compact set of daily tools in the order you use them: fill, grind, tamp, brew, steam, clean, and reset. Keep measurements repeatable, protect food-prep space, follow your machine’s water and clearance instructions, and change one brewing variable at a time.
A portafilter can turn a tiny counter into a pinball machine: grinder, tamper, scale, cup, milk jug, cloth, and nowhere to set down the coffee you just dosed. A calmer espresso morning does not require a bigger kitchen. It comes from planning the sequence and giving the few tools you use every day a reliable home.
This guide shows you how to build a compact station, make your shots easier to repeat, and clean up without leaving coffee grounds in the cutlery drawer. You will also learn where a tidy routine helps—and where it cannot rescue stale beans, unsuitable water, or a poorly prepared shot. The goal is not showroom neatness; it is a workflow that still works when you are half-awake and the toast is burning.
Map the steps from filling the reservoir through cleanup before you decide where the machine and grinder belong.
Keep the daily kit compact: machine, grinder, suitable tamper, scale, and only the extra tools you use regularly.
Start near an 18-gram dose and 36-gram yield if they suit your basket, then adjust to taste and change one variable at a time.
Check counter support, ventilation clearance, cabinet movement, splash risk, and the machine maker’s water instructions.
Wipe the steam wand after milk use, rinse the portafilter, and reset the tray so tomorrow’s coffee starts clean.
Plan the espresso sequence before you place anything
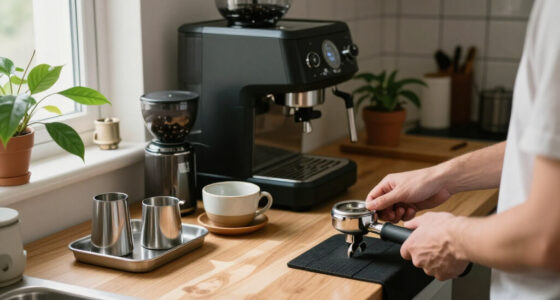
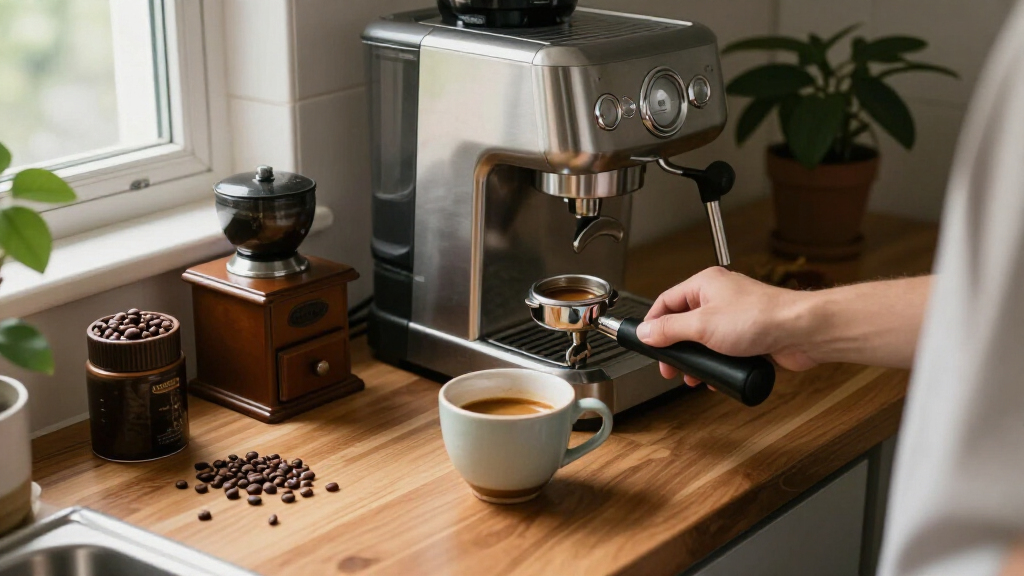
How to build a calm espresso workflow in a small kitchen starts with mapping the actions, not buying organizers. A typical sequence is fill the reservoir, prepare the portafilter, grind and dose, distribute and tamp, brew, steam milk if needed, then clean and reset. Put each item where your hand expects it next, and you will spend less time carrying a hot cup over loose grounds.
Try a dry run before you settle on a layout. Stand at the counter and mime each step: where will you set the portafilter while the grinder runs, where does the scale sit, and can you reach the water tank without moving the toaster? For example, if you need to slide a kettle every time you pull a shot, your coffee station is competing with breakfast instead of fitting into it.
Think of the counter as a short assembly line. The grinder should be close enough to dose directly into the basket, while the machine needs room for you to lock in the portafilter and place a cup under the spouts. Leave the manufacturer’s required ventilation clearance, keep plugs and connections clear of splashes, and check that cabinets still open fully.
A workflow in a small kitchen should serve the rest of the kitchen, too. If your espresso setup blocks the only chopping board area, move occasional-use tools to a drawer or shelf rather than forcing meal prep into a corner. Once the movement makes sense, decide what deserves a permanent place.
compact espresso machine for small kitchens
As an affiliate, we earn on qualifying purchases.
As an affiliate, we earn on qualifying purchases.
Keep only the daily tools within arm’s reach
A calm espresso workflow in a small kitchen needs a small daily kit, not a countertop museum. For most home routines, that means a machine, grinder, suitable tamper, a scale, and a cup or two; a milk jug and a dedicated cloth join the lineup if you make milk drinks. Keeping essential tools together makes the routine come from repetition, not from hunting through three drawers.
Group the small pieces on a washable tray. The tray catches stray grounds and gives your tamper, brush, and scale a clear boundary; when you need the counter for chopping, you can move that cluster in one trip. This is especially useful in a shared kitchen because it makes the espresso footprint visible: the tray can move, but the machine’s required working space stays clear. Keep beans in a closed container away from heat, sunlight, and steam, and store accessories you use only occasionally—such as a spare basket—elsewhere.
Consider the tradeoff between a hopper and single dosing. A hopper can make a weekday routine simpler if you use the same coffee each day, since beans are ready to grind without weighing a separate portion first. Single dosing can make changing beans easier and limit how long beans sit in the grinder, but it adds a weighing and handling step. Neither option fixes a poor grind or stale beans, so let your habits decide rather than chasing an elaborate setup.
For example, a renter with one narrow counter might keep the machine and grinder out, then store the milk jug and scale in a cabinet after use. Another person who makes two cappuccinos every morning may leave those items on the tray because taking them out and putting them away would add friction twice a day. The best setup is the one you can return to its place without a second rearrangement.
- Daily: machine, grinder, tamper, scale, cup, and any milk tools you use.
- Within reach but stored: cleaning brush, spare cloth, and beans in a lidded container.
- Elsewhere: spare accessories and tools used only for occasional experiments.
manual coffee grinder with dosing scale
As an affiliate, we earn on qualifying purchases.
As an affiliate, we earn on qualifying purchases.
Use a short, repeatable recipe to make shots less fussy
How to build a calm espresso workflow in a small kitchen also means choosing a starting recipe you can repeat. A common baseline is about 18 grams of coffee in and 36 grams of espresso out, close to a 1:2 dose-to-yield ratio. Your basket, coffee, roast, and machine affect the result, so treat those numbers as a starting point—not a law handed down with the portafilter. A baseline gives you a dependable comparison: if the cup tastes different, you can investigate a change instead of wondering whether the dose, yield, or both shifted unnoticed.
A small digital scale makes the recipe easier to repeat, and a timer gives you useful feedback about flow. Espresso depends on linked variables, including dose, grind size, distribution, tamping, brew ratio, temperature, and pressure. Because those variables interact, changing several at once may produce a better cup but leave you unsure why; that makes the next shot harder to improve. Keep the dose and target yield steady, then change grind size first if the shot runs noticeably fast or slow.
Finer grinding generally slows water flow; coarser grinding generally speeds it up. The coffee and equipment can change how that adjustment behaves, so use taste and shot behavior together rather than treating a time target as the whole answer. If a shot gushes into the cup, try a slightly finer grind; if it drips painfully slowly and tastes harsh, try a little coarser. Change one thing, pull another shot, and write down what you did. A brief note is enough to stop you from repeating an adjustment that already made the cup worse.
Freshly roasted beans release gas, and very fresh coffee can behave differently from coffee that has rested. That can alter how water moves through the coffee, so a grind setting that worked yesterday may not behave identically with a new bag. If your shots seem unpredictable after opening one, do not assume your hands suddenly forgot how to tamp. Give the beans time to settle according to their roast and your results, then adjust as needed. A tidy setup supports consistency; it cannot substitute for good coffee or a sound extraction.
- Weigh the dose: use the same starting amount each time, such as 18 grams if it suits your basket.
- Prepare evenly: distribute the grounds and tamp level, without changing your method between shots.
- Stop at a target yield: begin near 36 grams out, then taste and adjust the recipe to your coffee.
- Change one variable: usually adjust grind size first, and record the result.
espresso tamper and distribution tools
As an affiliate, we earn on qualifying purchases.
As an affiliate, we earn on qualifying purchases.
Set up a safe station without sacrificing prep space
How to build a calm espresso workflow in a small kitchen includes protecting the space around the machine, not just making the counter look tidy. Check the machine’s dimensions, weight, ventilation requirements, and water-filling method before you choose its spot. Leave enough room to handle the portafilter and cup, and make sure the counter can support the machine without wobbling. These details affect more than convenience: a tight fit can make routine filling awkward, restrict airflow if the manual requires clearance, or tempt you to move a heavy machine repeatedly to reach the tank.
Water and electricity need a little thought in a crowded kitchen. Keep plugs and electrical connections away from splashes, and do not route a cord where you can snag it while reaching for a cabinet. Follow the machine maker’s instructions for filling, cleaning, and descaling; local tap-water mineral content varies, so a blanket recommendation about water will not suit every appliance or home. In practice, treating water as a machine-specific requirement can prevent both unnecessary filtration and avoidable scale problems.
Make a simple comparison before committing to a layout:
| Check | What to test | Small-kitchen example |
|---|---|---|
| Working space | Can you move the portafilter and place a cup? | Pull the handle out without bumping the wall. |
| Clearance | Does the machine have the maker’s required airflow? | Do not wedge it tightly beneath a cabinet if the manual says not to. |
| Water and power | Are filling and plugging in safe and convenient? | Keep the outlet clear of the sink’s splash zone. |
| Shared counter | Can you still prepare food and open cabinets? | Leave the main cutting board area free. |
Imagine making coffee while someone else prepares a lunchbox. A station that blocks the sink or forces you to lift a hot reservoir over knives will feel stressful, even if every tool is neatly lined up. The issue is not only inconvenience: crossed paths increase the chance of bumping a hot drink or bringing coffee residue into food prep. Keep those movements separate; a small tray or a wall-mounted shelf for seldom-used items can reclaim useful counter space without crowding the working area.
milk frothing pitcher and cleaning cloth
As an affiliate, we earn on qualifying purchases.
As an affiliate, we earn on qualifying purchases.
Make cleanup the final shot, not an extra chore
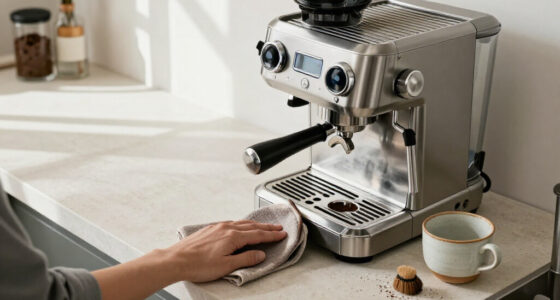
A calm espresso workflow in a small kitchen ends with a quick reset while the coffee mess is still fresh. Knock out the puck, rinse the portafilter, wipe the basket area as your machine’s instructions allow, and clean the steam wand immediately after steaming milk. A cloth reserved for the wand helps keep milk residue off your general counter cloth and away from other food-prep surfaces. Doing these tasks right away takes advantage of residue that has not dried or hardened yet, so a small reset is less work than a later scrub.
Small cleanup habits prevent the sticky, gritty buildup that turns tomorrow’s shot into a scrub session. Keep a brush or cloth near the machine, but store it so it can dry between uses; a damp cloth left in a pile is not a clean tool for the next session. Empty the drip tray when needed rather than waiting for it to slosh as you carry it to the sink. This matters in a crowded kitchen because a spill can spread coffee water across the counter or onto nearby electrical connections.
For a milk drink, wipe the wand right after use and follow the machine maker’s instructions for purging it. Milk dries into a stubborn film, especially around a warm tip, so waiting makes cleaning harder and can leave residue where it is difficult to see. If you are preparing food nearby, keep coffee tools and used cloths separate from clean utensils and food-contact surfaces, and wash reusable cloths regularly.
Here is a realistic end-of-shot reset: tap out the puck, rinse the basket, wipe the wand, return the tamper and scale to the tray, and check the drip tray. It takes a minute or two once you have the sequence down. The counter is then ready for toast, homework, or the next cup instead of becoming a record of every step you took. Returning tools to a defined spot also makes it easier to notice when something needs attention, rather than discovering a full tray or missing brush during tomorrow’s rush.
Reset before you walk away: a clean portafilter, wiped wand, and clear tray make the next morning feel like a fresh start.
Keep the routine forgiving when mornings get busy
A useful espresso routine is one you can repeat on a rushed morning, not one that depends on perfect conditions and a dozen accessories. A calm espresso workflow in a small kitchen leaves room for small disruptions: the water tank needs filling, a cabinet door is open, or someone needs the counter for breakfast. Build in enough slack that one interruption does not scatter tools across the room. That slack might mean leaving a small landing spot for the portafilter or keeping occasional-use items stored until they are needed, rather than filling every available inch.
Choose a few steps to keep consistent, then let the rest stay simple. Weigh the coffee, prepare it the same way, and stop the shot at a measured yield; you do not need to stare at every gauge if your machine does not offer one. Timers, pressure gauges, pre-infusion, and temperature controls can add feedback, but they are not required for a practical home routine. Extra controls are useful when you have a clear question to investigate; otherwise, they can add decisions without making the morning cup noticeably better.
For example, if you make one espresso before work and a milk drink on weekends, keep the weekday station limited to the machine, grinder, scale, and cup. Bring out the milk jug only when you need it. That avoids dedicating scarce counter space to tools that sit unused most days, though someone who makes milk drinks daily may reasonably prefer the jug close at hand to reduce repeated setup.
When a shot goes wrong, avoid changing dose, grind, tamp, and yield all at once. That is like turning every knob on a radio and then guessing which one found the station. Note what happened, change a single variable, and try again. Your process should make room for imperfect cups without turning each one into a kitchen-wide investigation; the purpose of repeatability is not to guarantee perfection, but to make the next adjustment understandable.
Frequently Asked Questions
What equipment do I actually need for home espresso?
A practical starting setup is an espresso machine, a grinder, a tamper suited to the basket, and a way to measure coffee. A small scale improves dose and yield consistency, while extra distribution tools are optional. For example, if your counter is tight, start with the basics and add accessories only when you can name the problem they solve.
How much counter space should I leave around an espresso machine?
Measure the machine and grinder, then leave the manufacturer’s recommended clearance and enough working room to handle the portafilter and cup. Check that nearby cabinets open fully and that the machine does not block food preparation. Test the layout with a dry run before you commit to it.
What is a good starting recipe for espresso?
A common starting point is about 18 grams of ground coffee in and 36 grams of espresso out, close to a 1:2 ratio by weight. Basket size, coffee, roast, and machine all affect the result, so adjust to taste rather than treating the ratio as a rule. A scale makes it easier to repeat the same starting point.
How can I make my espresso shots more consistent?
Keep your dose, distribution, tamping approach, and target yield steady. If a shot runs too quickly or slowly, adjust grind size first and change only that variable before pulling another shot. Freshly roasted beans may behave differently as they rest, so note the coffee and the result.
How do I reduce coffee mess in a small kitchen?
Use a tray to group small tools, keep a cloth and brush near the machine, and return accessories to the tray after each drink. Knock out the puck, rinse the portafilter, wipe the steam wand immediately after steaming milk, and empty the drip tray when needed. These small resets stop grounds and dried milk from spreading into the rest of your kitchen.
What water should I use in my espresso machine?
Follow the water guidance in your machine’s manual. Tap-water mineral content differs by location, and unsuitable water can affect flavor or contribute to scale and machine damage. If you are unsure whether your water suits the machine, check the maker’s specifications before choosing a filter or other treatment.
Can I make espresso without a grinder?
A capable grinder is strongly recommended because grind size has a major effect on shot flow and extraction. Pre-ground coffee can work in some setups, but it offers less control and loses freshness faster after opening. If you use it, keep the amount small and follow your machine and basket instructions.
How often should I clean an espresso machine?
Rinse and wipe the parts used during each session, including the portafilter and steam wand after milk use. Follow the maker’s schedule for backflushing, cleaning products, and descaling, since the right frequency depends on the machine and your water. A daily reset handles fresh residue; scheduled maintenance handles what builds up over time.
Conclusion
Build your espresso station around the sequence you actually follow: keep daily tools close, protect the counter you share with cooking, and make a short cleanup part of every cup. Measure a repeatable starting recipe, change one brewing variable at a time, and follow your machine’s directions for water, clearance, and maintenance.
A small kitchen does not need to look like a café. It needs one clear path from beans to cup—and a clear counter waiting when the coffee is gone.
Fall Picks
fall essentials
As an affiliate, we earn on qualifying purchases.