TL;DR

Get coffee and tea gear delivered free — and shop member deals
- Fast, free delivery on millions of items
- Access to Prime Big Deal Days deals on October 6–7
- Prime Video, Amazon Music and more included
A useful coffee bar layout follows your drink-making routine: store coffee and brewing tools near the brewer, place cups within easy reach, and keep water and cleanup supplies handy. Group equipment into practical zones, protect beans and perishables from heat, and adapt the arrangement to your space and dominant brewing method.
A coffee bar can look tidy and still make you walk back and forth for every cup. The fix is simple: arrange your tools in the order you use them, so your hand moves from beans to brewer to mug without crossing a cluttered counter.
This guide shows you how to plan a coffee bar layout around your actual routine, whether you pull espresso, make pour-over, or share a small counter with the toaster. You’ll see where to place equipment, coffee, cups, water, add-ins, and cleaning supplies—and how to keep the setup safe and easy to maintain.
There isn’t one perfect arrangement for every kitchen. A left-handed coffee drinker, a tea-loving household, and a compact apartment all have different needs. Start with the drinks you make most, then give every frequently used tool a home that makes each drink easier to prepare.
Arrange tools in the order you use them, from water and coffee through serving and cleanup.
Group equipment into brewing, coffee and tea, cups, add-ins, and cleanup zones.
Keep beans sealed and away from heat, light, moisture, and strong odors; store milk in the refrigerator.
Place heavy appliances on stable surfaces and keep hot equipment away from edges and awkward reach paths.
Test your setup by making a real drink, then move tools that cause extra steps or block cleaning.
The home coffee station field guide
Coffee Bar Layout: Where Every Tool Should Live
Arrange the station around your real drink-making routine. Keep the path from water and coffee to brewing, serving, and cleanup clear, safe, and easy to repeat.
Key insight
Place tools in the order you use them. Keep beans close to the brew zone, but away from heat.
01 / The essentials
Five rules for a smoother coffee bar
A tidy counter should make each step easier. Let your most common drink claim the easiest spot.
Arrange tools from water and coffee through serving and cleanup.
Give brewing, coffee and tea, cups, add-ins, and cleaning their own zones.
Seal beans away from heat, light, moisture, and strong odors. Refrigerate milk.
Set heavy appliances on stable surfaces and keep hot gear away from edges.
Make a real drink, then move anything that adds steps or blocks cleaning.
02 / Five-step reset
Map your morning before moving a tool
Follow one drink from first reach to final wipe. Your counter is a small one-way street.
03 / Give every tool a home
Five zones keep the counter tidy and flexible
Keep related items together, with a clear patch of workspace beside the brewer.
Brewing
Machine, kettle, dripper, scale, and grinder. Leave room to operate and wipe around them.
Coffee & tea
Beans, grounds, tea, and filters close to brewing, protected from heat and moisture.
Cups
Daily mugs in a nearby cabinet, drawer, or stable shelf that is easy to reach.
Add-ins
Group shelf-stable sweeteners, cocoa, and syrups. Keep milk refrigerated.
Cleanup
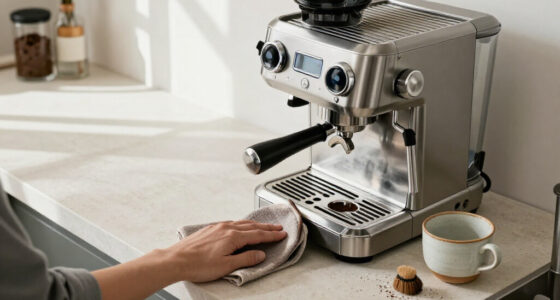
Keep a cloth, brush, waste container, or knock box handy for your setup.
Leave a lane
Zones can shift as habits change. Daily gear gets the easy spot; occasional tools can live nearby.
04 / Set up by brew method
Keep the hot, messy work contained
Make space for the movements your method needs, and check appliance instructions before choosing a spot.
Grinder beside machine
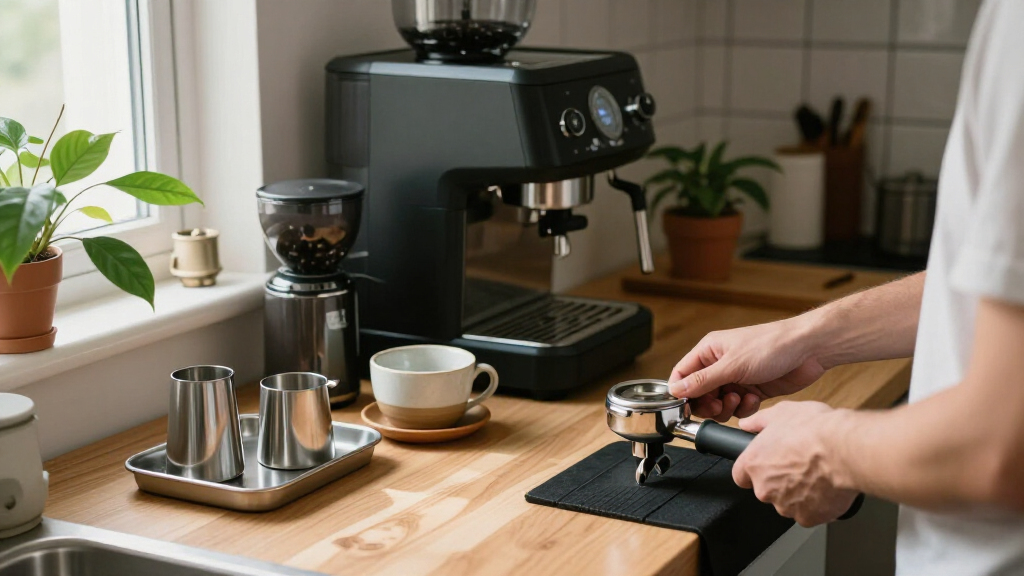
Use a sturdy, level surface with access to the reservoir, cord, and any required ventilation. Keep beans near the grinder but away from heat. Put cups within reach without stretching over a steam wand or hot shot. Leave room to catch grounds and wipe around the equipment.
- Beans
- Grind
- Machine
- Serve
- Clean
Tools together, counter clear
Group the dripper, dry filters, kettle, scale, coffee, and serving vessel. Leave open space for the brewer and carafe, and a safe path to lift and pour the kettle. Keep occasional-use accessories in a nearby cabinet.
- Filter
- Weigh
- Heat
- Brew
- Pour
05 / Store with care
Fresh supplies, clear surfaces
Convenience matters, but storage should protect ingredients and keep the work area maintainable.
Put freshness first
Keep beans or grounds in an airtight container away from heat, light, moisture, and strong odors. Counter storage can work when the container is sealed and out of sunlight. Store it near the brewing area for convenience, but not beside a hot appliance. Refrigerate milk and other perishables promptly; group shelf-stable add-ins nearby.
06 / Final station check
Make the setup safe to use and easy to clean
Small kitchens and mixed-use counters benefit from a few deliberate choices.
Heavy appliances sit on stable, level surfaces; hot equipment stays away from edges.
Cords, reservoirs, ventilation, and operating clearances follow the appliance manual.
Cups are secure and reachable without reaching across hot equipment.
Leave access to appliance sides and the counter behind them for wiping crumbs and spills.
Use shelves, hooks, trays, or drawer inserts selectively; keep heavy and fragile items within safe reach.
Keep only daily essentials visible. Store occasional-use gear in a nearby cabinet or drawer.
Map your morning routine before moving a single tool
A coffee bar layout should follow the steps you repeat most, from getting water to setting down a finished cup. Put the equipment and supplies you reach for every day along that path, then move occasional-use gear to a cabinet or shelf nearby. This cuts extra reaching and keeps the work surface open.
Try a quick rehearsal before you rearrange anything: make your usual drink and notice each movement. If you fill a kettle at the sink, weigh beans, grind, brew, and add milk, those steps form a simple route. Your layout should support that route, not force you to circle a sugar jar or reach across a hot kettle.
For example, if you make espresso before work, you might keep beans and a grinder beside the machine, cups on a shelf above or beside it, and a towel in a drawer within reach. If your household mostly drinks tea, the kettle, tea, and mugs deserve the easiest access instead. The counter’s most convenient spot belongs to your most common routine—not necessarily your fanciest appliance.
Think of the counter as a small one-way street. Your tools should sit along the route in the order you use them, while the return trip—rinsing, wiping, and putting things away—should stay just as easy. Once you know your route, zones make it easier to give everything a sensible home.
As an affiliate, we earn on qualifying purchases.
Create five simple zones so every tool has a home
A coffee bar is easier to use when you group tools into five practical zones: brewing, coffee and tea, cups, add-ins, and cleanup. Keep related items together, but leave clear counter space beside the brewer for the steps that need room. This gives you a tidy starting point without making the layout feel rigid.
- Brewing zone: Keep the machine, kettle, dripper, scale, or grinder where you can use it without moving other appliances.
- Coffee and tea zone: Store beans, grounds, tea, and filters close to the brewer, away from heat and moisture.
- Cup zone: Put daily mugs within easy reach, in a cabinet, drawer, or stable shelf.
- Add-in zone: Group shelf-stable sweeteners, cocoa, and syrups; keep milk and other perishables refrigerated.
- Cleanup zone: Make room for a cloth, brush, waste container, or knock box as your setup requires.
Imagine a two-person household that makes espresso and herbal tea. The espresso machine and grinder can occupy one end of the counter, while the kettle and tea tin sit together on the other. A shared mug shelf between them serves both routines, and a drawer keeps brushes and spare filters from spreading across the counter.
Zones are more like lanes than walls: you can change them when your habits change. If you begin making pour-over every weekend, shift the scale and dripper into the easiest-to-reach area rather than adding a second cluttered station. The trick is to make a planned coffee bar that can flex without losing its logic.
As an affiliate, we earn on qualifying purchases.
Place espresso gear where the hot, messy work stays contained
For espresso, keep the grinder and machine close together on a stable, level surface, with room to operate both and clean up grounds. Put beans near the grinder but not beside a hot appliance, and keep cups within reach without requiring you to stretch over the machine. This arrangement supports the short sequence from dosing to brewing to serving.
Start with the machine’s manual: check its space, water-reservoir access, cord position, and any ventilation instructions before choosing a spot. Heavy appliances belong on sturdy surfaces, and hot equipment should stay away from counter edges. Don’t place mugs where you must reach across a steam wand or a freshly brewed shot to grab one.
For a practical example, put the grinder to the left of the machine if that matches your dominant hand and gives you room to catch grounds. Place a small knock box or waste container nearby if you use one, then keep a cloth and brush in a drawer beneath or beside the station. A cup shelf can sit above the work area only if the cups are secure and easy to reach.
Espresso also creates fine grounds and occasional splashes, so access matters as much as appearance. Leave enough space to wipe the counter and reach the sides of the machine instead of boxing it in with jars. A setup that looks sleek but traps grounds behind the grinder will quickly feel like a chore.
As an affiliate, we earn on qualifying purchases.
Keep pour-over tools together for a smoother brew
For pour-over, group the dripper, filters, kettle, scale, coffee, and serving vessel so you can move through brewing without searching drawers. Leave an open patch of counter for the brewer and carafe, and set the kettle on a stable surface with its cord out of the way. The goal is a clear workspace for careful pouring.
A typical setup starts with filters and beans, moves to grinding and weighing, then to heating water and brewing into a mug or carafe. Keep filters in a dry container near the dripper and store the scale close enough to place beneath the brewer. If you use a gooseneck kettle, leave room to lift and pour it safely without hitting a shelf or another appliance.
Picture a Sunday morning brew for two: you take the filter from a nearby drawer, set the dripper over a carafe, weigh the beans on the scale, and pour from the kettle. When every tool is within a natural reach, you can focus on the bloom—the first pour that wets the grounds—rather than hunting for a scoop with wet hands.
Not every accessory needs to stay on display. A spare dripper or a special serving pot can live in a cabinet if you use it only now and then. Keep the daily tools visible or immediately accessible, and let the counter stay open enough for the kettle, scale, and carafe to share the stage.
As an affiliate, we earn on qualifying purchases.
Store beans, milk, and sweeteners where they stay fresh
Store coffee in an airtight container away from heat, light, moisture, and strong odors, while keeping it close enough to the brewer for easy use. Counter storage works if the container is sealed and kept out of direct sun, but the spot beside a hot machine is a poor choice. The same layout should also make it easy to return milk and other perishables to the refrigerator promptly.
Coffee beans are convenient near the grinder, but warmth and sunlight can work against freshness. A cabinet just beside the coffee station can be a better home than an attractive glass jar on a sunny windowsill. Grounds and beans can also pick up strong odors, so avoid storing them next to pungent spices or open cleaning products.
Separate shelf-stable add-ins from refrigerated ones. Sugar, cocoa, and unopened syrups can share a small tray; milk and cream need to go back into the refrigerator after pouring. For instance, if you make a latte and then get distracted by a call, put the milk away before you tackle the rest of the cleanup.
These storage choices are part of workflow, not just freshness. A sealed bean container near the grinder saves steps, while a small add-in tray stops spoons and syrup bottles from migrating across the counter. Keep the daily selection modest: the three sweeteners you use belong close by; the seasonal bottle you open twice a year can live elsewhere.
Fit a useful coffee station into a small counter
A small coffee bar works when you keep daily essentials visible, use safe vertical storage, and move occasional-use equipment into nearby drawers or cabinets. You need room for the appliance’s operating space and the steps you perform—not a full display of every coffee accessory you own. Check appliance dimensions and instructions before committing to a tight spot.
Start by choosing the setup you use most. If you make one mug of drip coffee each morning, keep that brewer, filters, coffee, and cups accessible; a second brewer for rare gatherings can go in a cabinet. A shallow tray can group the daily items and make crumbs or drips easier to clean, while drawer inserts can corral spoons and spare filters.
Vertical space can free the counter, but use shelves and hooks with care. Keep heavy appliances and fragile cups on stable surfaces within safe reach, rather than placing a loaded shelf above a hot kettle or work area. A rail for lightweight tools may help, but it should not force you to reach over steam or a sharp-edged counter.
Suppose your only free surface is beside the toaster. You could keep the brewer on the counter, store mugs in the cabinet above, and place beans and filters in a drawer below. When breakfast gets busy, the coffee station remains usable because it has a defined footprint instead of expanding into every open inch.
Use this five-step reset to arrange your station
To arrange a coffee bar, list your daily brewing steps, sort tools by task, place equipment safely, test the workflow, and adjust what feels awkward. This five-step reset turns a vague tidying job into a practical plan. It also helps you spot tools that take up space but rarely earn it.
- Write down your usual drink routine. Include water, coffee, brewing, serving, and cleanup.
- Gather the tools you use each week. Separate daily essentials from occasional gear.
- Place the brewer and grinder first. Check stability, cord access, operating clearance, and safe distance from edges.
- Add cups, coffee, add-ins, and cleanup supplies. Keep perishables refrigerated and coffee away from heat, light, and moisture.
- Make a drink, then revise. Notice unnecessary reaches, blocked surfaces, and spots that collect spills.
Here’s how that might work in practice: you discover that your scale lives in a drawer across the kitchen, so you move it beside the dripper. Then you notice the sugar jar blocks the kettle handle, so it moves to a small tray behind the mug area. A two-minute test brew reveals problems faster than a photo of a perfectly styled counter.
Repeat the test after a week, when the station has seen real mornings and rushed afternoons. If a tool stays unused or gets in the way, give it another home. A good layout is not a finished display; it’s a working arrangement that improves as you learn what your routine actually needs.
Keep your coffee bar safe and quick to clean
A safe coffee bar keeps hot equipment stable, cords out of the way, and surfaces accessible for wiping. Leave room to fill reservoirs and operate controls, and don’t place cups where you have to reach across steam or hot water. A little clearance can prevent spills and make everyday cleaning much easier.
Check the appliance manual for its placement and ventilation instructions, and make sure its cord does not dangle across a walkway or sink. Keep heavy machines on a sturdy, level counter, away from edges where a bump could send them sliding. If children share the kitchen, put hot kettles and fragile cups out of their easy reach.
Cleanup should be part of the route, not an afterthought. Keep a clean cloth and the appropriate brush accessible, and leave enough space to wipe around and behind equipment. For example, if your grinder sits flush against a syrup tray, grounds can collect in the narrow gap; move the tray and you can sweep the area in seconds.
Food safety matters when your coffee bar includes milk or other perishables. Return milk to the refrigerator promptly after use and don’t leave it sitting on the counter as part of a permanent display. A dedicated spot for the milk jug in the fridge and a clear place to set it while pouring make the safer choice the easy one.
Frequently Asked Questions
Where should a coffee machine go?
Place it on a stable, level surface with room to operate, access its water reservoir and cord, and follow any ventilation instructions in the manual. Keep it away from counter edges and leave space to wipe around it.
Should the grinder sit beside the espresso machine?
Usually, yes, if you make espresso or freshly ground coffee most days. Keep enough room to catch grounds and clean the area, and store beans nearby in an airtight container away from heat and sunlight.
Can I keep coffee beans on the counter?
Yes, if you store them in a sealed, opaque container away from direct sun, heat, moisture, and strong odors. A counter spot near the grinder is convenient, but avoid placing beans right beside a hot machine.
How do I organize a coffee bar in a small kitchen?
Keep only daily essentials on the counter, use a drawer or nearby cabinet for occasional-use gear, and add vertical storage only when it is safe and easy to reach. A small tray can group coffee, filters, and sweeteners while keeping the workspace contained.
Where should milk and syrups go?
Keep shelf-stable syrups and sweeteners with your other add-ins, but return milk and other perishables to the refrigerator after use. A small tray can keep bottles together without taking over the brewing surface.
How much counter space does a coffee station need?
There is no single required measurement: you need enough space for the equipment, the clearances in its instructions, and the steps involved in making your usual drink. Test the arrangement with a real brew and adjust if you cannot fill, pour, serve, or clean comfortably.
Conclusion
Build your coffee bar around the drink you make most, not the tools you hope to use someday. Keep the daily essentials on a clear route, protect coffee and perishables with sensible storage, and leave enough room to work and wipe down the counter.
Make one cup with your new setup tomorrow morning. If your hands find each tool without a detour, the layout is doing its job—and your counter can feel less like a storage shelf and more like a well-run little café.
Halloween Picks
halloween
As an affiliate, we earn on qualifying purchases.