TL;DR

Get coffee and tea gear delivered free — and shop member deals
- Fast, free delivery on millions of items
- Access to Prime Big Deal Days deals on October 6–7
- Prime Video, Amazon Music and more included
To teach someone else your espresso setup, start with safety and controls, demonstrate one repeatable workflow, then let them make a drink while you coach. Give them a measured starting recipe—such as 18 grams of coffee in and about 36 grams of espresso out—and explain that grind, taste, and consistency matter more than chasing one exact shot time.
A great espresso lesson doesn’t end when your guest can make one good shot. It ends when they can repeat the process tomorrow, safely, without you hovering over the grinder.
That means teaching your actual machine, not an imaginary standard setup. Your grinder may have numbered steps, your espresso machine may have unusual controls, and your coffee may need a different recipe from the beans in a video. The details matter.
Here’s how to teach the workflow from the first safety check to the final wipe-down. You’ll give your learner a measurable starting recipe, show them how to make small adjustments, and leave a simple note they can follow later. The goal is less about handing over a recipe and more about helping them repeat a good process.
Show safety, machine controls, and hot surfaces before your learner handles the equipment.
Use a measured starting recipe such as 18 grams in and 36 grams out; treat the 1:2 ratio as a baseline, not a rule.
Demonstrate the full workflow, then let the learner make a drink while you coach one correction at a time.
Adjust grind in small steps and judge shots by taste, yield, flow, and time together.
Leave a machine-specific recipe card and follow the manual for cleaning and maintenance.
Start with safety and the controls they’ll touch
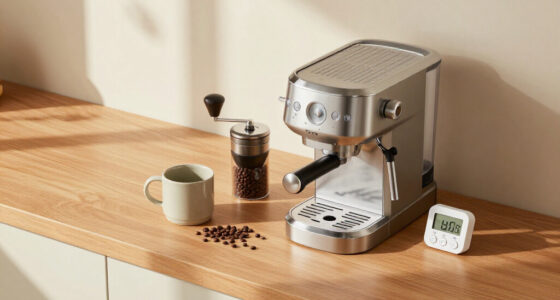
To teach someone else your espresso setup, start by showing the hot and moving parts before you discuss coffee recipes. Point out the power switch, water tank, portafilter, basket, grinder controls, group head, and steam wand, then explain which parts may be hot or under pressure. That two-minute tour gives your learner a mental map before they start handling equipment.
Show them how your specific machine turns on and how long it usually needs to warm up. Some machines heat quickly; others need more time for the group head and portafilter to get warm. Explain how to fill the tank and where to check the water level. If your machine has a pressure gauge, programmable buttons, or a lever, show what those controls do without assuming every setup has them.
Then flag the hazards in plain language. The group head and portafilter can burn skin, and steam can scald quickly. Tell your learner to keep fingers away from the group head while brewing and to handle the steam wand by its insulated grip, not the metal tip. For example, if your friend reaches to remove a portafilter right after a shot, stop them and show them how to release it carefully once brewing has ended.
Finish the tour by showing where the machine manual lives. Model instructions vary, especially for cleaning, backflushing, descaling, and steam-wand use. The manual, not a generic rule from another machine, is the authority for operating and maintaining your setup.
As an affiliate, we earn on qualifying purchases.
Give them a simple recipe they can measure
A useful beginner espresso recipe pairs a measured dry coffee dose with a measured espresso yield. For example, start with 18 grams of coffee and aim for about 36 grams of espresso, a 1:2 brew ratio by weight. Present it as a first attempt for your coffee and equipment, not a law that every espresso must obey.
Show your learner how to tare the scale, weigh the coffee, and place the cup so they can stop the shot near the target yield. A scale makes the result easier to repeat than judging the level of espresso in a cup, since crema can make volume look misleading. If your setup has no scale, explain what you currently use as a rough guide, but tell them that weight is the clearer way to compare shots.
What about shot time? Treat it as a clue, not a verdict. A shot that takes roughly 25–30 seconds can be a handy starting reference, but the right time changes with the coffee, dose, yield, grind, and machine. A fast shot can still taste pleasant, and a shot in the target window can still taste harsh.
Walk through an example together: your learner weighs 18 grams, grinds into the basket, and stops the shot at 36 grams. If it tastes balanced and the flow looks steady, write down the result. If the coffee tastes sharp or dry, you can test a small adjustment next time. Dose and yield give you a shared baseline, so you can talk about what changed instead of guessing from memory.
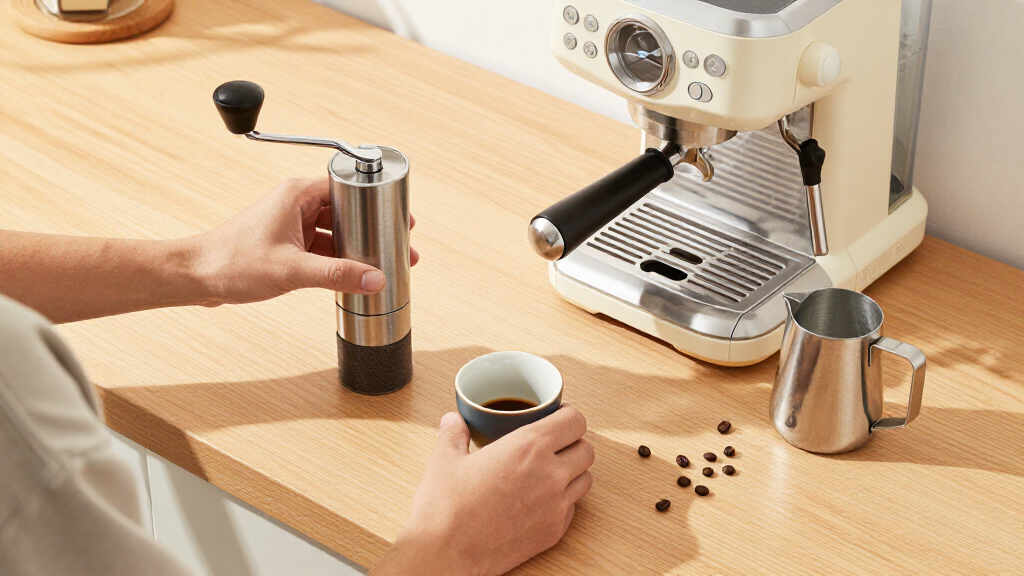
coffee grinder with adjustable grind size
As an affiliate, we earn on qualifying purchases.
As an affiliate, we earn on qualifying purchases.
Show the whole workflow before they try it
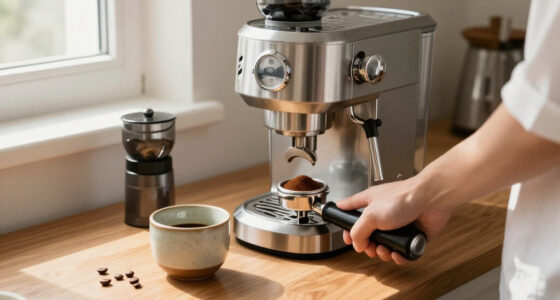
Teaching someone else your espresso setup works best when you demonstrate the whole drink in the same order they’ll use it. Show warming the machine, preparing the basket, grinding, distributing and tamping, locking in the portafilter, brewing, and cleaning up. A learner who sees the complete sequence can connect each action to the one that follows.
- Warm and prepare: Turn on the machine as its manual directs, check the water, and have the cup and scale ready.
- Dose and grind: Weigh the coffee and grind it for your espresso recipe.
- Distribute and tamp: Spread the grounds evenly, then tamp level and consistently.
- Lock in and brew: Secure the portafilter, start the shot, and watch the yield on the scale.
- Serve and clean: Make the drink, knock out the used puck, rinse the basket, and wipe the workspace.
As you demonstrate, narrate the cues that are easy to miss. Show how the portafilter should feel when it locks in, what an even tamp looks like, and where the espresso should land on the scale. Don’t turn the first lesson into a contest to perfect every detail. A level tamp matters more than pressing with all your strength.
For a practical example, put a small towel beside the machine and keep the scale in its usual spot. Then your learner can follow the same path each time instead of hunting for tools with wet hands. A repeatable order reduces forgotten steps and makes it easier to spot where a shot went off course.
As an affiliate, we earn on qualifying purchases.
Let them make the next drink while you coach
The learner understands your espresso setup when they can use it themselves, so hand over the portafilter after your demonstration. Ask them to talk through the next step as they work, then watch without grabbing tools or correcting every small movement. Your job is to catch safety issues and give one useful correction at a time.
Use a calm, specific prompt: “Let’s check that the coffee is level before you tamp,” works better than “You’re doing it wrong.” If they forget to tare the scale, show them once and let them repeat the step. Teaching someone else is less about handing over a recipe than helping them repeat the workflow until it feels familiar.
Some coffee may go to practice shots. That’s normal. To limit waste, weigh a modest dose and make one adjustment before pulling another shot. For instance, if the first shot runs very quickly and tastes thin, you might try a slightly finer grind while keeping the dose and yield the same. Changing three things at once makes it hard to tell which change helped.
Give feedback on what you can both observe: the starting dose, the shot yield, approximate time, and how it tastes. Ask whether the coffee seems sour, bitter, watery, or balanced, but don’t claim each flavor has only one cause. Guided practice builds confidence because your learner gets to make decisions while you’re there to help them recover from a mistake.
espresso cleaning and maintenance kit
As an affiliate, we earn on qualifying purchases.
As an affiliate, we earn on qualifying purchases.
Teach grind changes without turning them into guesswork
Teach the grind adjustment in one clear direction at a time: a finer grind generally slows the shot, while a coarser grind generally speeds it up. The grinder, coffee, and basket all affect the result, so this relationship is a useful starting rule rather than a guarantee. Ask your learner to change the setting in a small step and keep the dose and target yield steady.
A timer helps you compare shots, but time alone cannot tell you whether espresso tastes good. Think of it like a speedometer: it tells you how quickly something moved, not whether the journey was pleasant. Have the learner consider taste, yield, flow, and time together before deciding what to change.
Try a real-world example. The first shot reaches 36 grams much faster than your usual reference and tastes thin. The learner can grind a little finer, pull another shot to the same yield, then taste the difference. If a shot crawls and tastes harsh, a slightly coarser grind may help—but the flavor can also reflect dose, coffee freshness, water, temperature, or uneven distribution.
Keep the lesson simple: change one variable, record what happened, and taste again. Don’t use tamp pressure to compensate for a grind problem. A consistent, level tamp matters; pressing harder and harder is not a reliable way to control extraction. Small, recorded adjustments teach the learner how their equipment responds rather than asking them to memorize a fixed grinder number.
Add milk and cleanup without making the lesson longer
If your learner wants a milk drink, teach steaming as a separate skill after they can pull a basic shot. Show the pitcher position and steam-wand technique for your machine, and explain how to keep hands clear of hot metal and splashing milk. A quick demonstration matters here because steam wands differ, and a generic technique may not fit every machine.
Use the milk they’ll actually drink. Dairy and plant-based options can foam differently, so don’t promise that oat, soy, and dairy milk will behave exactly alike. Encourage your learner to avoid overheating the milk, keep the pitcher clean, and follow the machine’s instructions for the wand. If milk sprays or the wand makes an unfamiliar sound, stop and reset rather than leaning close to a hot tip.
Make cleanup part of the workflow, not an optional extra. Knock the puck into the knock box, rinse the basket, and wipe the steam wand promptly so milk doesn’t dry into a sticky film. Purge the wand as your machine’s manual recommends, then leave the counter ready for the next person. For example, a damp cloth beside the machine makes the wipe-down easy to remember.
Daily cleaning and periodic maintenance aren’t the same thing. Backflushing, descaling, water choice, and cleaning products depend on the model. Follow the machine manual for maintenance instead of borrowing a schedule meant for different equipment.
Leave a recipe card they can follow tomorrow
A short machine-specific recipe card helps your learner use the setup again without relying on memory. Write down the coffee dose, target espresso yield, approximate shot-time reference if you use one, and the current grinder setting if it remains stable. Add the machine’s warm-up routine and any control they might otherwise forget.
Keep the card useful, not crowded. A note such as “18 g in, aim for 36 g out; taste and adjust one thing at a time” gives more room to learn than a long list of rules. Include reminders to keep fingers away from hot parts, wipe the steam wand after milk, and check the manual for maintenance. If your grinder setting changes with a new coffee, label it with the bean name rather than treating the number as permanent.
Imagine your friend making coffee alone the next morning. They see the card, find the scale, and follow the same steps you practiced together. If the shot runs faster than expected, the note reminds them to check the taste and make one small grind adjustment instead of changing the dose, tamp, and yield all at once.
A recipe card is not a substitute for practice, but it bridges the gap between a lesson and independent use. Record the process, not just the settings: settings can shift with fresh beans and grinder changes, while a clear workflow still helps. That’s how a simple note becomes a reliable guide.
Frequently Asked Questions
What should I teach first: the machine or the recipe?
Start with safety and basic controls, including hot parts, the power switch, and the water tank. Then demonstrate the workflow and give your learner a measured starting recipe. A recipe makes more sense once they know how to operate the machine safely.
What is a good beginner espresso recipe?
A practical starting point is 18 grams of coffee in and about 36 grams of espresso out, which is a 1:2 brew ratio by weight. The right recipe depends on the coffee and equipment, so encourage your learner to taste the result rather than treating those numbers as fixed rules.
How long should an espresso shot take?
Roughly 25–30 seconds is a common reference, but shot time varies with dose, yield, coffee, grind, and machine. Use a timer to compare shots, then judge time alongside taste and the amount of espresso in the cup.
How do I explain grind adjustments simply?
Tell your learner that a finer grind generally slows a shot, while a coarser grind generally speeds it up. Have them make a small change, hold the dose and yield steady, and taste again. Changing one thing at a time makes the result easier to understand.
Does tamping need to be very hard?
No. A level, consistent tamp matters more than extreme force. Pressing harder is not a dependable fix for a shot that runs too quickly or slowly; teach your learner to check the grind and other variables instead.
How should I teach cleanup and machine maintenance?
Show the learner how to knock out the puck, rinse the basket, and wipe the steam wand promptly after steaming milk. For purging, backflushing, descaling, and other maintenance, follow the manual for your specific machine, since models have different requirements.
Conclusion
Teach your espresso setup as a sequence your learner can repeat: stay safe, measure a simple starting recipe, taste the result, and change one thing at a time. Then let them make the next drink themselves. A clear note beside the machine can turn your lesson into tomorrow morning’s coffee.
The real win isn’t one perfect shot—it’s someone confidently making the next one, with the grinder humming and the steam wand clean when they’re done.
Halloween Picks
halloween
As an affiliate, we earn on qualifying purchases.