
TL;DR

Get coffee and tea gear delivered free with Prime
- Fast, free delivery on millions of items
- Prime Video, Amazon Music and more included
- Member-only deals all year
Milk can turn from pleasantly sweet to scorched with only a small change in heating conditions. Scorching is caused by the Maillard reaction on the pan’s surface, often occurring before the bulk of the milk reaches boiling point. Control heat distribution and stirring to keep milk sweet.
You pull your mug of cocoa from the microwave, take a sip, and wince. It tastes metallic, bitter, and wrong. You didn’t boil it, so what happened? You crossed the invisible **milk temperature line between sweet and scorched**.
Milk is deceptively simple. It looks like a uniform liquid, but it is a complex suspension of proteins, fats, and sugars. When you heat it, you are triggering chemical reactions that can either enhance sweetness or create burnt, acrid flavors. The difference often comes down to just a few degrees or seconds of contact with a hot surface.
This guide breaks down exactly why milk burns before it boils, how to spot the early signs of scorching, and the specific techniques that keep your milk tasting like milk, not charcoal. Whether you are steaming for a latte or simmering for hot chocolate, mastering this balance changes everything.
Milk scorches on the bottom of the pan before the bulk reaches boiling point, so do not rely on bubbles as a warning sign.
Use a heavy-bottomed pan and low heat to minimize temperature gradients that cause localized burning.
Stir constantly to prevent proteins from settling and sticking to the hot surface.
Plant-based milks require different heating techniques due to varying starch and protein contents.
If milk smells burnt, discard it; the bitter compounds cannot be removed by straining or masking.
Kitchen science · A practical guide
The Milk Temperature Line Between Sweet and Scorched
Milk can shift from softly sweet to bitter with just a little more heat or time. The key is managing the hot surface at the bottom of the pan, not waiting for the whole pot to boil.
The pan can scorch milk while the surface still looks calm.
Why milk burns before it boils
Scorching happens where milk solids meet a hot surface. The rest of the liquid can remain below boiling while that small contact zone overheats.
A hot bottom, a calm top
Thin pans and high heat create temperature gradients. Milk proteins and sugars can stick and scorch at the pan before bubbles appear across the surface. A rolling boil is a late warning.
Sweet notes can turn bitter
Lactose, milk’s natural sugar, reacts with proteins during heating. This Maillard reaction can add toasted, caramel-like notes; too much heat or time pushes the flavor toward burnt and acrid.
There is no single “sweet spot”
A thermometer is useful, but it cannot predict flavor by itself. Heating rate, holding time, pan, stirring, and milk composition all matter.
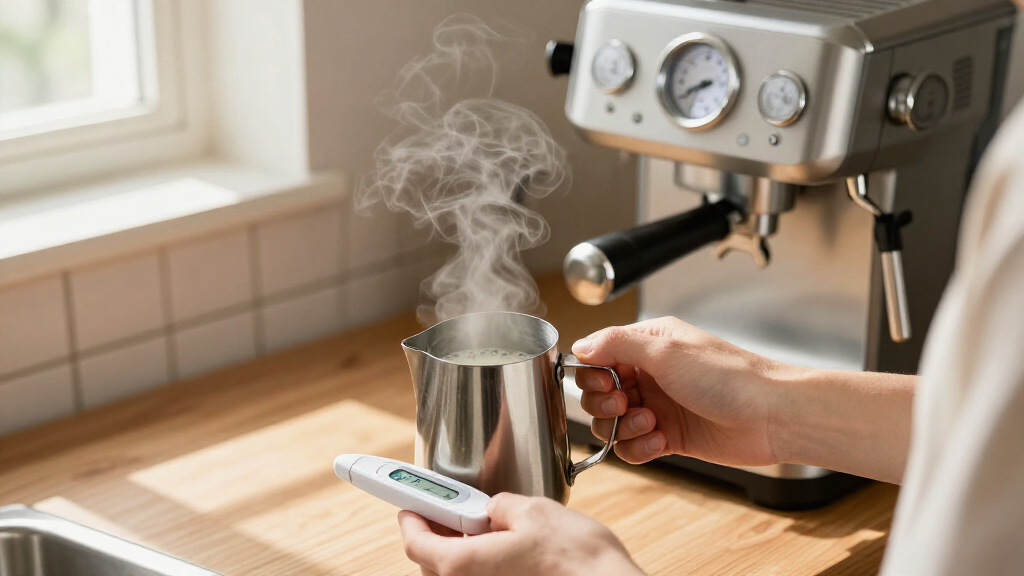
For many hot drinks, 140–155°F (60–68°C) is a useful comfort range, not a guarantee against scorching. Recipe and steaming targets vary; stop when the milk reaches the texture and temperature your drink needs.
Plant-based drinks play by different rules
Products vary in sugars, proteins, oils, and stabilizers. Start gently, stir, and watch for texture changes rather than relying on dairy timings.
Oat
Starches can thicken quickly. Keep the heat low and stir often to reduce sticking and scorching.
Soy
Rapid heating or high acidity may encourage curdling or separation. Warm gradually and check the texture.
Almond
Thinner drinks may heat unevenly. Use low heat and frequent stirring, and look for separation.
Five steps to heat milk without scorching
Spread heat evenly, keep the milk moving, and take it off the burner before residual heat carries it too far.
Choose a heavy pan
A thick base distributes heat more evenly and limits hot spots.
Start with cold milk
Let the pan and milk warm together instead of adding milk to a hot pan.
Stir the bottom
Scrape the base and corners so solids do not settle against one hot zone.
Keep heat low
Use low to medium-low heat. Vigorous bubbling means the milk is heating hard.
Remove early
Take the pan off just below your target; residual heat continues the cooking.
Save a slight scorch—or discard it
Burnt flavor compounds can spread through the batch. A clean transfer may help when the scorch is very slight, but strong bitterness is hard to remove.
Faint toastiness
Remove the pan from the heat. Pour the unburnt milk into a clean container, leaving the last half-inch behind. Do not scrape the bottom. Taste before using.
Burnt, bitter, or ashy
Discard the milk. Straining may remove particles, but it cannot reliably remove a scorched flavor that has spread. Sugar or cocoa may mask it briefly, not fix it.
Why Milk Burns Before It Boils
Milk burns before it boils because scorching is a surface phenomenon, not a bulk liquid event. The bottom of your pan can reach temperatures far higher than the milk itself, causing proteins and sugars to stick and carbonize locally. This creates a burnt taste that permeates the liquid, even if the top layer never reaches 212°F (100°C).
Think of it like cooking eggs in a non-stick pan that has lost its coating. The egg touches the hot metal, sticks, and burns, while the rest of the egg remains soft. Milk behaves similarly. The **Maillard reaction** — a chemical reaction between amino acids and reducing sugars — kicks in rapidly at the interface between the hot pan and the milk solids. This reaction produces the toasted, caramel-like flavors we enjoy in small doses, but it quickly turns bitter and burnt if uncontrolled.
According to Espressoguide, scorching can happen before milk boils because the heat transfer at the bottom is intense. If you rely on seeing bubbles to know when to stop, you are already too late. The damage at the bottom has already occurred. You need to watch the milk’s behavior and smell, not just the thermometer in the center of the pot.
Products Worth Considering
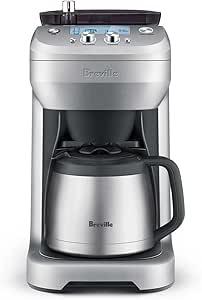
Breville Grind Control BDC650BSS Thermal Carafe Coffee Maker – Brushed Stainless Steel

Cuisinart 14-Cup Food Processor, 720-Watt Motor, Stainless Steel, DFP-14BCNY

Breville Bambino Espresso Machine, Brushed Stainless Steel (BES450BSS)
As an affiliate, we earn on qualifying purchases.
The Sweet Spot: Temperature vs. Time
There is no single “sweet spot” temperature for milk because the outcome depends on how long the milk stays hot, not just how hot it gets. A brief spike to 160°F (71°C) might taste fine, while holding milk at 140°F (60°C) for ten minutes could dull its flavor. **Time and temperature are partners**, and you cannot control one without considering the other.
For most hot drinks, you want to heat milk to between 140°F and 155°F (60°C–68°C). This range is hot enough to feel comforting and to dissolve cocoa powder or sugar, but it is generally below the point where delicate fresh aromas are destroyed. However, if you are making a custard or a sauce, you might need to go higher, but you must do so with constant agitation to prevent localized burning.
Consider the difference between a microwave and a stovetop. A microwave heats the water molecules throughout the liquid relatively evenly, but it can create hot spots. A stovetop heats from the bottom up, creating a steep gradient. If you use a thin pan on high heat, the bottom might hit 300°F (149°C) while the top is still 100°F (38°C). That gradient is where scorching lives. To keep milk sweet, you need to minimize that gradient.
Dairy vs. Plant-Based: Different Rules Apply
Plant-based milks do not behave like cow’s milk because their chemical makeup is fundamentally different. Oat, soy, and almond milks have different protein structures, sugar types, and fat contents, which means they scorch, foam, and separate at different rates. You cannot apply the same temperature rules to oat milk that you use for whole dairy milk.
Dairy milk contains lactose and casein proteins that react predictably with heat. Plant milks often contain added oils, stabilizers, and gums. For example, oat milk is high in starches that can thicken rapidly and burn if not stirred constantly. Soy milk has a different protein profile that can curdle or separate if heated too quickly or with high acidity. Almond milk, being thinner, might scorch faster because it has less mass to absorb the heat.
If you are switching to plant-based options for your morning latte, start with lower heat and stir more frequently. Watch for separation, which looks like little curds or a watery layer, rather than just browning. The line between sweet and scorched is often blurred by the added sugars and flavors in commercial plant milks, which can caramelize and burn much faster than plain dairy.
5 Steps to Heat Milk Without Scorching
You can consistently heat milk without burning it by controlling the heat source and managing agitation. The goal is to distribute heat evenly and prevent milk solids from settling and sticking to the hot bottom of the vessel. Here is the process that works for stovetop heating.
- Use a heavy-bottomed pan. Thin pans create hot spots that burn milk instantly. A stainless steel pan with an aluminum or copper core distributes heat evenly.
- Start with cold milk. Never pour hot milk into a hot pan. Starting cold allows the milk and pan to heat up together, reducing the thermal shock that causes sticking.
- Stir constantly. Use a wooden spoon or silicone spatula to scrape the bottom and corners. This prevents proteins from settling and burning.
- Keep heat low to medium-low. High heat is the enemy. If you see vigorous bubbling, you are likely already scorching the bottom. Aim for a gentle simmer or just steam.
- Remove from heat early. Milk continues to cook from residual heat. Take it off the burner when it is slightly below your target temperature.
How to Save Scorched Milk (And When to Toss It)
If you catch the scorching early, you might be able to save the milk, but if the burnt smell is strong, it is usually better to discard it. The burnt flavor compounds are potent and can permeate the entire batch. Pouring the unburnt milk into a clean container without scraping the bottom is your best bet for minor incidents.
Imagine you are making hot chocolate and you smell a faint toastiness. Immediately remove the pan from the heat. Carefully pour the milk into a new pot, leaving the last half-inch of milk in the original pan. Do not scrape the bottom, as that is where the burnt solids are concentrated. Taste the transferred milk. If it tastes clean, you can proceed. If it tastes bitter or ashy, the burnt flavor has already diffused.
There is no chemical way to “neutralize” the burnt taste once it has spread. Adding sugar or cocoa might mask it slightly, but the acrid aftertaste will likely remain. In professional kitchens, scorched milk is discarded because the flavor defect is too prominent to hide. At home, you can try straining it through a fine-mesh sieve to remove any large burnt particles, but this will not remove the dissolved bitter compounds.
Why Milk Forms a Skin and How to Stop It
Milk forms a skin because heat causes proteins and fat to gather at the surface as water evaporates. This film, often called a “skin,” is made of denatured proteins that coagulate and float to the top. It is not harmful, but it is unpleasant in drinks and can trap heat, leading to uneven cooking.
You can prevent skin formation by stirring the milk frequently during heating. Stirring breaks up the protein network before it can solidify into a film. Alternatively, covering the pot with a lid can reduce evaporation and keep the surface moist, preventing the skin from forming. However, be careful when covering, as this can cause the milk to boil over if the heat is too high.
If you are making a drink where skin is undesirable, like a latte, steaming the milk introduces air and agitation, which naturally prevents skin formation. For stovetop heating, a simple whisk or spoon stir every 30 seconds is usually enough. If a skin does form, you can gently lift it off with a spoon before serving, but prevention is much easier than removal.
Food Safety: Is Scalded Milk Dangerous?
Scalding milk is a cooking term, not a safety hazard, provided the milk was fresh to begin with. Scalding simply means heating milk to just below boiling, which can actually help kill bacteria if done correctly. However, if milk has been left out at room temperature for more than two hours, heating it will not make it safe to drink.
Bacteria produce toxins that are heat-stable, meaning they do not break down even at boiling temperatures. If your milk smells sour or looks curdled before you heat it, throw it away. Do not try to “cook out” the spoilage. Fresh milk heated to 165°F (74°C) is safe for immediate consumption, but it should be cooled rapidly if you are storing it.
According to food safety guidelines, milk should be stored at 40°F (4°C) or below. When heating milk for drinks, do not reheat the same milk multiple times. Each cycle of heating and cooling increases the risk of bacterial growth. Heat only what you need for that specific drink. If you have leftover heated milk, refrigerate it immediately and use it within one day.
Frequently Asked Questions
At what temperature does milk scorch?
There is no universal temperature for scorching because it depends on the pan’s heat and contact time. Milk can scorch at the bottom of a hot pan while the surface is still below 100°F (38°C). Focus on heat distribution and stirring rather than a specific thermometer reading.Why does milk burn on the bottom before it boils?
The bottom of the pan is in direct contact with the heat source, so it gets much hotter than the milk above it. Milk solids stick to this hot surface and carbonize before the rest of the liquid reaches boiling point. This is why a rolling boil is not a reliable warning sign.Can I save scorched milk?
If the scorching is slight, you can carefully pour the unburnt milk into a clean container, leaving the burnt layer behind. Do not scrape the bottom. However, if the burnt smell is strong, the flavor has likely permeated the entire batch, and it is best to discard it.Does stirring prevent scorching?
Yes, stirring helps distribute heat evenly and prevents milk solids from settling and sticking to the hot bottom of the pan. However, stirring cannot compensate for excessive heat. You must combine stirring with lower heat settings to effectively prevent scorching.Is scalded milk unsafe to drink?
No, scalding is a cooking term for heating milk to just below boiling. It is safe to drink if the milk was fresh before heating. However, if the milk was already spoiled or left out too long, heating it will not make it safe due to heat-stable toxins.Conclusion
The line between sweet and scorched milk is thin, but it is not impossible to stay on the right side. By understanding that scorching is a surface reaction driven by heat gradients and time, you can adjust your technique to protect the delicate flavors of your milk. Use a heavy pan, keep the heat low, and stir like you mean it.
Next time you heat milk, ignore the boil. Watch the steam, smell the aroma, and trust your senses. Your palate will thank you for the difference between a creamy, sweet treat and a bitter, burnt mistake.