
TL;DR

Get coffee and tea gear delivered free with Prime
- Fast, free delivery on millions of items
- Prime Video, Amazon Music and more included
- Member-only deals all year
In espresso drinks, stretching and texturing milk are two connected stages of steaming: stretching adds air near the milk’s surface, while texturing uses a rolling motion to blend that air into smooth microfoam. Add only as much air as your drink needs, keep the milk moving as it heats, and aim for about 55–65°C (130–150°F) to avoid an overheated, flat taste.
A pitcher can sound like a tiny tearing-paper machine and still produce milk that pours like a cloud of soap bubbles. The difference comes down to when you add air and what you do with it afterward.
In espresso drinks, stretching adds air, while texturing blends that air into the milk and refines it into a smooth, glossy foam. You’ll learn how the two stages work, how to adjust them for a cappuccino or flat white, and what to change when your foam sits on top instead of flowing from the pitcher.
Stretching introduces air near the milk’s surface; texturing rolls the milk to blend and refine that air.
Stop stretching when the milk reaches the volume your drink needs, then focus on a steady rolling motion.
A cappuccino generally needs more aeration than a flat white, though café recipes vary.
Glossy, uniform microfoam pours more smoothly than a stiff foam cap sitting above thin milk.
Many baristas aim for 55–65°C (130–150°F); overheating can flatten the milk’s flavor.
Espresso craft · A field guide
The Difference Between Stretching and Texturing Milk
Two connected stages shape a silky pour. Stretching adds air; texturing rolls and refines it into smooth microfoam. Control the first, keep the milk moving, and finish before heat flattens its flavor.
Add air near the surface. Then blend it through the pitcher.
What changes in the pitcher?
The wand position and milk movement shift as the milk warms. The air enters early; the rolling motion makes it pour as one mixture.
Stretching
AerationIntroduce a controlled amount of air through the milk’s surface. The volume rises and small bubbles begin to form.
Texturing
Rolling & refiningUse a rolling motion to circulate the milk, break up larger bubbles, and distribute fine foam throughout.
They overlap in practice. Add air near the start, then keep the milk rolling as it heats. Continuing to aerate can build a coarse foam cap.
Five steps to smoother steamed milk
Make one adjustment at a time. Listen to the hiss, watch the milk rise, and check how it moves in the pitcher.
Start cold
Use fresh, cold milk and a clean pitcher with room for expansion. Half full is a useful practice starting point.
Set the wand
Place the tip just beneath the surface and angle the pitcher so the milk can begin to move.
Add air briefly
Listen for a soft hiss and watch the volume grow. Add less air for a flat white, more for a cappuccino.
Keep it rolling
Adjust the wand to circulate the milk. Let the movement disperse bubbles as the pitcher heats.
Swirl and pour
Stop at your preferred temperature, swirl until glossy, and pour promptly while the texture is cohesive.
Heat with care
Many baristas aim for this range to preserve flavor and texture. Wand power, milk type, and personal preference affect the result.
130–150°F
Choose foam for the drink
These are relative aeration guides, not fixed recipes. Café definitions and preferences vary.
Cappuccino More air
A thicker foam layer generally calls for a little more stretching. Stop before the foam becomes dry or stiff.
Latte Balanced
Often sits between a cappuccino and a flatter style, with enough fine foam to support a smooth pour.
Flat white Less air
Usually needs less expansion and a silkier, flatter surface. Stretch briefly, then focus on rolling.
When the foam does not flow
A gentle tap and swirl can help with a few surface bubbles. A separated pitcher points to a change in technique next time.
Shorten the stretching stage and make a steady roll to break down bubbles and distribute the foam.
Bring the tip closer to the surface briefly to introduce controlled air, then return to rolling.
If thin milk swirls beneath a dense cap, improve the rolling motion so air spreads through the pitcher.
Foam may be too thick, too thin, or uneven. Adjust air time and wand position, then swirl and reassess.
Stop earlier and use temperature as a guide. Many baristas target 55–65°C (130–150°F).
Try a fresh milk or a barista-formulated plant-based option. Formulations respond differently to heat and steam.
Read the texture, then adjust
Use the pitcher’s appearance and movement as feedback instead of relying on a fixed steaming time.
Are stretching and texturing the same?
No. Stretching introduces air; texturing blends and refines that air into the milk. The stages connect and overlap.
When should I stop stretching?
Stop adding air once the milk expands to the volume your drink needs. Keep it rolling as it heats.
What should microfoam look like?
Glossy and uniform, often compared to wet paint. Large dry bubbles floating over thin milk signal uneven texture.
Can I make microfoam without a machine?
A handheld frother or French press can make and refine foam, though neither recreates a steam wand’s heating and rolling action.
Stretching adds air; texturing turns it into pourable foam
The difference between stretching and texturing milk is simple: stretching introduces air, while texturing blends and refines that air throughout the milk. They are two stages of steaming milk, though they overlap as you move the wand and the milk heats.
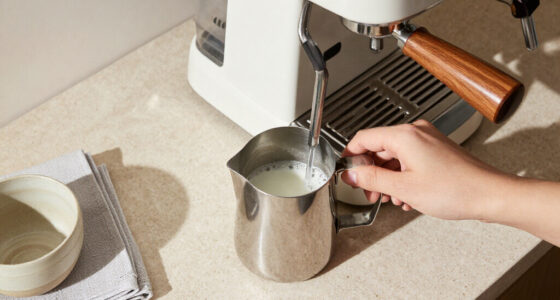
During stretching, the steam wand tip sits just below the surface. You hear a light, controlled hiss as small amounts of air enter the milk and its volume grows. If the tip sits too high, the hiss can turn into loud spluttering and the pitcher fills with large bubbles.
During texturing, you position the wand to make the milk roll. That rolling motion breaks larger bubbles into smaller ones and distributes the foam, creating microfoam: milk that looks glossy and even rather than frothy on top and thin underneath. Think of folding air into batter: adding it matters, but so does spreading it through the mixture.
For example, if your cappuccino has a dry cap that plops onto the espresso while liquid milk sloshes beneath, you may have stretched the milk but not textured it enough. A smooth pitcher should pour as one consistent stream.
Products Worth Considering

Breville BES870XL Barista Express Espresso Machine, Brushed Stainless Steel

De'Longhi Magnifica Evo Automatic Espresso Machine with Milk Frother – Silver

De'Longhi Magnifica Evo Fully Automatic Espresso Machine with Manual Milk Frother
As an affiliate, we earn on qualifying purchases.
Use the first seconds to add just enough air
Stretching milk is the early part of steaming when you draw a controlled amount of air through the milk’s surface. Keep the wand tip just below the surface and listen: a gentle, steady hiss is a useful cue that small bubbles are entering the milk.
Start with cold milk in a pitcher that leaves room for it to expand. As air enters, the surface may rise and the sound may resemble soft paper tearing. When you’ve added enough air for the drink, lower the tip slightly or adjust the wand position so the milk starts rolling without adding more.
Consider a cappuccino and a flat white made with the same pitcher size. The cappuccino generally calls for a thicker foam layer, so you’ll stretch the milk a little more; the flat white usually needs less air and a silkier, flatter pour. Café recipes vary, but the principle stays steady: the desired foam level controls how long you stretch.
Too much stretching creates stiff, dry foam that separates from the liquid. That separation makes the drink harder to pour evenly and can leave a thick cap after the liquid has been poured. Too little stretching leaves the drink with little texture and gives the milk less body. The tradeoff is between adding enough air to suit the drink and keeping the foam fluid enough to blend with espresso. If you’re learning, add air in short bursts and watch the milk’s rise instead of relying on a fixed number of seconds; the same timing can produce different results with another milk, pitcher, or steam wand.
Roll the milk to make bubbles small and glossy
Texturing milk uses the wand’s movement to blend introduced air through the milk and refine it into fine, even foam. Once you’ve stretched enough, adjust the wand so it creates a steady rolling motion rather than pulling in a fresh stream of air.
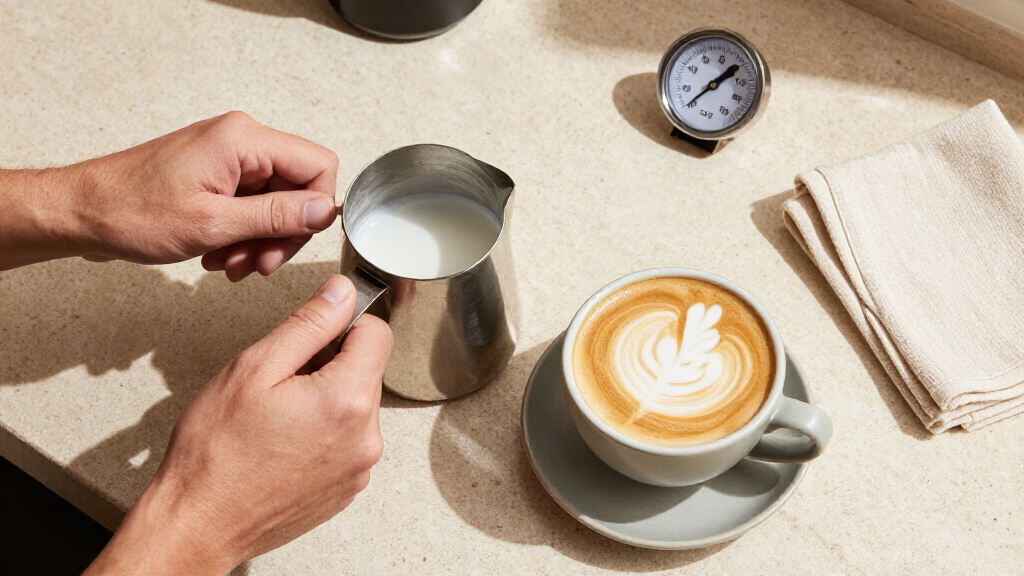
The rolling milk acts a little like a slow whirlpool. It carries bubbles through the pitcher, where movement and steam help break larger ones into smaller ones. Done well, the surface looks shiny, like wet paint, and the milk feels cohesive rather than split into foam and liquid.
Why does this matter? Fine bubbles stay suspended through the milk more evenly than a layer of large bubbles, so the pitcher pours at a steadier rate instead of releasing thin milk first and foam last. That cohesion also gives the milk enough body to support latte art without making it too stiff to flow. A useful home-barista check: after steaming, gently swirl the pitcher. The milk should turn glossy and move as one mixture. If a dense cap stays put while thin milk swirls underneath, the air has not been evenly incorporated. A few big surface bubbles can often be reduced with a gentle tap and swirl, but a pitcher full of stiff foam may need a better steaming approach next time.
That smooth consistency makes pouring easier and helps latte art lines hold their shape. For instance, a heart poured into a latte can blur or break when the milk is too thin, while thick, dry foam may land in a clump instead of flowing from the spout. The goal is a balance: enough fine foam to give the pour structure, with enough fluid milk for it to move smoothly.
Follow these five steps for smoother steamed milk
Steam milk in this order: add controlled air first, then use rolling movement to blend it as the milk heats. This sequence gives you a practical way to make adjustments when a pitcher sounds wrong or the foam looks uneven. The order matters because air is easiest to add near the surface, while a rolling motion later helps distribute it; continuing to add air throughout can build a coarse, oversized foam layer.
- Start cold. Pour fresh, cold milk into a clean pitcher, leaving room for expansion. A half-full pitcher is a useful starting point when you’re practicing.
- Position the wand. Place the tip just beneath the milk’s surface, with the pitcher angled so the milk can begin to move.
- Stretch briefly. Listen for a soft hiss and watch the milk expand. Add less air for a flat white and more for a cappuccino.
- Texture as it heats. Adjust the wand to create a steady roll. Keep the milk moving so bubbles disperse instead of collecting in a stiff layer.
- Stop and pour. Many baristas aim for about 55–65°C (130–150°F). Swirl the milk to restore its gloss and pour promptly.
Imagine steaming milk for a morning cappuccino before work. If the pitcher grows too quickly and the hiss becomes a roar, shorten the stretching stage; if the milk heats without expanding, adjust the tip closer to the surface. Watch, listen, and change one thing at a time. That way you can tell whether a change in tip depth or air time improved the texture instead of guessing from a different result.
Choose foam for the drink and the milk you have
Different drinks need different amounts of stretch, and different milks respond differently to the wand. A cappuccino generally has a thicker foam layer than a flat white, while a latte often sits between those styles; exact café recipes and drink names vary. More air gives a drink a lighter, more distinct foam layer, while less air keeps the milk closer to a single fluid texture. Matching the stretch to the drink helps the foam complement the espresso instead of dominating the cup.
Dairy milk’s proteins help stabilize foam, while its fat contributes to a creamy impression. Plant-based milks can also form microfoam, but their performance depends on the product and formulation. Barista-style versions are often designed to steam more reliably, though they may roll or foam differently from dairy milk. In practice, a milk’s behavior affects both how much air it can take and how easily that air stays dispersed, so a technique that works with dairy may create too much foam with another product.
For example, if your usual oat drink keeps making large bubbles, try a barista-style version and shorten the initial air stage while you learn how it behaves. Keep the same pitcher and wand position for your next attempt; changing one variable at a time makes the result easier to read. If the milk then pours too thinly, add a little more air on the next try rather than changing several parts of the process together.
Temperature, freshness, pitcher size, steam power, and wand design can all affect the finish. A milk that works beautifully in one machine may need a different touch on another. Aim for the texture your drink calls for, rather than trying to copy a foam level that doesn’t suit the milk or equipment in front of you. That adjustment is a practical tradeoff: a little extra experimentation can produce a more cohesive pour, while chasing a fixed café recipe may leave you with separated foam on your setup.
Fix foam that is bubbly, thin, or hard to pour
Milk that pours poorly usually needs a change in air or movement: large bubbles often point to too much air or too little rolling, while thin milk may need a touch more stretching. Milk that separates into foam above liquid needs more even blending during the texturing stage. Look at when the problem appears: bubbles during stretching suggest air is entering too quickly, while separation after steaming suggests the air was not distributed well enough. That distinction helps you change the relevant part of the process instead of adding more air to a pitcher that already has plenty.
| What you see | Likely cause | What to try next time |
|---|---|---|
| Large, stiff bubbles | Air entered too quickly or for too long | Shorten stretching and establish a steady roll |
| Thin milk with little foam | Too little air entered, or the wand sat too deep | Raise the tip slightly and listen for a gentle hiss |
| Foam sitting separately on top | The air was not distributed evenly | Keep the milk rolling during heating, then swirl before pouring |
| Flat or cooked taste | The milk overheated | Stop nearer 55–65°C (130–150°F), adjusting to your preference |
Suppose your latte pours in two parts: a watery stream followed by a thick blob of foam. Next time, focus on the rolling motion after the milk has expanded. This targets the separation by blending the existing foam through the milk, rather than adding more air and making the cap denser. A gentle swirl before pouring can also help restore an even texture when the pitcher has been sitting briefly.
Milk safety matters too. Start with fresh milk and keep it refrigerated at 4°C (40°F) or colder. Don’t leave milk sitting warm on the counter, and discard leftovers that have spent too long at room temperature. Milk is a common allergen; plant-based drinks may also contain allergens such as soy or nuts, so check the label when serving others.
Use a frother when you don’t have a steam wand
You can make foamed milk without an espresso machine, though a handheld frother or French press won’t reproduce exactly the steam wand’s simultaneous heating and rolling action. These tools can still help you make a pleasant topping for coffee at home. The difference matters most if you want a continuous pour: separate heating and frothing can make it harder to disperse bubbles as finely, so the result may suit a topped coffee better than detailed latte art.
With a handheld frother, warm the milk separately, then move the frother through it to introduce air and blend the foam. In a French press, pump the plunger through warm milk to add air, then swirl or stir to help the foam become more even. Start gently; vigorous pumping can make coarse bubbles that sit like a cap. A few controlled movements leave more room to adjust the texture, while aggressive frothing adds volume quickly but can be difficult to undo.
For a weekend coffee, you might warm a small amount of oat milk, froth it briefly, and pour it over espresso. The result can be tasty even if it doesn’t have the same fine, glossy microfoam as a well-steamed pitcher. If you want to draw latte art, consistency matters, and non-steam methods can make that harder. For a simple topping, however, a looser, less uniform foam may be perfectly pleasant.
Whatever method you use, avoid overheating the milk. Aim for a warm, drinkable temperature and serve it promptly. If you’re using a plant-based drink, check its carton for storage instructions and allergen information.
Frequently Asked Questions
Are stretching and texturing the same thing?
No. Stretching adds air near the milk’s surface, while texturing blends that air throughout the milk and refines the bubbles. They are connected stages of steaming.
When should I stop stretching milk?
Stop adding air when the milk has expanded to the volume your drink needs. Then keep it rolling as it heats so the bubbles become finer and more evenly distributed.
What should properly textured milk look like?
It should look glossy and uniform, often compared to wet paint. It should pour as one stream rather than leaving dry bubbles on top and thin milk underneath.
Can plant-based milk form microfoam?
Yes. The result depends on the product, and barista-style plant milks are often formulated to steam more consistently. They can still behave differently from dairy milk, so adjust the amount of stretching to what you see in the pitcher.
What temperature should steamed milk reach?
A common working range is 55–65°C (130–150°F). Your preferred endpoint can depend on the drink and milk; overheating may reduce sweetness and create a cooked taste.
Why does my milk still have bubbles after steaming?
Air may have entered too quickly, the milk may not have rolled enough to break up larger bubbles, or the pitcher may need a gentle swirl before pouring. If bubbles keep returning, shorten the stretching stage and focus on a steady roll.
Conclusion
Remember the sequence: stretch for air, texture for smoothness. Add just enough air for your drink, keep the milk rolling as it heats, and stop around 55–65°C (130–150°F) if that suits your milk and taste.
Next time you steam a pitcher, listen for the soft hiss, watch the milk turn glossy, and pour while it still moves like silk.