TL;DR

Get coffee and tea gear delivered free with Prime
- Fast, free delivery on millions of items
- Prime Video, Amazon Music and more included
- Member-only deals all year
Clumps form when fine coffee particles stick together, often because of static electricity, moisture, grind size, or grinder design. They can leave dense pockets in an espresso puck, encouraging water to flow unevenly and contributing to channeling or inconsistent flavor. Break up visible clumps, distribute grounds evenly, and judge changes by taste and repeatability.
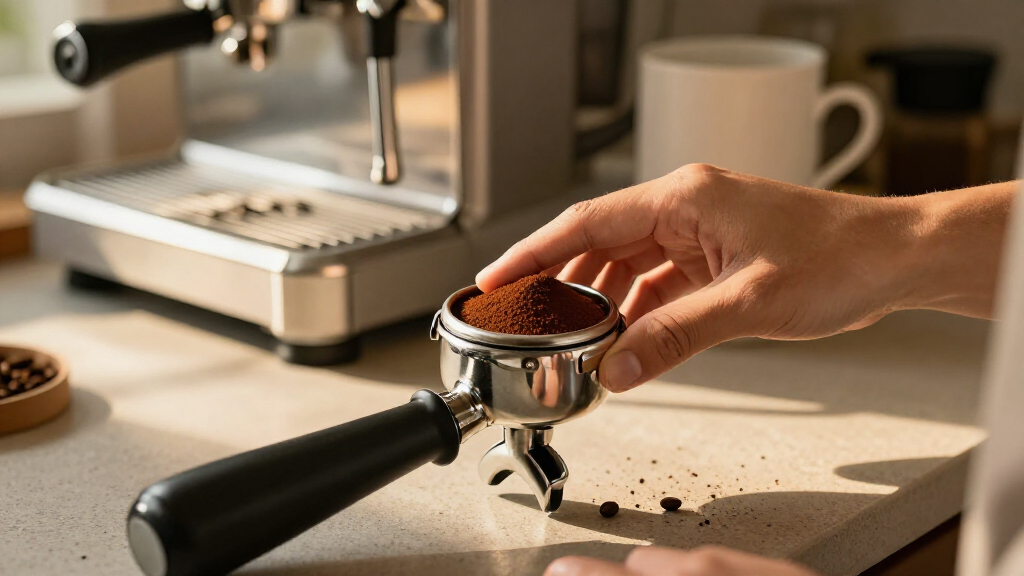
Your grinder can turn a dose of coffee into a little landscape of powdery peaks and stubborn nuggets—and those nuggets can matter once water hits the espresso puck. Clumps are common, especially with fine espresso grounds, but they can make it harder to spread coffee evenly through the basket.
This guide explains why clumps form, how they can affect water flow and flavor, and what you can try before changing your grinder or blaming your beans. You’ll also learn why a clumpy dose does not automatically mean stale coffee, and how to tell whether a distribution change actually helps your shots.
Think of the goal as a level, evenly prepared bed of coffee. A few small clumps are not a verdict; what matters is whether the grounds end up distributed well enough for water to pass through the puck consistently.
Clumps form when fine grounds stick together, often from static, moisture, grind fineness, or grinder design.
Clumps can leave dense pockets that contribute to uneven water flow and channeling, but they are only one possible cause of inconsistent shots.
Use gentle WDT to break up and distribute clumps before tamping; judge results by taste and repeatability.
RDT uses a tiny amount of water on beans to reduce static, while WDT works on grounds after grinding.
Clumping alone does not show that coffee is stale; check storage, aroma, taste, and shot consistency.
Espresso prep / grounds & flow
Why Clumps Form in Ground Coffee and How They Hurt Espresso
Fine grounds can gather into powdery peaks and stubborn nuggets. Clumps may make an espresso bed harder to distribute evenly, but they are a clue to investigate—not proof of stale coffee or a bad shot.
01 / Why grounds gather
Clumping has more than one cause
Fine particles stick during grinding and handling. Notice where grounds cling and when clumps appear to choose a useful adjustment.
Static
Grinding friction can charge grounds. They may attract each other or cling to the chute, dosing cup, and portafilter.
Moisture
Humidity, damp tools, or condensation can make particles adhere. Too much water can create sticky grounds.
Fine grind
Espresso-sized particles have more surface area relative to their size, creating more opportunities to stick.
Design & residue
Burr geometry, grind speed, chute shape, and buildup affect how coffee exits the grinder.
Coffee characteristics
Roast, freshness, processing, and bean composition can change grinder behavior. The effect varies by coffee.
Clumps ≠ stale
Appearance alone cannot tell you freshness. Check storage, aroma, taste, and shot consistency instead.
Keep the grinder and dosing tools clean and dry. If the grounds still clump, focus on breaking them up and distributing the dose evenly.
02 / From clump to cup
How uneven density can affect flow
Clumps matter when they stay as dense pockets. Water can favor lower-resistance paths through the puck, contributing to channeling.
Clumps remain
Grounds settle unevenly, leaving dense pockets beside looser areas.
Flow finds a path
Water moves more readily through lower-resistance parts of the bed.
Extraction varies
Some coffee may be over-extracted while other parts are under-extracted.
The cup can wobble
Shots may taste sour, bitter, thin, or simply out of balance.
Clues, not proof: Shot-to-shot flow changes, spurting, uneven extraction, or localized wet patches can have other causes—including grind setting, dose, tamping, basket choice, and machine setup.
03 / Practical technique
Distribute first. Tamp second.
Use a gentle, repeatable routine to loosen visible pockets. Change one preparation variable at a time and compare several shots.
WDT / In the basket
Break up clumps before tamping
The Weiss Distribution Technique uses thin needles to stir grounds across the basket. Move gently through the depth of the dose, not just across the surface, so you loosen pockets and spread coffee more evenly before compression.
RDT / Before grinding
Reduce static with care
The Ross Droplet Technique uses a tiny amount of water on beans before grinding. It may reduce static-related mess for some setups. Keep the amount very small, avoid wetting the grinder, and follow the manufacturer’s guidance.
Clean & dry
Check the grinder, dosing cup, and tools for residue or dampness.
One change
Adjust one preparation variable at a time so the result is easier to read.
Taste & repeat
Compare shot behavior and flavor across several pulls, not appearance alone.
04 / A useful mental model
A level bed is the target
A few small clumps are common. The practical question is whether the grounds end up distributed well enough for water to pass through the puck consistently.
If gentle distribution improves repeatability and taste, keep it in your routine. If it makes little difference over repeated shots, investigate another part of the recipe.
Why Clumps Form in Ground Coffee, Even When the Beans Are Fresh
Why clumps form in ground coffee comes down to fine particles sticking together during grinding or handling. Static electricity, moisture, grind size, and grinder design can all contribute, so a clumpy dose does not prove that your beans are stale or defective. These causes matter because they point to different fixes: changing the way grounds are distributed may help a basket full of clumps, while it may do little for grounds that cling to the grinder from static.
Grinding creates friction, and friction can leave coffee particles electrically charged. Those fine coffee particles may attract one another or cling to the chute, dosing cup, and portafilter. Smaller particles have more surface area relative to their size, so they can be especially prone to sticking. If your counter looks dusted with coffee and a little lump has formed under the grinder spout, static may be part of the story. In that case, a dosing routine that controls static could reduce both mess and variation in how much coffee actually reaches the basket.
Moisture can change the picture. A humid kitchen, damp dosing cup, or condensation near the grinder may make grounds adhere; a very small amount of water added to beans can also reduce static for some setups. Too much water, however, can make grounds sticky and put unwanted moisture near grinder parts. Keep the distinction simple: reducing static is the aim, not wetting the grinder. If clumps appear only on humid days or when a cup is damp, drying tools and keeping beans away from steam may be a safer first adjustment than adding water.
Espresso’s fine grind gives particles many opportunities to stick, while burr geometry, grind speed, chute shape, and residue can affect how coffee leaves the grinder. Roast, freshness, and bean composition may also affect behavior, but the result varies. For example, two coffees ground at the same setting may leave one dose fluffy and the next visibly clumpy; appearance alone cannot identify the cause. This is why clumps are better treated as an observation than a diagnosis: the pattern of where they form and whether grounds scatter or cling can help you choose what to adjust.
A clean grinder and dry dosing tools are sensible first checks, but neither guarantees clump-free grounds. If clumps remain, focus on whether you can break them up and distribute the dose evenly before tamping. That is the part most directly tied to preparing a consistent puck. Trying to eliminate every visible clump can add steps without improving the cup, so judge the effort by whether shots become more repeatable and taste better.
espresso coffee grinder static reducer
As an affiliate, we earn on qualifying purchases.
As an affiliate, we earn on qualifying purchases.
How Clumps Can Turn Into Channeling and Uneven Flavor
Clumps can hurt espresso when they remain as dense pockets in the basket, leaving the coffee bed less evenly distributed. Water tends to move more easily through lower-resistance paths, so uneven density can contribute to channeling—water passing through some areas more readily than others. The key implication is that the clump itself is not the problem in isolation; it matters when it creates differences in how tightly packed parts of the puck are.
Imagine pouring water through a garden bed with one tightly packed patch and one loose patch. The water will not treat both areas alike. In a coffee puck, that uneven flow can leave some coffee over-extracted and other coffee under-extracted, which may contribute to a shot that tastes sour, bitter, thin, or simply out of balance. The flavor can seem confusing because these impressions may coexist: water has extracted unevenly rather than producing one uniform result across the dose.
You might notice a shot that runs differently from one morning to the next, spurting from a bottomless portafilter, or leaving an uneven-looking puck. These are clues, not proof. Grind setting, dose, tamping, basket choice, and machine setup can also affect flow, so a clump should be one possibility to investigate rather than an instant diagnosis. A visual sign is most useful when it repeats alongside changes in shot behavior or taste.
For example, if your 18-gram dose sometimes yields a steady stream and sometimes sprays despite the same routine, look at how the grounds land in the basket. A visible mound or pocket may be worth redistributing before you adjust the grind. Changing grind size at the same time can mask the cause: a slower shot might appear to improve, even if distribution is still inconsistent. Change one preparation variable at a time and compare taste and repeatability across several shots.
A smooth-looking puck does not guarantee a delicious espresso, and an untidy puck does not guarantee a bad one. Taste and repeatability matter more than appearance by itself. Treat clumps as a practical prompt to inspect distribution, not as a verdict on the whole setup. If breaking them up makes little difference over repeated shots, the time may be better spent checking another part of the recipe.
As an affiliate, we earn on qualifying purchases.
Use WDT to Break Up Clumps Before You Tamp
To break up clumps in the basket, use the Weiss Distribution Technique (WDT): gently stir the grounds with thin needles before tamping. The aim is to spread coffee throughout the basket and loosen visible clumps so the dose does not stay as a mound with dense pockets. This can matter because tamping compresses the bed; it is easier to correct uneven distribution before compression than to try to fix it afterward.
- Grind into the basket or dosing cup using your usual dose and setting.
- Stir gently through the grounds with thin, smooth needles, reaching across the basket rather than only scratching the surface. Moving through the depth helps loosen pockets instead of merely making the top look level.
- Settle and level the coffee with a light, consistent motion, then tamp level as you normally would. Avoid forceful tapping that can cause grounds to settle unevenly again.
- Pull a shot and record what changed, including dose, yield, time, and taste, while keeping other settings steady.
For a home example, say your grinder leaves a compact knot near one side of the portafilter. A careful WDT pass can separate it and move grounds through the basket; pressing harder with a thick tool may simply push coffee around without loosening the knot as evenly. The goal is to redistribute the grounds, not compact them before the tamp.
Thin, smooth needles are generally preferred because they can move through the grounds with less disturbance. A purpose-made tool is convenient, but the important part is gentle, thorough distribution. A toothpick or paperclip may be handy in a pinch, yet a thick or rough object can move grounds unevenly or scratch equipment. A repeatable motion matters more than buying a particular tool, since an elaborate routine is hard to evaluate if it changes from shot to shot.
WDT can help make shots more repeatable when clumps are visible, but it cannot fix every extraction problem. A poor grind setting, inconsistent dose, or tilted tamp can still cause trouble. It also adds time, so keep the routine simple enough to repeat and decide whether it helps by comparing several shots rather than one lucky pull. If taste and consistency do not improve, the extra step may not be useful for your grinder and coffee.
coffee grounds distribution needle
As an affiliate, we earn on qualifying purchases.
As an affiliate, we earn on qualifying purchases.
Choose WDT or RDT for the Clumping Problem You See
WDT and RDT address different parts of the process. WDT stirs grounds after grinding to distribute them in the basket; RDT adds a very small amount of water to beans before grinding to reduce static. The right first move depends on whether clumps form in the basket or static makes grounds cling and scatter. This distinction helps avoid adding a step that treats the wrong problem: RDT may reduce cling at the grinder, but it does not distribute grounds that have already formed pockets in the basket.
| Method | When you might try it | What it does | Care point |
|---|---|---|---|
| WDT | Clumps remain in the basket | Breaks up and distributes ground coffee before tamping | Stir gently and consistently |
| RDT | Grounds cling to the chute or dosing tools | Uses a minimal droplet on beans to reduce static | Keep water away from the grinder interior and follow its maker’s guidance |
Picture a grinder that sprays dry grounds onto the counter before they even reach the basket. RDT may help with the static-related mess, while WDT may still be useful afterward if the dose forms clumps. They can complement each other, but neither is mandatory for every coffee or grinder. Adding both at once can make it harder to tell which step helped, so begin with the issue you can observe most clearly.
RDT means the Ross Droplet Technique, and the word “droplet” matters: users aim for a tiny amount, not damp beans. Excess moisture can create sticky grounds or leave water where the grinder maker advises against it. Check the grinder’s instructions, keep tools clean and dry, and skip RDT if you are unsure how your grinder handles moisture. That tradeoff is practical: a small reduction in static may be useful, but it is not worth risking moisture exposure against the maker’s guidance.
Try one method at a time so you can tell what changed. If WDT alone improves shot consistency, you may not need another step. If static remains the obvious nuisance, test a minimal RDT carefully and compare the results without changing dose or grind setting. Keep whichever approach improves your workflow or cup enough to justify the added effort.
As an affiliate, we earn on qualifying purchases.
Use a Simple Routine to Get More Repeatable Shots
A reliable routine for clumpy grounds starts with clean equipment, even distribution, and a level tamp. These steps help you control variables that sit between the grinder and extraction, which makes it easier to tell whether clumps are affecting your espresso. Their value is not that they guarantee a perfect shot; they reduce avoidable variation so each adjustment gives you clearer feedback.
- Keep the grinder and dosing tools clean. Old grounds and coffee oils can build up around the exit path; wipe or clean parts according to the grinder maker’s directions. Residue can interfere with the way grounds leave the grinder, so cleaning is a useful baseline before judging a new distribution method.
- Keep tools dry. Damp residue may encourage grounds to stick, so dry a dosing cup before use. This also makes your routine easier to repeat across days with different humidity.
- Distribute before tamping. If clumps are visible, use gentle WDT or another consistent distribution motion. The aim is to reduce dense pockets before compression, not to make the grounds look perfectly uniform.
- Tamp level. A tilted tamp can add another source of unevenness even after you loosen clumps. Keeping tamping consistent helps you avoid confusing one source of variation with another.
- Change one variable at a time. Keep your dose and grind setting steady while comparing shots. Otherwise, improvements or setbacks are difficult to attribute to distribution.
Suppose your usual 18-gram dose tastes fine on Monday but runs fast and tastes thin on Tuesday. If you change the grind setting, dose, and distribution method all at once, you will not know which change helped. Keep the recipe steady, add a distribution step, and compare a few pulls. That small trial tells you more than trying several fixes and relying on memory.
Record the dose, espresso yield, shot time, and a short taste note. You do not need a laboratory notebook; a line in your phone is enough. If the shots become more alike and taste better, the routine is doing useful work, even if a few small clumps still appear. If the numbers become more consistent but the coffee tastes worse, reconsider whether the method suits that coffee rather than treating consistency alone as success.
Clumping is one factor among several, so avoid chasing perfect-looking grounds. Your goal is a repeatable puck and a cup you enjoy. When the routine is stable, later adjustments to grind or dose become easier to understand, because you have fewer preparation changes competing for your attention.
Read Clumps as a Clue, Not a Freshness Test
Clumps do not reliably tell you whether coffee is stale. Static, humidity, fine grind size, grinder design, and bean characteristics can all make grounds stick together, so clumping alone is not a freshness test. This matters because replacing beans based only on appearance can waste good coffee while leaving the actual cause—such as static or uneven distribution—untouched.
That distinction matters when you open a new bag and find little clusters in the dosing cup. It is tempting to assume the coffee has gone bad, especially if the grounds look different from yesterday’s dose. Yet the room may be more humid, the grinder may have built up residue, or the coffee may simply behave differently at that setting. A change in clumping is a reason to notice what else changed, not enough evidence to judge freshness.
Check how the coffee smells and tastes, and store beans in a sealed container in a cool, dry place. Avoid leaving the bag open beside a steaming kettle, where heat and moisture can reach it. If the espresso tastes good and shots repeat well, a few clumps may not call for a change at all. Aroma, flavor, and storage history provide more useful context than the shape of the grounds.
For instance, a fresh bag might produce fluffy grounds in a dry winter kitchen and more cohesive grounds in a humid summer kitchen. The coffee did not necessarily become stale overnight; the conditions around grinding changed. A quick check of the grinder exit, basket, and room humidity can give you more useful clues than the clump itself.
Use taste, aroma, and storage history to assess the coffee, then use distribution to assess puck preparation. Keeping those questions separate prevents you from replacing good beans when a small adjustment to your workflow may solve the real problem. It also keeps a normal variation in grinding from becoming a reason to overcorrect a recipe that is already producing enjoyable shots.
Frequently Asked Questions
Are coffee clumps bad?
Not automatically. Small clumps are common with fine espresso grounds; they matter when they remain in the basket and interfere with even distribution. If your shots taste good and repeat well, appearance alone is not a reason to change your routine.
Do clumps mean my coffee is stale?
No. Static, humidity, grind size, grinder design, and bean characteristics can all affect clumping. Check the coffee’s aroma, flavor, and storage history rather than using clumps as a freshness test.
Does WDT really help espresso?
WDT can break up visible clumps and distribute grounds through the basket, which may make shots more repeatable. It will not correct every problem with grind setting, dose, tamping, or machine setup, so compare results while keeping other variables steady.
What is the difference between WDT and RDT?
WDT stirs ground coffee in the basket before tamping. RDT adds a very small amount of water to beans before grinding to reduce static. One distributes grounds; the other targets static before the grounds leave the grinder.
Can clumps cause channeling?
They can contribute if they leave dense pockets or uneven distribution in the puck, giving water easier paths through other areas. Channeling can also come from grind, dose, tamp, basket, or machine setup, so treat clumps as one clue rather than a complete diagnosis.
Should I wet my beans before grinding?
Some people use a minimal droplet to reduce static, but RDT is optional. Keep moisture away from the grinder interior where possible, use very little, and follow the grinder maker’s guidance. If you are uncertain, try dry distribution with WDT first.
Conclusion
When you see clumps, start by asking whether they stay in the basket and disrupt distribution. Keep your grinder and tools clean, loosen visible knots with gentle WDT, tamp level, and compare shots while holding the recipe steady.
Remember the coffee bed, not the countertop: your best espresso comes from a routine you can repeat and a cup that tastes balanced. A few stubborn nuggets are a clue to inspect, not a reason to throw out the beans.
Halloween Picks
halloween
As an affiliate, we earn on qualifying purchases.