TL;DR

Get coffee and tea gear delivered free with Prime
- Fast, free delivery on millions of items
- Prime Video, Amazon Music and more included
- Member-only deals all year
A small grinder adjustment changes the spaces between coffee particles, which changes how quickly pressurized water flows through the puck and how much flavor it extracts. Go one small step at a time, keep dose and yield steady, and taste each result; shot time can guide you, but it cannot tell you by itself whether a shot tastes good.
Your espresso can go from sharp and lemony to slow and bitter after a grinder move so small you can barely see it. That can feel mysterious until you remember that espresso pushes hot water through a compact puck in a short burst: a tiny change in the spaces between coffee particles can shift the flow and the taste.
This guide explains what a finer or coarser setting does, how to read sour or harsh flavors, and how to make changes without losing track of what worked. You’ll get a simple dialing-in routine you can use at home, plus practical ways to account for changing beans and puck preparation.
Finer grinds usually slow water flow and can increase extraction; coarser grinds usually speed flow and can reduce extraction.
Change one variable at a time, holding dose and target yield steady while you test grind size.
Use sour, thin flavors and harsh, dry flavors as clues, then confirm with taste and repeatability.
Shot time around 25–30 seconds is a common starting point, not a quality score.
Coffee freshness, humidity, puck preparation, and coffee type can all shift the setting that works.
Why a Tiny Grinder Adjustment Can Transform a Shot
A small grind change reshapes the spaces water moves through. Keep dose and yield steady, adjust gradually, and let the cup—not the timer—tell you when the shot is balanced.
Five rules for a better dial-in
Grind size is a powerful control, but it works alongside recipe, beans, and puck preparation.
Finer usually slows water and can raise extraction; coarser usually speeds flow and can lower it.
Hold dose and target yield steady while testing one small grind change.
Sour, thin, harsh, and dry are clues. Taste the whole cup before deciding.
25–30 seconds is a starting point, not a score for shot quality.
Freshness, humidity, coffee type, and puck prep can all shift the setting.
One small click changes the path
Think of the puck as a bed of small stones. Finer particles leave narrower gaps; coarser particles leave wider ones. Under pressure, those gaps shape both flow and flavor.
Narrower paths
Water usually moves more slowly, giving it more contact with coffee. This can bring out sweetness when a shot is fast and sharp, but too much resistance can make it harsh or uneven.
Wider paths
Water usually moves faster, which can ease an overly slow shot. A large jump may leave the cup thin, sour, or underdeveloped.
Dial in with four clear steps
Changing one thing at a time gives you a useful comparison instead of a guessing game.
Keep dose and yield
Weigh the same dose and aim for the same amount in the cup each time.
Record what happened
Write down setting, yield, rough time, and taste. “Sour, fast, thin” is a useful note.
Adjust grind slightly
Try finer for a fast, sharp shot; try coarser for a slow, harsh or dry shot.
Keep the better cup
Repeat the recipe and compare. Balanced taste matters more than hitting a time target.
Flavor and flow give clues
Use taste alongside shot behavior. Time measures flow duration; it cannot measure enjoyment or balance on its own.
| What you notice | Possible clue | Small next move | Check again |
|---|---|---|---|
| Fast, sour, thin | May be under-extracted | Try a little finer | Same dose and yield; taste |
| Very slow, harsh, dry | May be over-extracted | Try a little coarser | Same recipe; compare finish |
| Sour and bitter together | Possible uneven flow | Inspect puck distribution | Even grounds; level tamp |
| Outside 25–30 seconds | Timing is a diagnostic | Let taste guide you | Recipes and grinders differ |
Fix uneven flow before chasing finer
Channeling happens when water finds easier paths through an uneven or damaged puck. More resistance cannot repair weak spots created during preparation.
Water takes the shortcut
A mound of grounds, clumps, tilted tamp, or damaged puck can create fast paths. The shot may taste sharp and bitter at once, even when the grind setting has not changed.
Resistance stays more even
Dose consistently, distribute grounds evenly, and tamp level. A simple routine you can repeat makes grinder adjustments easier to judge.
Why yesterday’s setting may change
The grinder is a strong lever, but the shot responds to several parts of the routine.
Freshness and coffee type can change how the puck flows.
Weather and storage conditions may shift dialing in.
Different amounts change the recipe and resistance.
Distribution and tamp consistency affect water paths.
Water, pressure, and temperature also shape extraction.
When you switch coffees: note the grinder setting and dial in again. Beans rarely share one perfect setting; coffee often needs a finer grind as it ages, while humidity and storage can also matter.
Turn a click into a useful answer
Small, repeatable comparisons show whether the change improved the cup and help you find your way back.
Why one small click can change the whole shot
A tiny grinder adjustment can change espresso because it alters the gaps between coffee particles, changing how much resistance the puck offers to pressurized water. Go finer and water usually moves more slowly; go coarser and it usually moves faster. Since espresso extracts over a short time, even a modest shift can change how the cup balances acidity, sweetness, and bitterness.
Think of the puck as a bed of small stones with water moving through the gaps. Smaller particles leave narrower paths, like a gravel path after someone has poured in sand. On Monday, your 18-gram dose might run quickly and taste tart; one small finer step on Tuesday can slow the flow enough to bring out more sweetness.
That change can feel dramatic because espresso concentrates a lot of flavor in a small drink. A few grinder clicks—or a modest turn on a stepless collar—can shift shot time and taste, even when your basket, dose, and machine stay the same. The exact effect depends on the grinder and coffee, so one click does not represent the same change on every setup.
Finer does not automatically mean better. A very fine setting can create too much resistance or worsen uneven flow if you prepare the puck inconsistently. Your goal is a balanced, repeatable shot, not the finest grind your grinder can produce.
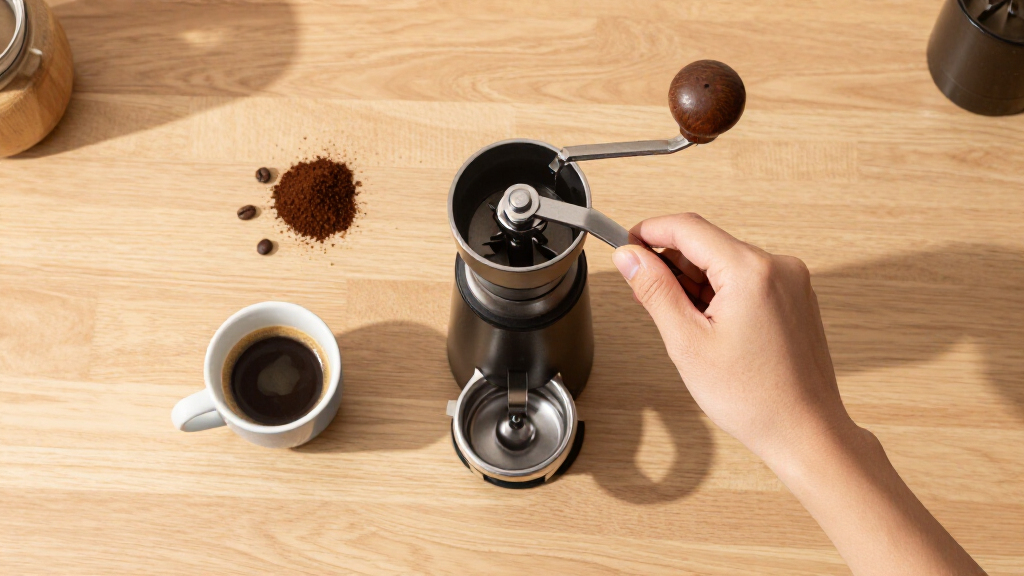
espresso grinder with micro-adjustment
As an affiliate, we earn on qualifying purchases.
As an affiliate, we earn on qualifying purchases.
Use sourness and bitterness to choose your next step
A small grinder adjustment is a useful first move when your espresso tastes clearly under- or over-extracted. A shot that tastes sour, thin, or hollow may have extracted too little; one that tastes bitter, harsh, or dry may have extracted too much. These are clues, not a diagnosis by themselves, because recipe and puck preparation also affect flavor.
Suppose you pull a shot with your usual dose and target yield, but it gushes into the cup and tastes like sharp citrus without much sweetness. Try a small move finer, then keep the other variables steady and taste again. If the next shot crawls and leaves a dry, lingering bitterness, move slightly coarser instead of making a large jump.
Shot time gives you another clue. Roughly 25–30 seconds is a common starting range, but recipes differ, and a shot outside that window can still taste good. A timer measures how long water flows; it does not measure balance or enjoyment. Let taste decide whether the adjustment helped.
The flavor clues can overlap. Some coffees naturally show bright acidity, and bitterness can come from roast character or other recipe choices. Compare the cup with your usual recipe and note how the flavor changes as the flow changes. For example, if a faster shot is both sour and weak while a slightly slower one tastes sweeter and fuller, you have a useful direction to follow.
As an affiliate, we earn on qualifying purchases.
Dial in a shot with four repeatable steps
To dial in espresso, keep the dose and target yield steady, change grind size in small steps, and taste each shot before changing another variable. This gives you a clear comparison: if the cup changes, you can connect that result to the grinder adjustment instead of guessing whether your dose, yield, or preparation also shifted.
- Choose a repeatable recipe. Weigh the same dose each time and use the same target yield. For example, use 18 grams of coffee and aim for 36 grams in the cup.
- Pull a shot and take notes. Record the grinder setting, yield, approximate time, and taste. “Sour, fast, thin” gives you more to work with than “bad.”
- Make one small grind change. If the shot runs quickly and tastes thin or sharply sour, try finer. If it runs very slowly and tastes harsh or dry, try coarser.
- Repeat the recipe and taste again. Compare the new cup with the previous one. Keep the move if the shot tastes more balanced, even if its time does not match a familiar benchmark.
Imagine your first shot reaches 36 grams in 19 seconds and tastes sharp. You adjust one step finer, pull the same dose to the same yield, and the next shot takes longer with more sweetness. That comparison tells you more than changing the grind, dose, and yield all at once.
If a grinder has a wide gap between settings, or your shot is extremely fast or nearly stalled, a larger correction may make sense to get back into a workable range. After that, use smaller changes. Write down settings when you switch beans, since coffees rarely share one perfect grind setting.
As an affiliate, we earn on qualifying purchases.
Fix uneven flow before chasing a finer setting
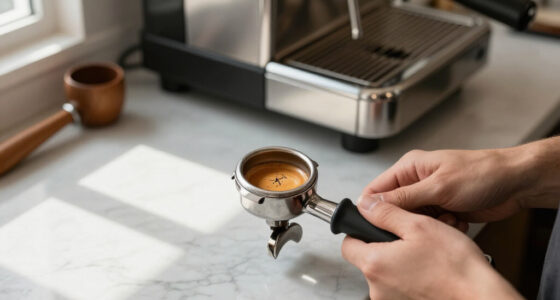
A grinder adjustment cannot fully fix channeling, which happens when water finds easier paths through an uneven or damaged puck. Finer coffee can increase resistance, but an uneven puck can still let water rush through a few weak spots. You may see spurting from the portafilter or taste a shot that is both sharp and bitter.
Picture two shots with the same coffee and grinder setting. In the first, the grounds sit in a mound on one side of the basket; in the second, you distribute them evenly and tamp level. The second shot may flow more consistently because water meets more even resistance across the puck. A grinder change helps most when your preparation is repeatable.
Build a simple routine: dose consistently, break up clumps or distribute the grounds evenly, and tamp level with a steady hand. You do not need a complicated ceremony. The practical test is whether you can prepare the next puck in much the same way as the last one.
If one shot tastes sour and bitter at once, resist the urge to keep cranking finer. First look for uneven distribution, a tilted tamp, or a damaged puck. A modest adjustment can help tune flow, but it cannot repair gaps and weak spots created during preparation.
As an affiliate, we earn on qualifying purchases.
Know when dose, yield, or beans are changing the result
Grind size has a strong effect on flow, but dose, yield, coffee freshness, water, puck preparation, and machine pressure can also change the shot. A grinder setting that worked yesterday may stop working when the beans age or the weather turns humid. Before blaming the grinder, check whether the rest of your routine stayed the same.
For a basic dialing-in routine, start by holding dose and target yield steady while you adjust grind. Once the shot flows consistently, you can change yield if the flavor still needs work. For example, if a balanced shot tastes a little too intense, increasing the yield may change its concentration and flavor balance; make that a separate experiment after you’ve established a repeatable grind.
Beans also move with time. Coffee often needs a finer setting as it ages after roasting, though humidity and storage conditions can affect what you see. You might find that the same setting gives you a slower shot this morning than it did when the bag was fresh; note the change and taste before adjusting further.
Different coffees need different settings, too. Roast level, density, age, and solubility all affect how a coffee behaves. A lighter roast may call for a different balance of grind, yield, temperature, and extraction than a darker roast. Treat each new bag as a fresh starting point, then use small, recorded changes to find a shot you enjoy.
Use shot time as a clue, not a score
Shot time helps you spot a change in flow, but it cannot tell you on its own whether espresso tastes good. A common starting point is around 25–30 seconds, yet coffee, dose, yield, basket, and recipe all affect the useful range. Let the timer describe what happened, then let taste guide what you do next.
Here’s a real kitchen-style comparison: one shot runs for 23 seconds and tastes sweet, round, and clean; another reaches 29 seconds but tastes dry and harsh. If you only chase the longer time, you may keep grinding finer and make the second cup worse. The first shot is the better result for that person, even though it falls outside a conventional target.
Write down a few details rather than treating time as a grade: grinder setting, dose, yield, approximate time, and a short flavor note. If your notes show that finer settings repeatedly slow the shot and soften sharp acidity, you’ve learned how your setup responds. If the taste gets worse despite a more familiar time, you’ve learned that the number is not the goal.
Some coffees suit a different recipe or extraction style, and home machines do not all behave alike. Use a familiar timing range to find a starting point, then trust repeatable taste tests. A good shot is one you can reproduce and enjoy.
Frequently Asked Questions
How much should I adjust my espresso grinder?
Start with one small step, since the right step size depends on your grinder. If the shot runs quickly and tastes sour or thin, try finer; if it runs slowly and tastes harsh or dry, try coarser. Keep dose and yield steady so you can judge the change.
What shot time should I aim for?
About 25–30 seconds is a common starting point, but recipes vary. Use time to understand the flow, then decide by taste and whether you can repeat the result. A shot outside that range can still be enjoyable.
Should I change grind size or dose first?
For a basic dialing-in routine, keep your dose fixed and adjust grind size first. Once the shot flows consistently, adjust yield or another recipe variable if the flavor still needs work. Changing one thing at a time makes each result easier to interpret.
Why did my espresso change when I didn’t touch the grinder?
Beans age, humidity shifts, and small differences in dosing or puck preparation can change resistance and flow. Check whether you distributed and tamped the grounds consistently, and note how long the coffee has been open. The same setting can behave differently as conditions change.
Does finer grinding always mean more extraction?
Finer grinding often slows flow and can increase extraction, but it does not guarantee a better or more even shot. Excessive resistance or uneven puck preparation can lead to channeling and harsh flavors. Aim for a balanced cup rather than the finest possible setting.
Can a grinder adjustment fix channeling?
It can change flow, but it cannot fix inconsistent distribution or a damaged puck by itself. Make puck preparation repeatable, then use small grind changes to tune the shot. Spurting or a cup that tastes both sour and bitter can be a reason to check preparation first.
Conclusion
When a shot tastes off, make one small grinder adjustment, keep your recipe steady, and taste the result. A few seconds on the timer can point you toward a flow problem, but the flavor in the cup tells you whether you found a better setting.
Write down the setting that gives you a balanced shot. Tomorrow, your beans may ask for a nudge; you’ll have a clear starting point instead of a guess.
Fall Picks
fall essentials
As an affiliate, we earn on qualifying purchases.