TL;DR

Get coffee and tea gear delivered free — and shop member deals
- Fast, free delivery on millions of items
- Access to Prime Big Deal Days deals on October 6–7
- Prime Video, Amazon Music and more included
During espresso pre-infusion, water enters the dry coffee bed, pushes air out, wets and swells particles, and begins dissolving coffee compounds. As the puck saturates, its resistance to flow changes and pressure builds; gradual wetting can help some setups, but it cannot reliably correct poor puck preparation, and a longer pre-infusion is not automatically better.
The first drops of espresso can arrive before your puck has finished changing. As water reaches the coffee, it pushes air out of the tiny spaces between grounds, sets fresh coffee bubbling, and begins carrying soluble compounds into the cup. Meanwhile, the bed absorbs water and changes how strongly it resists flow.
That’s what happens inside the puck during pre-infusion: several changes overlap before the shot settles into its main flow. Knowing what those changes mean can help you understand why a machine’s low-pressure start sometimes produces a sweeter, more even shot—and why the same setting may do little for another coffee. You’ll learn what to watch for, how to test a setting, and which puck-preparation problems pre-infusion cannot fix.
Pre-infusion is part of brewing: extraction begins as soon as water touches the coffee.
Wetting, gas release, swelling, pressure buildup, and extraction overlap inside the puck.
Visible bubbles can indicate gas escaping, especially with fresh coffee, but they do not show whether the whole bed is evenly wet.
Pre-infusion may help a particular setup, but it cannot reliably fix clumps, cracks, poor distribution, or an inconsistent tamp.
Compare settings by changing one variable at a time, recording when your timer starts, and tasting repeatable shots.
Espresso mechanics · Inside the basket
What Happens Inside the Puck During Pre-Infusion
Water enters the dry coffee bed, displaces air, wets and swells particles, and starts dissolving coffee compounds. As the puck saturates, its resistance changes and pressure builds. These overlapping changes shape the opening of the shot.
01 / The sequence
One opening. Several changes.
A puck is the compacted bed of ground coffee in the portafilter. Pre-infusion is the early part of brewing, often delivered at lower pressure or in short pulses. The machine, basket, coffee, and preparation all shape what happens.
Water arrives
The shower screen feeds water onto the bed; distribution depends on the machine and puck.
Air moves out
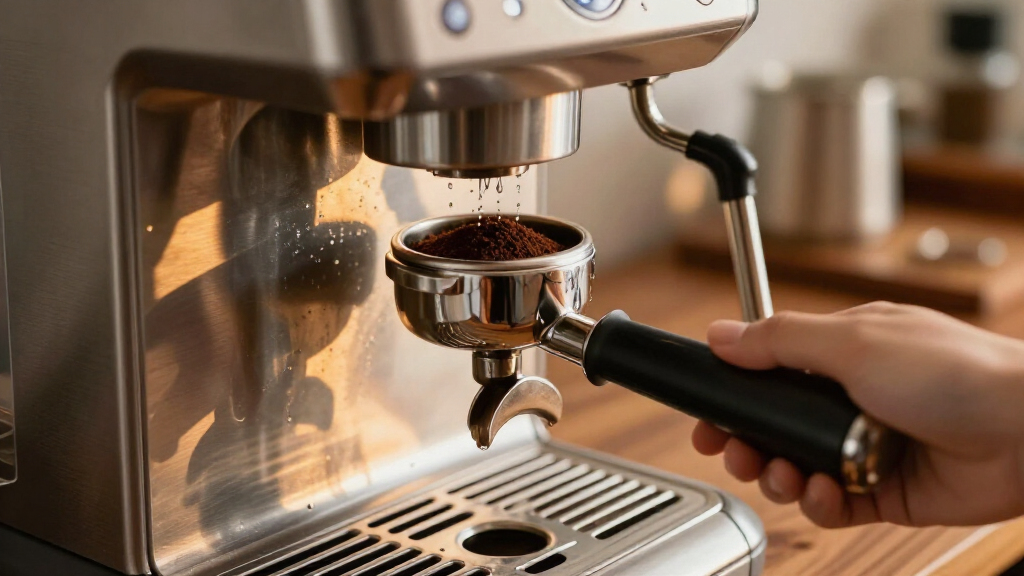
Water enters the gaps between grounds, displacing air as fresh coffee may release carbon dioxide.
Grounds swell
Particles absorb water; the bed can settle, expand, or shift inside the basket.
Resistance changes
As saturation evolves, the pathways and resistance to flow change too.
Pressure builds
Incoming water presses against the puck before main brewing pressure arrives.
Extraction begins
Water dissolves and carries coffee compounds from the moment it touches the grounds.
02 / Inside the bed
The puck is changing while water flows.
Wetting, gas release, swelling, pressure buildup, and extraction overlap; they do not happen in neat, separate stages. The sketch shows that overlap, not a fixed timeline or measured scale.
03 / Read the clues
What you can—and cannot—see.
The puck is constrained by the metal basket, but it is not a rigid block. Water can favor easier paths, so surface clues offer context rather than a view of the whole bed.
01 · Gas
A visible bloom
Fresh coffee may fizz as carbon dioxide escapes. Degassing is gradual and does not finish in one tidy pre-infusion stage.
02 · Flow
Uneven resistance
A clump or loose patch can create different flow paths. A slow start cannot guarantee that every region catches up.
03 · Swelling
A bed in motion
Particles take up water while the bed settles or shifts. The basket limits movement, but the internal structure still changes.
04 / Benefits and limits
Pre-infusion can help. It cannot fix everything.
A gentle start may give water more time to enter the bed and can support a more even extraction in some setups. The result depends on the coffee, machine, basket, delivery profile, and puck preparation.
A longer pre-infusion is not automatically better. It can change the opening conditions and shot timing, but no single duration or pressure setting suits every coffee and machine.
| May influence | Cannot reliably correct | Useful cue |
|---|---|---|
| How quickly the puck saturates | Clumps or poor distribution | Repeatable preparation |
| How pressure develops | Cracks or an inconsistent tamp | Flow and taste together |
| Shot timing and flavor | Every uneven flow path | Bubbles are not proof of even wetting |
05 / A fair comparison
Test a setting without guessing.
Change one variable at a time and compare repeated shots while keeping the rest of your recipe steady. Make your timing convention explicit: pump activation and first drip produce different shot-time numbers.
Keep dose, grind, basket, and puck preparation consistent.
Adjust only the pre-infusion setting between comparisons.
Note whether the timer starts at pump activation or first drip.
Compare several shots; judge flavor and repeatability, not delay alone.
06 / Trace the brew
From dry bed to flowing espresso.
Follow the connected changes inside the puck: water entry alters the bed, and the evolving bed shapes the flow that reaches the cup.
What Pre-Infusion Changes Before the Main Shot
Pre-infusion is the early part of espresso brewing, when water first reaches the puck, often at lower pressure or in short pulses before full brewing pressure arrives. During that time the dry coffee bed becomes wet and pressurized, and its resistance to water flow changes. On one machine it may last only a brief moment; another may pause or deliver several gentle pulses.
The word can sound like a separate warm-up before extraction, but extraction begins at first contact. Water starts dissolving coffee compounds immediately, even while it is still spreading through the bed. This matters because the opening of the shot contributes to the cup rather than merely setting up the “real” extraction. If your timer starts with pump activation, pre-infusion counts toward the shot time; if you start at the first drip, it doesn’t. That difference can make two otherwise similar recipes look mismatched, even when the brewing profiles are alike.
Imagine two shots from the same basket and dose. One machine sends water in a short low-pressure start, while the other reaches its main pressure more directly. The first shot may take longer to show a drip because water is still entering and saturating the puck. That delay alone cannot tell you whether the shot will taste better: it may reflect a gentler opening, or simply how that machine delivers water. The puck, coffee, water delivery, and timing convention all matter when interpreting the result.
There’s no single duration or pressure setting that works for every coffee and machine. A profile that gives one setup a smoother start can leave another tasting less balanced, because changing the opening also changes the time and conditions under which water first moves through the bed. Think of pre-infusion as a change to the opening of the brew, with benefits and tradeoffs you judge in the finished cup—not by duration alone.
As an affiliate, we earn on qualifying purchases.
How Water First Reaches and Wets the Coffee Bed
Water first reaches the puck through the machine’s shower screen, then spreads across the bed of ground coffee. How evenly it spreads depends on the shower screen, basket, puck preparation, and water-delivery design. These parts shape where water enters and how easily it can move, so a gentle start cannot be expected to behave identically across different machines and baskets. It can give water time to move into the bed, but the screen does not make every puck distribute water in the same way.
When water first touches the dry grounds, it begins replacing air in the spaces between particles. Freshly roasted coffee may release noticeable carbon dioxide, so you might see bubbles gathering on the puck surface or escaping around the edges. That bubbling is a visible sign of gas leaving, not proof that every part of the puck has become wet. Some regions can release bubbles while others remain less saturated, which is why the surface alone is an incomplete picture of what is happening inside.
Water also starts moving through pores between the grounds. If it meets an area with less resistance, more flow can pass there than through a tighter patch. For example, a clump left near one side of a basket may stay poorly wetted while a looser area gets more water. This unevenness matters because water then spends more time moving through the easier path, so a gradual start may not give the resistant area enough flow to catch up. A slow opening may help water spread in some setups, but it cannot guarantee uniform wetting or erase the clump.
Think of pouring water into a dry sponge with a loose corner: the first areas to catch water change as the material absorbs it. A coffee puck is more constrained by its metal basket, but it is still a changing bed rather than a perfectly even block. A visible bloom gives you a clue about gas release; it does not let you see the entire flow path. Use that clue to inform what you observe, then rely on consistent preparation and repeated shots to judge whether the water is moving more evenly.
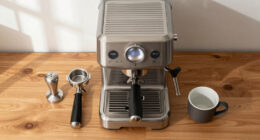
coffee tamping and distribution tools
As an affiliate, we earn on qualifying purchases.
As an affiliate, we earn on qualifying purchases.
Why the Puck Swells as Gas Escapes
As the coffee absorbs water, its particles swell and the bed can settle, expand, or shift slightly. The basket limits how far the puck can move, but the grounds do not remain frozen in place. At the same time, water displaces air from gaps between particles and carbon dioxide may escape from the coffee, especially when the roast is fresh. These changes matter because they alter the spaces water can travel through while brewing is already underway.
These changes overlap. Swelling can narrow some gaps while settling changes others; released gas can affect how water passes through the bed. The balance varies with the coffee and the way water arrives, so a puck is not simply “letting all the gas out” during pre-infusion. Degassing continues over time and does not finish in one neat stage. That is one reason visible bubbling cannot be treated as a countdown to a fully prepared puck: the internal structure and flow are changing at the same time.
For instance, a very fresh coffee may show a fizz of small bubbles as the opening water reaches it. A coffee that has rested longer may show less visible bubbling. That difference can be useful context when you compare shots, because freshness may affect how the puck behaves as it wets. But it does not tell you on its own which pre-infusion length to choose. You still need to taste the coffee and repeat the result, since more bubbling does not automatically mean that more pre-infusion will improve the cup.
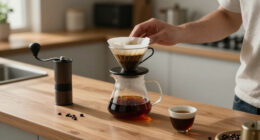
Pre-infusion in espresso also isn’t identical to blooming in pour-over coffee. Both involve wetting grounds and releasing gas, but the brewer, pressure, and flow conditions differ. A pour-over bloom can be a separate pause in a manual recipe; espresso pre-infusion takes place within a pressurized brewing process, and extraction is already underway. The distinction matters when borrowing advice between methods: a pause that makes sense in an open pour-over bed does not translate directly to a puck confined in a basket under pressure.
espresso shot timer with pre-infusion settings
As an affiliate, we earn on qualifying purchases.
As an affiliate, we earn on qualifying purchases.
How Pressure Builds as the Puck’s Resistance Changes
Pressure builds as the machine supplies water against the puck’s resistance, and that resistance changes as the coffee wets. During a low-pressure start or a series of pulses, water can enter before the machine reaches its main brewing pressure. The puck is not a fixed filter: its saturation and internal flow paths evolve as the shot begins. This means a pressure setting describes only part of the brewing conditions; the changing bed also determines how the incoming water moves.
A machine’s displayed pressure also needs context. The number may describe pressure at the pump or another measurement point, rather than the pressure every part of the coffee bed experiences. Two machines showing a similar number may not deliver water to the puck in exactly the same way, so comparing their displays as if they were identical can lead to the wrong conclusion about the puck. Use the display to repeat your own recipe and note the machine’s behavior, rather than assume it describes every local condition.
Consider a shot where the machine pauses briefly after wetting the bed. That pause changes the time available before the main flow, and the first drop may arrive later. If you count time from pump activation, your reported shot length includes the pause; if you count from first drip, it doesn’t. State your timing convention when comparing recipes, or the same shot can appear to have two different durations. The convention also affects how you interpret a change: a longer pump-to-finish time may simply include a longer pause rather than indicate a slower main extraction.
Pressure is only part of the story. Dose, grind, basket, coffee freshness, and water delivery all help shape flow and resistance. A low-pressure start may suit a particular combination, while a longer pause in that same setup could make the result less pleasing. More time before full pressure is a tradeoff: it changes how the puck is wetted, but it also changes the brewing profile and the time before the main flow. There is no universal pressure target that makes every puck behave alike.
As an affiliate, we earn on qualifying purchases.
How Pre-Infusion Affects Extraction and Flavor
Pre-infusion affects the early flow through the puck, but it does not guarantee a better-tasting espresso. Extraction starts when the water contacts the grounds, then continues as water dissolves and carries away compounds while moving through the bed. Because wetting and flow are still developing, the compounds that reach the cup depend on the coffee and the full brewing profile. A change to pre-infusion can therefore change the way the shot begins without producing a predictable flavor change for every coffee.
That is why taste matters more than the timer alone. A gradual start may help a particular setup produce a more even result, while an overly long or unsuitable profile may leave you less happy with the cup. If a shot tastes harsh, thin, or simply different from your usual one, change one brewing variable at a time so you can tell whether pre-infusion made the difference. The point is to learn how your setup responds, not to treat a longer time as a direct route to more sweetness or balance.
For a practical comparison, pull one shot using your usual setting and another with a small pre-infusion change. Keep dose, grind, basket, and the rest of the recipe steady. Taste both after they cool enough to sip comfortably; note the flavor and texture in plain words, such as “sweeter and rounder” or “more bitter at the finish.” Keeping the rest of the recipe fixed makes those notes more useful: if the difference repeats, you have a better reason to connect it to the profile you changed.
Repeat the comparison before settling on a change. A single cup can be affected by distribution, an inconsistent tamp, or a small difference in preparation. If the result changes consistently and you prefer it, the setting works better for your setup. The useful target is a repeatable cup you enjoy, not the longest possible pre-infusion. A setting that is easier to reproduce may also be more useful in daily brewing than a profile that gives a good result only when preparation is unusually precise.
What Pre-Infusion Can—and Cannot—Do About Channeling
Pre-infusion may help water wet the puck more gradually, but it cannot reliably repair poor distribution, clumps, cracks, or an incorrectly prepared puck. If some parts of the bed offer less resistance than others, more water may follow those paths. Uneven flow matters because it concentrates water through easier routes rather than correcting the underlying difference in resistance. A gentle start changes how the shot begins; it does not automatically make the coffee bed evenly prepared.
Suppose you notice coffee flowing heavily from one side of the basket. If you keep your preparation the same and simply add a longer pause, the unevenness may remain. Check the steps you can control: distribute the grounds evenly, break up clumps, level the bed, and tamp consistently. Then keep those steps steady while you experiment with the machine’s pre-infusion option. This order helps because you establish a more consistent starting point before asking whether a pressure profile changes the result.
That order matters for diagnosis. If you change distribution and pressure profile at the same time, you won’t know which change helped. If the flow becomes more even after you correct a clump, you have a clearer reason for the improvement than if several variables moved at once. You can then judge whether a pre-infusion adjustment adds anything for that coffee and basket. Separating the changes also prevents you from relying on a longer pre-infusion to mask a preparation issue that may return with another dose or coffee.
Also, don’t treat one visual sign as a verdict. Bubbles can reflect gas escaping; a delayed first drip can reflect timing and flow; neither alone proves channeling or even extraction. These signs are useful prompts to investigate, but they have more than one possible cause. Use what you see as a prompt to check preparation, then use repeatable shots and taste to guide your next adjustment.
How to Test a Pre-Infusion Setting Without Guessing
To test pre-infusion, change one setting at a time and compare repeated shots while holding the rest of your recipe steady. Start with the machine’s recommended setting, record how you time the shot, and make a small adjustment only if you have a reason to try it. This keeps a tasting comparison useful instead of turning each cup into a new experiment with several unknowns. It also makes it easier to reverse the change if the result is less consistent or less enjoyable.
- Choose a baseline: use your usual dose, grind, basket, and machine profile, then note the coffee and how recently it was roasted.
- Write down timing: say whether your timer starts at pump activation or at first drip. Include any pause in your record if you count from activation.
- Adjust one thing: make a modest pre-infusion change the machine supports, such as a shorter or longer start. Don’t also alter the grind or dose.
- Repeat and taste: compare more than one shot if possible, and describe sweetness, bitterness, texture, and how consistent the flow looks.
For example, if your machine allows a short pause, compare that profile with your baseline using the same coffee and preparation. If the cups taste much the same, you may prefer the simpler routine; the extra pause has not shown a clear benefit for your setup. If one profile repeatedly tastes more balanced to you, keep notes so you can reproduce it. Repeating the comparison helps distinguish a profile effect from the normal variation between shots.
Modern machines increasingly offer adjustable pressure or flow profiles, including low-pressure starts and pauses. Those controls make experimentation easier, but they don’t create a universal best setting. A machine with little or no user adjustment may provide a built-in pre-infusion—or none at all—and you can still focus on consistent preparation and taste. The useful outcome is a setting you can repeat and enjoy, whether it comes from a detailed profile or a simpler machine routine.
Frequently Asked Questions
Does pre-infusion improve espresso?
It can help in some setups by changing how the puck wets and how pressure builds. Whether it improves your espresso depends on the coffee, machine, preparation, and profile, so compare repeatable shots by taste.
How long should pre-infusion last?
There is no universal duration for every machine and coffee. Start with your machine’s recommended setting, then change one variable at a time and keep the setting only if repeated shots taste better to you.
Why does the puck bubble during pre-infusion?
Bubbles can form as gas, including carbon dioxide from coffee, escapes when water reaches the grounds. The amount can vary with freshness, roast, and brewing conditions; bubbling alone does not show that the bed is fully wet.
Can pre-infusion prevent channeling?
A gradual start may encourage water to wet the bed more evenly in some setups, but it cannot reliably fix poor distribution, clumps, cracks, or an inconsistent tamp. Prepare the puck carefully, then test whether a profile change helps.
Does pre-infusion count toward espresso shot time?
It depends on when you start your timer. If you start at pump activation, pre-infusion is included; if you start at the first drip, it is excluded. State your timing convention when comparing shot times.
Is espresso pre-infusion the same as pour-over blooming?
They share the early wetting of grounds and can both involve gas release, but they happen in different brewing setups. Espresso pre-infusion takes place within a pressurized brew, and extraction begins at first contact.
Conclusion
Remember the puck as a changing bed: water enters, air and some gas escape, grounds absorb water, pressure builds, and extraction starts right away. Pre-infusion can shape that opening, but no single length makes every shot better.
Keep your preparation steady, change one setting at a time, and let repeatable taste guide you. The next time your espresso blooms with tiny bubbles, you’ll know the shot has already begun its work.
Evergreen bestsellers Picks
bestsellers
As an affiliate, we earn on qualifying purchases.