TL;DR

Get coffee and tea gear delivered free with Prime
- Fast, free delivery on millions of items
- Prime Video, Amazon Music and more included
- Member-only deals all year
Pressure profiling means varying the pump pressure during an espresso shot instead of holding a flat 9 bars — typically starting with low-pressure pre-infusion (2–4 bars) and often tapering pressure down toward the end. This reduces channeling, pulls sweeter shots, and makes lighter roasts easier to extract. Measurable differences exist, but grinder quality, fresh beans, and consistent puck prep matter more than any profile [1].
Your espresso machine has probably been lying to you. That little gauge pointing at 9 bars isn’t a law of physics — it’s a habit inherited from lever machines designed in the 1940s and ’50s, starting with Gaggia. Nobody ran taste tests to prove 9 bars makes the best shot. It just stuck [1].
Pressure profiling is what happens when you stop treating that number as sacred. Instead of a flat 9 bars for the entire shot, you start low, ramp up, and maybe back off at the end — shaping the extraction the way a chef controls heat under a pan.
In the next few minutes you’ll learn what pressure actually does to the coffee puck, which profiles produce which flavors, and whether you need a $3,000 machine to try any of this. (Spoiler: you might not.)
Pressure profiling means varying pump pressure across the shot — low pre-infusion (2–4 bars), ramp to ~9, then often a decline to 4–6 bars — instead of holding…
The 9-bar standard is historical accident from 1940s–50s lever machines and Gaggia’s design, not a proven optimum — so deviating from it isn’t heresy [1].
Low-pressure pre-infusion reduces channeling by letting CO₂ escape and wetting the puck evenly; declining tail pressure reduces harsh, astringent over-extracti…
Grinder quality, fresh beans, and consistent puck prep improve your espresso more than any pressure profile — upgrade those first.
Cheapest ways in: a used lever machine for natural declining profiles, the Lelit Bianca’s paddle for manual control, or the Decent DE1 for full pressure-and-fl…
What Pressure Profiling Actually Is (In Plain English)
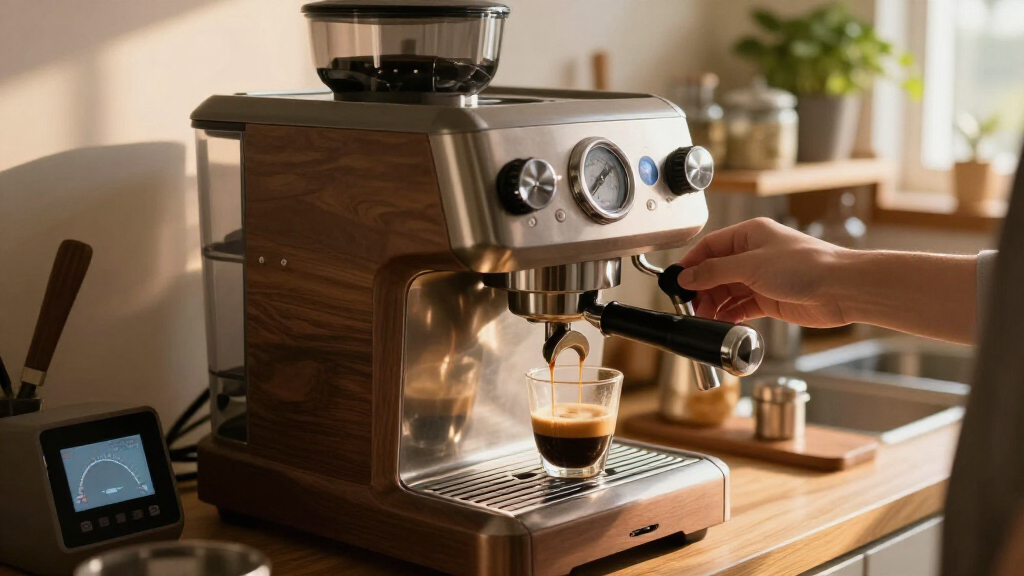
Pressure profiling is the practice of varying the pump pressure applied during an espresso shot rather than holding it at a constant 9 bars. Think of it like the gas pedal in your car: a traditional machine drives flat-out the whole way, while a profiling machine accelerates, cruises, and eases off — all on a schedule you control.
A typical profile looks like this: pre-infusion at a gentle 2–4 bars for a few seconds to wet the puck, a ramp up to 9 bars for the main extraction, and sometimes a decline to 4–6 bars at the end. Each phase changes what ends up in your cup.
Here’s the key insight: pressure and flow are connected through the coffee puck itself. As the puck erodes and soluble material washes out, its resistance drops — so even on a standard machine, pressure behavior changes during the shot. Profiling just puts you in charge of that relationship instead of leaving it to chance.
Why does that matter? Because pressure is what drives water through the bed of grounds, and how violently that water moves determines which compounds dissolve and how fast. High pressure pushes water through quickly and aggressively, favoring the fast-dissolving compounds — acids, sugars, and, if you overdo it, the bitter and astringent ones too. Lower pressure slows the whole process down, giving extraction time to even out across the puck. So a profile isn’t just a curve on a screen; it’s a timeline of extraction intensity. When you shape that timeline, you’re deciding which flavors arrive early and which get left behind at the end.
That also explains the central tradeoff of profiling: control versus repeatability. A flat 9-bar shot is the same every time because the machine does one thing. The moment you start shaping curves, you introduce another variable you can get wrong — a profile that’s too aggressive early can mimic channeling, and an overly long soak can make a dark roast taste flat and papery. Profiling rewards attention; it punishes sloppy routine.
The four most common profiles you’ll see baristas use, and what each is actually for [1]:
- Flat 9-bar — the classic. Predictable and forgiving, which is why busy cafés default to it. The tradeoff is a ceiling: you get consistency, not customization.
- Long pre-infusion → ramp to 9 → decline — the all-rounder. Even saturation up front, full extraction in the middle, a gentle finish. Best when you serve many different roasts from one machine.
- Declining profile — spike high early, taper to 4–6 bars. Extracts the bright, sweet compounds fast, then backs off before harshness sets in. Sweetness-focused, ideal for medium roasts.
- Lever simulation — a big pressure spike, then a natural fall. Mimics old manual machines. Produces heavy body with a soft tail, at the cost of being harder to repeat shot to shot.
Why Pre-Infusion Low Pressure Saves Your Shot
Pre-infusion at low pressure — around 2–4 bars — wets the coffee puck evenly before full pressure hits, and that alone fixes one of espresso’s most common flaws: channeling. Channeling is what happens when water finds a few preferential paths through the puck, over-extracting some grounds while barely touching others. The result is a shot that’s simultaneously bitter and sour — bitter from the over-washed channels, sour from the pockets that were never properly extracted. It’s the most frustrating failure mode in espresso precisely because the two flaws mask each other, making it hard to diagnose by taste alone.
Here’s the mechanism. Fresh coffee is full of trapped CO₂, and when 9 bars slams into a dry puck all at once, that gas fights back. Water can’t pass evenly through grounds that are still degassing, so it punches holes instead. A slow, low-pressure soak gives the gas time to escape and lets the puck swell and settle — like letting a sponge fully absorb water before you squeeze it. The implication is worth sitting with: the first few seconds of a shot determine the geometry of everything that follows. Once channels form, they persist for the rest of the extraction, because water always follows the path of least resistance. Pre-infusion is your one chance to make sure that path is everywhere at once.
Picture pulling two shots of the same light-roast Ethiopian. One goes straight to 9 bars and spritzes unevenly, blonde early, tasting thin and sharp. The other gets a 10-second soak at 3 bars first — the espresso drips in slow, dark honey-colored threads, and the cup tastes like blueberry jam instead of lemon cleaner. Same beans, same grinder, same dose. The only difference is that the second puck was fully saturated before full pressure arrived, so the water had no weak spots to exploit.
There are tradeoffs, though. Pre-infusion adds time to every shot, and it’s not equally valuable for every coffee. Dark roasts are more porous and degas faster, so they need very little soaking — a long pre-infusion on a dark roast can push the shot toward flat, woody flavors. And pre-infusion is not a substitute for good puck prep: if your distribution is a mess, a gentle soak reduces channeling but doesn’t eliminate it. It’s insurance, not a cure.
You don’t need a profiling machine for this, either. Many machines have a built-in pre-infusion mode, and some let you do it manually just by pulsing the pump button or half-engaging a lever. Even a 5-second pause before full pressure makes a visible difference in flow evenness [1].
The Declining Profile Trick That Makes Shots Sweeter
Declining pressure at the end of a shot reduces over-extraction of harsh, astringent compounds, which is why many baristas taper from 9 bars down to 4–6 for the final third of the shot. The result is a sweeter, rounder cup — less of that drying, chalky grip on your tongue [1].
Think about it like steeping tea. The first 30 seconds of steeping pulls the pleasant stuff; the last 30 seconds mostly pulls tannins. Espresso works the same way. Late in the shot, most of the good flavors are already in the cup, and high pressure just keeps forcing out the compounds you’d rather leave behind. Backing off the pressure is like pulling the tea bag out on time.
This matters most for lighter roasts. Dense, lightly roasted coffee extracts less easily, so traditional wisdom says crank everything up — but that over-extracts the tail of the shot. A long, gentle pre-infusion plus a declining tail lets you hit high overall extraction without the harshness. That’s why you’ll see specialty shops pulling light roasts on Slayer and Synesso machines with needle-valve pre-infusion all day [1].
Try this comparison at home if your machine allows any pressure control: pull the same dose one way flat at 9 bars, then again with pressure tapering once the shot turns blonde. Most people describe the second cup as smoother and noticeably sweeter — even people who swear they can’t taste differences in coffee.
Pressure vs. Flow Profiling: The Difference That Trips Everyone Up
Pressure profiling controls the force pushing water through the puck, while flow profiling controls how much water passes per second — and since the puck sits between them, the two are interdependent. Change one and you change the other. According to Espressoguide’s research brief, this relationship is governed by the puck’s own resistance, which falls as the shot progresses [1].
| Feature | Pressure Profiling | Flow Profiling |
|---|---|---|
| What you set | Bars of pressure over time | Milliliters per second |
| Best for | Taming harshness, shaping the tail of the shot | Consistent pre-infusion, repeatable shots |
| Feedback style | Pressure gauge or live graph | Live flow readout (mL/s) |
| Machines | Lelit Bianca (paddle), Synesso MVP Hydra | Decent DE1 (does both) |
| Learning curve | Moderate | Moderate, more data-driven |
In practice, the Decent Espresso DE1 — crowdfunded from around 2017 — does both and shows you live pressure and flow charts on a tablet. You can even download other people’s profiles and share your own, which turned profiling into a genuine community hobby rather than a dark art [1].
Do You Need It? An Honest Answer for Home Brewers
For most home brewers, the honest answer is no — not yet. Measurable flavor differences from profiling exist, but puck preparation, grinder quality, and bean freshness matter more [1]. If your grind is inconsistent or your beans are three months old, no pressure curve on earth will save that shot.
Think of it like cooking. A great pan makes a difference, but a sharp knife and fresh ingredients come first. Profiling is the pan; your grinder is the knife.
A rough priority order for your money:
- A burr grinder that produces consistent particles (this dwarfs everything else).
- Fresh beans — roasted within the last 2–4 weeks.
- Consistent dosing and distribution (a scale, a WDT tool, a level tamp).
- Then machine upgrades, including profiling.
That said, if you already own a solid grinder and you’ve nailed your routine, profiling is the next genuinely interesting frontier. The cheapest real entry points are used lever machines (natural declining profiles, often under $300), the Lelit Bianca’s manual paddle for a hands-on feel, or the Decent DE1 if you want full programmability and data [1].
Profiles aren’t universal. A curve that makes a washed Ethiopian sing will flatten a dark-roast blend — expect to re-tune for every new bean.
Why Pressure Drops at the End of Every Shot (Even Without Profiling)
If your machine’s gauge sags toward the end of a shot, that’s normal — it’s the puck, not the pump. As the shot progresses, coffee solids dissolve and get carried away, so the puck becomes less dense and offers less resistance. With a vibration pump especially, the pressure the gauge reads is a product of that resistance, so a softening puck means falling pressure.
The deeper implication: your coffee bed is a consumable part of the machine. Over 25–35 seconds, it physically transforms from a tight, dry puck into a loosening, partially dissolved one — and every property that made it a good filter is degrading the whole time. That’s why shot length matters so much, and why a shot that runs long doesn’t just get weaker, it gets qualitatively different: the same water is passing through a different, weaker barrier. This is also why espresso is a moving target you can’t simply “set and forget” — the puck you start with is not the puck you finish with.
This is actually a free mini-profile. That natural decline is a rough version of what profiling machines do deliberately — one reason very long “lever-style” shots often taste surprisingly sweet and gentle at the tail. Lever machines have always worked this way: a spring pushes hardest at the start and naturally fades, which is why classic lever shots have that heavy body with a soft finish. Volumetric and pump machines flattened that curve into a straight line for the sake of consistency, and profiling is essentially a way to buy it back on purpose.
Want to read a pressure curve like a pro? Watch three things on the graph or gauge:
- The ramp — how fast pressure climbs after pre-infusion. Faster ramps favor body; slower ramps favor clarity.
- The plateau — how steady pressure holds during the main extraction. Wobbles hint at channeling.
- The tail — where pressure lands as the shot ends. A taper to 4–6 bars usually reads as sweetness on the palate.
Why bother learning this? Because the curve is diagnostic evidence, not just decoration. A plateau that dips sharply mid-shot tells you water found a fast path — grind too coarse or distribution too uneven. A ramp that never reaches target pressure usually means the puck offers too little resistance — grind too coarse or dose too low. Once you can read those three zones, you can start diagnosing shots by the shape of the curve alone, before you even taste them — and fix the real cause instead of randomly adjusting dose and hoping.
Frequently Asked Questions
Does pressure profiling actually taste better, or is it hype?
It’s real but not magic. Measurable differences in extraction and flavor exist — especially sweeter tails from declining profiles and fewer channeling issues from pre-infusion. However, puck prep, grind consistency, and bean freshness matter more, so fix those before investing in profiling hardware [1].
What pressure and duration should pre-infusion use?
A good starting point is 2–4 bars for 5–10 seconds, or until you see the first drips form at the spouts. Denser light roasts benefit from longer soaks (up to 15 seconds); darker roasts need less. Adjust by taste: sour and uneven shots usually want more pre-infusion.
Can I retrofit pressure profiling onto my existing machine?
Usually not fully. Most home machines lack the pump control or hardware for programmable profiles. But many machines offer built-in pre-infusion, and some let you approximate profiles manually with a lever or paddle. A device like the Pressprofessional-style add-ons or a flow control kit works only on specific E61 group machines.
How is pressure profiling different from flow profiling?
Pressure profiling controls the force applied to the puck (bars over time), while flow profiling controls water volume per second (mL/s). Because the puck’s resistance links the two, they’re interdependent — change one and the other shifts. The Decent DE1 does both and shows live graphs of each [1].
Why does pressure drop at the end of a shot on a normal machine?
It’s the puck softening, not a pump fault. As coffee solids dissolve and wash away, the puck offers less resistance, so the gauge reads lower pressure. This natural decline is a rough, free version of what declining profiles do deliberately — one reason long lever-style shots often finish sweet.
Conclusion
If you remember one thing, make it this: pressure is a tool, not a rule. The 9 bars on your gauge are a 70-year-old habit, and once you treat pressure as something you shape — low to start, gentle to finish — you open up sweetness and balance that a flat shot can’t reach. Just earn it in order: grinder, beans, prep, then profiles.
Next time your shot spritzes and tastes sharp, don’t reach for a new machine first. Slow down the start instead. Sometimes the best profile is just a little patience before the push.
Halloween Picks
halloween
As an affiliate, we earn on qualifying purchases.