
TL;DR

Get coffee and tea gear delivered free with Prime
- Fast, free delivery on millions of items
- Prime Video, Amazon Music and more included
- Member-only deals all year
Espresso channeling happens when brewing water finds a few easy routes through the coffee bed instead of flowing evenly through it. It can cause sour and bitter flavors in the same cup, and a shot can still reach a normal time and yield. Watch the flow, taste the coffee, and change one preparation or brewing variable at a time.
A beautiful espresso can still taste like lemon squeezed over burnt toast. That clash often points to channeling: water has rushed through a few paths in the coffee puck while other areas got much less flow.
Channeling matters because it can make one shot taste sour, bitter, hollow, or harsh—sometimes all at once. The tricky part is that the shot may still look plausible and finish at your usual time. You will learn how to read the stream, connect what you see with what you taste, and make a practical adjustment without changing five things at once.
You do not need a special portafilter or a drawer full of gadgets to get started. Think of the puck as a small garden bed: if water finds a bare trench, it floods that route and skips the soil around it. A level bed, even distribution, and repeatable recipe give water fewer easy shortcuts.
Channeling is uneven water flow through the puck, not simply a fast shot.
A shot can reach its usual time and yield while still extracting unevenly.
Spraying from a bottomless portafilter is a useful clue, but it does not identify the cause by itself.
Sour and bitter flavors can appear together when different areas of the puck extract differently.
Distribute grounds evenly, break up clumps when needed, tamp level, and change one variable at a time.
Espresso field guide · extraction / 01
Channeling Explained: The Espresso Problem You Can See and Taste
A shot can hit its usual time and yield while water takes a few shortcuts through the puck. Learn to read the flow, connect it with flavor, and adjust your preparation one step at a time.
01 / Inside the puck
Water takes the easiest route
Channeling is uneven water flow through the coffee bed. A crack, clump, or uneven patch can create a fast path, while nearby grounds receive less flow. Think of rain cutting a trench through a garden bed: the groove floods and the soil beside it stays dry.
The shortcut
Fast paths
Water rushes through the puck’s weakest routes instead of spreading evenly across the bed.
The missed ground
Uneven extraction
Some areas get less effective flow while others contribute more intense, harsher flavors.
The false reassurance
Normal numbers
An 18 g dose and 36 g yield in 30 seconds describe the whole shot, not every water path.
02 / Read the cup
Competing notes, one espresso
A channeled shot may taste sour, bitter, hollow, or harsh—sometimes in the same sip. Flavor is evidence from the cup, not a single-cause diagnosis. Combine it with flow clues and repeatable comparisons.
Flavor report
Sharp lemon up front. Dry, burnt finish.If the stream also sprays from one edge, inspect puck preparation before making a large grind adjustment. Taste and flow together tell you more than either alone.
03 / Observe, don’t guess
Clue is not a verdict
A bottomless portafilter can reveal spurting, spraying, early streams, or flow that joins and separates. These patterns are useful clues, but grind, dose, basket design, and equipment also affect what you see.
| What you notice | What it can tell you | What it cannot prove |
|---|---|---|
| Shot time | ✓ Whether the total brew ran faster or slower than usual. | ✗ That water flowed evenly through the puck. |
| Bottomless spray | ~ Flow may be starting unevenly or escaping through a fast route. | ✗ The exact cause; grind and equipment also affect flow. |
| Crema | ✓ A visible feature to note alongside the shot. | ✗ That extraction is balanced or channel-free. |
| Taste | ✓ Whether the cup seems sour, bitter, hollow, or balanced. | ✗ Which single brewing variable caused the problem. |
04 / Build a repeatable bed
Four steps before the shot
A consistent routine gives water a more uniform coffee bed to move through. Careful technique matters more than buying a particular accessory. Keep the basket and equipment clean, and make one change at a time while troubleshooting.
Distribute
Spread grounds evenly across the basket instead of leaving high and low patches.
Break clumps
When needed, use a WDT needle tool or another careful method to loosen clumps.
Level
Settle the bed evenly. A lopsided surface can leave an uneven puck.
Tamp consistently
Keep the tamp level and repeatable. Consistency matters more than maximum force.
Trace the evidence
From puck to practical adjustment
Treat each shot as a small experiment. Keep your recipe and preparation steady enough to see whether a single adjustment changes both the flow and the cup.
What channeling looks like inside your espresso puck
Espresso channeling is uneven water flow through the coffee puck: brewing water finds a few easy routes instead of flowing evenly through the bed. The fast routes extract one part of the coffee differently from the areas they bypass. That is why channeling is not just another name for a fast shot.
Imagine pouring rain onto a garden bed with a narrow groove down the middle. Water races through that groove, but the dry soil beside it barely gets wet. In espresso, a crack, clump, or uneven patch can work like that groove. The water does not politely spread itself across the puck just because the pump is running.
Channeling can start before you lock in the portafilter. Grounds may land unevenly in the basket, clumps may survive distribution, or a rough tamp may leave one side higher than the other. During brewing, pressure pushes water through the weakest available paths. A puck with one convenient shortcut can behave very differently from a uniformly prepared one, even with the same dose and grinder setting.
For example, suppose you dose 18 grams and pull a 36-gram shot in 30 seconds. Those numbers describe the total recipe, not whether water traveled evenly through the puck. If one area offered a fast route and another resisted flow, the finished espresso can still contain unevenly extracted flavors. Watch the flow and taste the result, not just the timer.
As an affiliate, we earn on qualifying purchases.
Spot the flow clues without blaming every messy shot on channeling
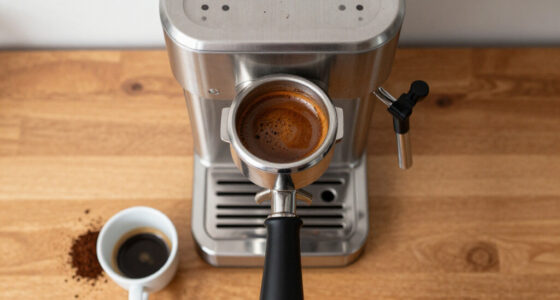
Channeling shows up most clearly as irregular flow, such as spurting, spraying, or streams that join and separate unpredictably. A bottomless portafilter can make these clues easier to see because the coffee exits into open air. The clues are useful, but they do not prove the cause by themselves.
Watch for early spurts from one side, a stream that starts much sooner in one spot, or droplets spraying outward instead of forming a steadier flow. If you can see the basket bottom, you can compare shots made with the same coffee and recipe. One shot that suddenly sprays after you changed how you distributed the grounds gives you a useful lead—not a final diagnosis.
Flow also changes for reasons that are not channeling. A different grind, dose, basket, or recipe can alter how quickly espresso leaves the portafilter. A bottomless portafilter reveals some flow problems; it does not cause them. It can also make ordinary drops look dramatic, so avoid treating every stray spray as proof that your puck failed.
Try a simple comparison at home: keep the dose and yield the same for two shots, but prepare one puck carefully and one using your usual routine. If the careful shot produces steadier flow and tastes more balanced, your preparation may have been part of the problem. If both shots spray, check the grind, basket, and equipment as well. The strongest clues come from repeatable changes in flow and taste, not one memorable splash.
As an affiliate, we earn on qualifying purchases.
Why one channeled shot can taste sour and bitter at once
Channeling can make espresso taste sour and bitter in the same cup because water does not extract every part of the puck equally. Areas that receive too little effective flow may taste sharp or underdeveloped, while water rushing through faster paths can create harsher, more intense flavors. The result is a cup that feels jumbled rather than simply weak or strong.
Think of the puck as a choir. If every section sings together, the flavor can feel clear and balanced. If one group rushes ahead while another barely joins in, you hear competing notes. Espresso does something similar: the cup mixes coffee from different routes through the bed, and those routes may contribute very different flavors.
A sour, thin shot often leads people to grind finer or extend the yield. That can help in some cases, but if the puck has a weak spot, changing the recipe alone may not solve the uneven flow. Likewise, bitterness does not automatically mean channeling. Roast level, dose, temperature, and recipe can all affect taste, so use several clues rather than diagnosing by flavor alone.
For instance, imagine your usual espresso tastes chocolatey, but today it starts with a sharp lemon note and ends with a drying, burnt finish. The stream also sprays from one edge. That combination suggests you should inspect puck preparation before making a large grind adjustment. Taste is your report from the cup; the flow gives you another piece of evidence. Together, they help separate a puck problem from a recipe that simply needs tuning.
As an affiliate, we earn on qualifying purchases.
Use shot time and crema as clues, not a verdict
A normal shot time does not rule out channeling, because time and yield summarize the whole brew rather than revealing every path water took. Crema has the same limitation: its color and thickness cannot confirm an even extraction on their own. Use these measurements alongside flow and taste.
A kitchen timer is like checking a car’s trip time without looking at the route. It tells you how long the journey took, but not whether you drove smoothly or got stuck on one road and sped along another. In espresso, a total time near your target can hide an uneven puck. A neat-looking crema can sit on top of a shot that tastes harsh or hollow.
| What you notice | What it can tell you | What it cannot prove |
|---|---|---|
| Shot time | Whether the total brew ran faster or slower than your usual recipe | That water flowed evenly through the puck |
| Bottomless spray | That flow may be starting unevenly or escaping through a fast route | The exact cause; grind and equipment can also affect flow |
| Crema | A visible feature to note alongside the shot | That extraction is balanced or channel-free |
| Taste | Whether the cup seems sour, bitter, hollow, or balanced | Which single brewing variable caused the problem |
Say your recipe usually gives you 36 grams out in 29 seconds, and today it does the same—but the flow sprays and the espresso tastes both sharp and drying. The timer has stayed steady; the cup has not. Record time, yield, visible flow, and taste together. That quick note helps you notice patterns across several shots instead of chasing one number.
As an affiliate, we earn on qualifying purchases.
Prepare the puck with a repeatable four-step routine
A repeatable puck-preparation routine gives water a more uniform coffee bed to move through. Start with even distribution, address clumps when you see them, level the grounds, and tamp consistently. The goal is not to press as hard as possible; it is to avoid building obvious weak spots into the puck.
- Fill the basket evenly. Avoid leaving a mound on one side or a bare patch near the edge. If grounds pile up in the center, gently spread them before tamping.
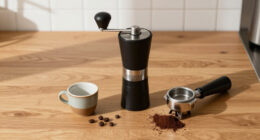
- Break up clumps when needed. A Weiss Distribution Technique (WDT) tool uses fine needles to loosen clumped grounds. Move it carefully through the coffee rather than stirring so aggressively that you spill grounds or create new uneven patches.
- Level the bed. Give the basket a gentle, consistent settling motion if that is part of your routine. Check that the grounds sit evenly before the tamper goes in.
- Tamp level and consistently. Apply a controlled press that leaves a flat surface. A crooked tamp can tilt the bed; pressing dramatically harder usually does not fix poor distribution underneath.
Picture making two coffees before work. In the first, you dump in a clump, tap the portafilter hard, and tamp at an angle. In the second, you distribute the grounds, loosen the visible clump, level the bed, and tamp flat. The second method is easier to repeat, so if the shot changes, you have fewer mysteries to untangle. A WDT tool can help, but careful technique matters more than a particular accessory.
Troubleshoot channeling by changing one variable at a time
Change one variable at a time when diagnosing suspected channeling, so you can tell what actually helped. Keep your dose and target yield steady while you check preparation, flow, and grind. Grind, basket, pressure, and puck preparation interact, so changing several at once can turn a small problem into guesswork.
Start with the basics: check that the basket is clean and undamaged, use a consistent dose, distribute the grounds evenly, and tamp level. If the shot sprays and runs slowly, inspect the puck routine and consider whether the grind is too fine for that coffee and basket. If it runs quickly, preparation still deserves a check, but a coarser grind may not be the answer. There is no universal grind adjustment for every channeling symptom.
Try this practical sequence with a coffee that sprays from one edge. First, keep your current grind and recipe but improve distribution. Pull another shot and record whether the spray changes. If the flow remains uneven, check for a damaged basket or inconsistent dosing. Only then test a small grind adjustment, holding the rest of the routine steady.
Recent home espresso discussions often feature precision baskets, distribution devices, pressure profiling, and flow-aware brewing. These tools can help you observe or manage a shot, but no accessory guarantees a channel-free puck. A plain notebook can be just as useful: write down dose, yield, time, preparation change, flow, and taste. Clean equipment also helps; coffee oils and stray grounds can muddy what you see and affect the next brew.
Know when to trust the pattern instead of one dramatic shot
Repeated flow and taste clues are more useful than one dramatic shot. A single spurt can come from several causes, while a pattern across carefully repeated brews gives you better evidence. Compare like with like: keep your dose, basket, coffee, and target yield steady while testing a preparation change.
Consider a home barista who sees a spray on Monday and immediately grinds finer. Tuesday’s shot runs slower but still tastes sharp and bitter. On Wednesday, they return to the original grind, break up clumps more carefully, and tamp level; the stream becomes steadier and the cup tastes clearer. The useful change was not a more extreme grind. It was a more consistent puck.
Now imagine the careful routine produces the same spray on three shots, and each shot runs unusually slowly. That pattern gives you a reason to inspect other factors, such as an overly fine grind, an obstructed or damaged basket, or a dose that leaves too little headspace. Do not assume every fast or slow stream means channeling; note what changed and test a likely cause in isolation.
For a practical test, pull two or three comparable shots before drawing a strong conclusion. You do not need laboratory precision. You need enough consistency to answer a useful question: did the flow become steadier after I changed distribution, or did the taste improve after I changed the grind? Treat each shot like a small experiment, not a verdict on your skill.
Keep espresso troubleshooting safe, clean, and useful
Safe, clean equipment makes espresso troubleshooting more reliable. A dirty basket or portafilter can add stray grounds and make flow harder to read, while hot water and pressurized equipment can burn you. Clean the coffee-contact parts regularly, and handle the portafilter carefully after brewing.
After a session, knock out the puck and rinse the basket and portafilter. Wipe away grounds from the rim before locking the handle into the machine; stray coffee can interfere with the seal and leave a mess. Follow your machine’s cleaning directions for backflushing or other maintenance, since equipment varies.
When testing, do not put fingers or tools near a pressurized portafilter, and do not try to adjust a locked-in basket while the machine is brewing. Hot espresso can splatter, especially when a bottomless portafilter sprays. If a shot starts spraying toward you, stop the brew if your machine allows it safely, then wait for pressure to release before removing the portafilter.
For example, if you are comparing two distribution methods before breakfast, prep both baskets away from the machine, then lock in each one only when you are ready to brew. Keep the machine area dry and clear. These habits are not just tidiness: they protect your hands and give you a cleaner comparison. A clean basket, dry work area, and careful handling make it easier to see what the puck is doing without adding avoidable risk.
Frequently Asked Questions
How can I tell if my espresso is channeling?
Look for spurting, spraying, or uneven flow, especially with a bottomless portafilter, and compare those clues with the taste. A sour, bitter, hollow, or inconsistent cup can support your suspicion. None of these signs alone proves channeling, so look for a repeatable pattern.
Can channeling happen if my shot time is right?
Yes. Shot time measures how long the full brew took, not whether water flowed evenly through every part of the puck. A shot can hit its usual time and yield yet still taste uneven.
Why does a channeled shot taste both sour and bitter?
Water can move quickly through some areas while other parts of the puck receive less effective flow. That uneven extraction can put sharp, underdeveloped flavors and harsher flavors into the same cup.
Does a bottomless portafilter cause channeling?
No. A bottomless portafilter makes some flow problems easier to see, but puck preparation and brewing conditions drive the problem. Spraying is a warning sign to investigate, not proof that the portafilter caused it.
Will tamping harder prevent channeling?
Usually, a level and repeatable tamp matters more than maximum force. If grounds are clumped or uneven before tamping, pressing harder will not reliably repair the distribution beneath the surface.
Does a WDT tool fix channeling?
A WDT tool can help loosen clumps and distribute grounds, but it cannot guarantee an even extraction. Use it with a careful, consistent routine, and judge the result by repeatable flow and taste.
Should I grind finer or coarser to stop channeling?
There is no universal answer. If a shot sprays and runs slowly, check puck preparation and whether the grind is too fine for your setup; if it runs quickly, check distribution and your recipe. Change one variable at a time so you can tell what helped.
Conclusion
When espresso tastes confused, do not let a normal timer talk you out of what your eyes and palate are telling you. Look for repeated flow irregularities, taste for competing sour and bitter notes, and improve your preparation before making a string of recipe changes.
Make the puck more even, change one variable, and watch the next shot. A steady stream is not the whole story, but it is a much better trail to follow than one lonely number on a timer.
Halloween Picks
halloween
As an affiliate, we earn on qualifying purchases.