TL;DR
Dial-in drift is the gradual change in how an espresso recipe performs, even when its recorded settings appear unchanged. Coffee age, humidity, grinder condition, puck preparation, machine temperature, and measurement habits can all change flow and flavor. Check your workflow, taste the shot, then adjust one variable at a time.
Your espresso can go from sweet and syrupy to thin and sharp overnight, even if the grinder still shows the same number. That maddening shift has a name: dial-in drift, the gradual change in how a coffee recipe performs as beans and brewing conditions change.

Get coffee and tea gear delivered free with Prime
- Fast, free delivery on millions of items
- Prime Video, Amazon Music and more included
- Member-only deals all year
A recipe records useful details, such as dose, grind setting, and beverage weight. It cannot freeze the coffee, the air in your kitchen, or every small movement in your workflow. Your 18-gram dose and 36-gram yield are a map, not a promise that every shot will taste identical.
This guide shows you what can change, how to narrow down the cause, and when to leave a shot alone. You’ll learn how to use time and measurements as clues without letting them overrule the cup. That matters on a busy morning: a clear routine can save good beans from a string of random adjustments.
Dial-in drift describes how the same espresso recipe can perform differently as coffee and brewing conditions change.
Check coffee, dose, yield, grinder condition, puck preparation, and timer habits before making a large grind change.
Treat shot time as a clue about flow, then taste the espresso before deciding it needs correction.
Hold dose and target yield steady while you test a small grind adjustment.
Record a few recipe details and taste notes so you can compare shots without expecting every coffee to stay static.
The Dial-In Drift Problem Why Yesterday’s Recipe Fails Today
The same recorded recipe can produce a different flow and flavor as coffee and brewing conditions change. Check your routine, taste the shot, then adjust one variable at a time.
What can shift the shot
Small changes in coffee, equipment, or preparation can alter flow and flavor.
Beans keep changing
Age, roast, packaging, and storage affect how coffee behaves.
Conditions matter
Humidity, temperature, and a warmed grinder can shift results.
Preparation adds variation
Dose, clumps, tamping, residue, and timing habits affect the shot.
Check before adjusting
A quick routine helps find the cause before a large grind change hides it.
Check the bag, dose, and target beverage weight.
Look for residue, setting changes, clumps, or uneven tamping.
If the cup needs improvement, change grind slightly and keep dose and yield steady.
Read time as a clue
Flow time helps compare shots, but it cannot decide whether the espresso tastes good.
- Keep shot-start timing consistent.
- Record dose, yield, setting, and time.
- Notice balance, sweetness, sharpness, or thinness.
- A changed time alone does not mean the shot needs fixing.
What dial-in drift means for your next espresso
Dial-in drift is the gradual change in how the same coffee recipe performs over time. You may use the same dose, grinder setting, and target yield, yet get a different flow rate or taste. The term describes a familiar brewing problem; it is not the name of one formally defined scientific effect.
Imagine yesterday’s shot: 18 grams of coffee go in, 36 grams of espresso come out in about 30 seconds, and the cup tastes balanced. Today, the same recipe runs in 24 seconds and tastes sharper. The numbers look familiar, but the coffee bed may offer less resistance because the beans, grounds, or preparation have changed.
A recipe is a snapshot of a successful moment. It helps you repeat the main choices, but it does not capture every detail, such as how long the beans have rested after roasting or whether a few grounds stayed in the grinder. Even when the recipe stays the same, small changes can add up and move the shot.
That shift does not prove your machine has failed or your coffee has gone bad. It tells you that today’s shot deserves a quick check. Taste first, compare the flow with your usual results, and treat the recipe as your starting point.
Products Worth Considering

Instant Pot Pro 8 Qt 10-in-1 Electric Pressure Cooker, Black

Breville Smart Grinder Pro Conical Burr Coffee Grinder, Brushed Stainless Steel

Cuisinart 8-in-1 Portable Wood Pellet Grill and Smoker
As an affiliate, we earn on qualifying purchases.
The coffee and kitchen changes that move your shot
Espresso recipes drift because coffee and brewing conditions change, even when your recorded settings do not. Freshly roasted beans release carbon dioxide and continue to change after roasting. Their age, roast, packaging, and storage all influence how they behave, so two bags can react differently over the same number of days.
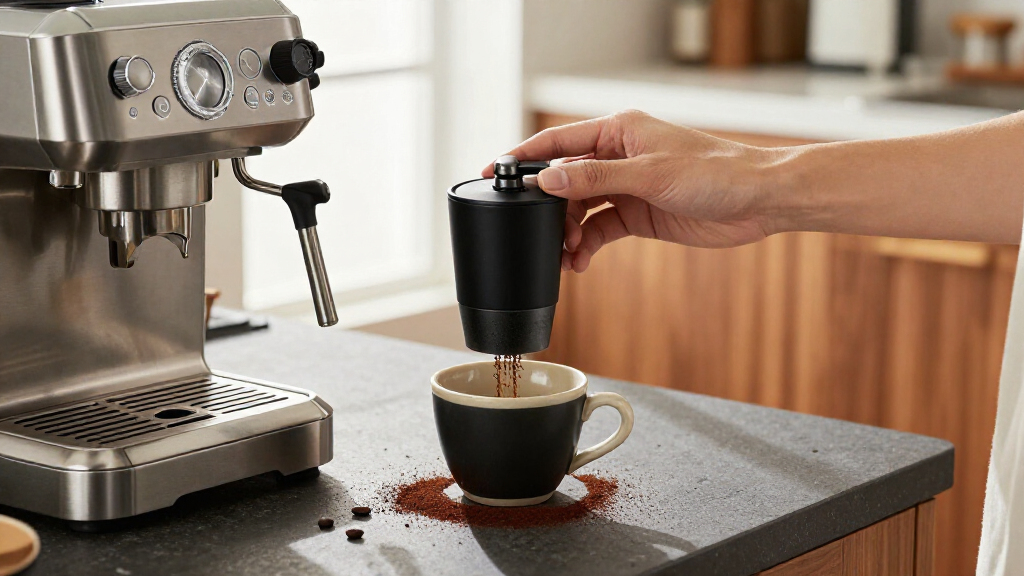
Weather can play a part, too. Beans and grounds respond to changing humidity, while temperature can affect both the coffee and your grinder. If a grinder has warmed up during a string of shots, or collected residue since your last cleaning, its output may not match the first dose you ground that morning.
Puck preparation adds another moving piece. A dose that is off by a few tenths of a gram, a clump that survives distribution, or a less even tamp can change the resistance water meets. Water composition, machine temperature, pressure, and cleanliness can also influence flow and flavor. These details often interact; one small shift may be enough to make a shot run faster or slower.
For example, you open a new bag and notice the espresso runs faster than it did with the previous bag at the same grinder setting. The beans may simply behave differently. Before making a dramatic change, confirm the dose and yield, then make one small adjustment and taste again.
Check these five things before you touch the grinder
Before you adjust grind size, confirm that the coffee, dose, output, and workflow match your usual recipe. A grinder adjustment can hide the original cause, especially if you change several things together. A quick check helps you tell a real change in coffee behavior from a missed scale reading or uneven puck.
- Confirm the coffee and recipe. Check the bag, dose, and target beverage weight. If you normally use 18 grams in and 36 grams out, verify both instead of relying on memory.
- Check the grinder. Look for a recent setting change, retained grounds, or visible residue. A brief purge may help if old grounds are mixing with the new dose.
- Review puck preparation. Did the grounds clump? Did you distribute and tamp as usual? A lopsided puck can create uneven flow.
- Watch the shot and note the time. Keep your shot-start definition consistent. Starting the timer at the pump on one day and at first drip the next makes comparisons less useful.
- Taste, then change one variable. If the cup needs improvement, adjust grind slightly while holding dose and yield steady.
Consider a rushed weekday shot that runs much faster than usual. You might be ready to turn the grinder several steps finer, but first notice the dose was 17.5 grams instead of 18. Correcting that measurement may solve the problem. This routine makes each adjustment an experiment with a clear result, rather than a guess followed by another guess.
Use shot time as a clue, not a flavor verdict
Shot time describes how quickly espresso flows; it does not, by itself, tell you whether the coffee tastes good. A fast shot may taste sharp, but time and flavor do not map neatly onto one another. Coffee, ratio, preparation, and personal taste all shape the cup.
Say your usual recipe takes 30 seconds, but today it takes 26. That difference gives you a reason to compare the shots, not an automatic reason to reject the new one. If today’s espresso still tastes sweet and balanced, the changed time may not matter to you. If it tastes thin or sour, time is one clue to use alongside taste and the recipe.
Measurements can make comparisons more repeatable. Weighing dose and output keeps the recipe grounded in numbers, and a refractometer can estimate dissolved solids. Those tools help you notice changes, but they cannot fully describe flavor or decide what you enjoy. A reading is more like a weather report than the whole day outdoors.
Keep a short record when you are dialing in a coffee: the dose, yield, grinder setting, time, and a few words about taste. For example, “18 in, 36 out, 27 seconds, sweet but slightly thin” gives you more to work with than “bad shot.” Use the numbers to guide your next test, then let the cup make the final call.
Adjust one variable at a time to get back to balance
When an espresso changes, adjust one variable at a time so you can tell what improved the cup. For a basic espresso workflow, keep the dose and target beverage weight steady while making a small grind adjustment. Taste the next shot before changing anything else.
This approach matters because espresso variables interact. If you grind finer, change the yield, and increase the dose at once, a better result will not tell you which change helped. It also makes a worse result hard to undo. A simple note beside the grinder can keep the sequence clear: “one small step finer; same dose and yield.”
Suppose your shot runs quickly and tastes sour. Keep your 18-gram dose and 36-gram target, then make a small grind adjustment finer. If the next shot runs more slowly and tastes sweeter, you have a useful signal. If it becomes harsh or stalls, move back slightly and reassess rather than changing the brew ratio at the same time.
A different beverage weight can sometimes improve balance, and dose changes can be useful when you have a clear reason to test them. But change those variables deliberately, one at a time. The goal is not to force every coffee into one timing target. It is to find a cup you like and learn which adjustment got you there.
Keep a simple record so tomorrow’s recipe still helps
A brief, consistent log turns a saved recipe into a useful reference instead of a number you follow blindly. Record the coffee, dose, yield, grinder setting, shot time, and a few plain words about taste. Add the date or a note about a major change, such as opening a new bag or cleaning the grinder.
You do not need a spreadsheet full of decimal places. A note like “Tuesday: 18 grams in, 36 out, 29 seconds; sweet, slight dry finish” gives tomorrow’s you a clear comparison. If Wednesday’s shot takes 25 seconds, you can see what shifted and whether the taste changed with it.
Keep your workflow steady where you can. Weigh dose and output, use the same timer start point, clean coffee residue from equipment, and store beans in a suitable closed container away from heat and direct sunlight. Good storage slows avoidable changes, but it does not stop beans from evolving. Dialing in may still call for small adjustments as coffee ages.
For instance, you might find one bag stays predictable through several mornings while the next needs a finer grind after a few days. Your notes help you recognize that pattern without assuming every coffee will behave alike. Repeatability gives you a cleaner comparison; it does not make the coffee static.
Know when a different time does not need fixing
If the espresso tastes good, a different flow time does not automatically call for a correction. Recipes and timing targets help you reproduce a result, but flavor is the point of making the drink. A shot that falls outside your usual range can still be enjoyable.
Picture serving your usual espresso to a friend on a quiet weekend morning. The shot finishes a few seconds sooner, yet tastes rounded, fragrant, and full. You could chase the old time with another adjustment, but that might push the flavor away from the version you both like. Stop when the cup works for you.
On the other hand, trust your palate when something is clearly off. If a shot tastes unpleasantly sharp, dry, or hollow, use the time and flow as clues and make a measured change. Taste is personal, so one person’s preference for a brighter espresso may be another person’s sign to adjust.
The useful balance is simple: record your recipe, use measurements to make comparisons fair, and let taste decide whether the result needs work. That mindset takes pressure off the clock. It also prevents dial-in drift from turning into an endless chase for a number that cannot guarantee a delicious cup.
Frequently Asked Questions
Why does my espresso run faster today with the same grinder setting?
The coffee may have changed with age, or your grinder, puck preparation, dose, and kitchen conditions may differ. Confirm the dose and workflow first, then make a small grind adjustment if the shot also needs improvement.
Does a faster shot always taste sour?
No. A faster shot can taste sharp, but flow time alone cannot predict flavor. Taste the coffee and consider the dose, beverage weight, and how evenly you prepared the puck.
How often should I dial in my espresso?
Dial in when a change in coffee, grinder, machine, or brewing conditions affects the cup. Some coffees need small, frequent adjustments; others stay consistent for longer.
Should I change grind size or dose first?
For a basic espresso workflow, keep dose and target beverage weight steady while you adjust grind size to improve flow and taste. Change another variable when you have a clear reason to test it.
Can a refractometer tell me whether my espresso tastes good?
A refractometer estimates dissolved solids, which can help you compare extractions. It cannot capture all the qualities of flavor or determine what you personally enjoy.
Can I stop dial-in drift by storing beans carefully?
Good storage can limit avoidable exposure to heat and air, but beans still change after roasting. Store them in a suitable closed container away from heat and direct sunlight, and expect that a coffee may need recalibration as it ages.
Conclusion
Your espresso recipe is a starting point you can return to, not a guarantee that tomorrow’s beans will behave exactly like today’s. When a shot shifts, check your dose and workflow, use time as a clue, and make one small adjustment before tasting again.
Remember the order: check, taste, adjust. That simple habit can turn a frustrating morning into a better cup—and leave you with a recipe that earns its place beside the grinder.