

TL;DR

Get coffee and tea gear delivered free with Prime
- Fast, free delivery on millions of items
- Prime Video, Amazon Music and more included
- Member-only deals all year
A rosetta is a feather-shaped latte art pattern made by pouring glossy textured milk into espresso while moving the pitcher side to side. Start with a higher pour to mix milk into the coffee, lower the spout near the surface to build curved leaves, then lift and draw a thin line through the center. Smooth milk, steady movement, and a rounded cup matter more than speed.
A rosetta can look like a tiny feather drawn on coffee, but its leaves come from a simple change in pouring height. You begin high to blend milk into espresso, then bring the spout close so foam rests on top and forms the pattern.
This guide explains the rosetta pour step by step in plain English. You’ll learn how to prepare the milk, when to lower the pitcher, how to move your hand, and what to change when your pattern turns into a white blob or disappears beneath the crema. Think of the pour like drawing with a brush: the milk is your paint, the espresso is your dark paper, and a steady hand gives the lines their shape.
A rosetta is a feather-shaped latte art pattern made from curved leaves and a center stem.
Pour from several centimeters above the cup to blend milk into espresso, then lower the spout so foam can form visible leaves.
Aim for glossy, flowing milk without large bubbles; whole milk is often a forgiving place to start, while plant milk varies by product.
Use small, steady side-to-side movements and change one part of your technique at a time when troubleshooting.
Latte art is a sign of pouring practice, not a guarantee of good flavor; espresso quality and milk texture still matter.
Coffee craft / pour guide
The Rosetta Pour, Explained Step by Step in Plain English
A rosetta is a feather-shaped latte art pattern made by pouring glossy milk into espresso while moving the pitcher side to side. The key is changing height: pour high to blend, lower to lay down the leaves, then lift to draw the stem.
01 / Read the pattern
What makes a rosetta?
The repeated side-to-side motion leaves curved white bands on the coffee. A final line pulls through them to create the stem. Think of it like combing wet paint: regular marks become a feather when one clean stroke ties them together.
01 / The leaves
Curved, stacked bands
Small, steady wiggles create a row of evenly spaced curves. Large or hurried movements tend to make the pattern uneven.
02 / The stem
One fine center line
Lift the pitcher slightly and draw a thin stream through the design toward the far rim.
03 / The balance
Start on center
Keep the pitcher aligned with the cup’s centerline. A small drift can make the feather lean toward the rim.
Good art is not a flavor test. A rosetta shows pouring control, but espresso quality, milk temperature, and milk texture have a bigger effect on how the drink tastes.
02 / Set up for control
Gather the right tools
Each part helps control either the milk or the shape. A rounded bowl gives the pattern room to spread; a pointed spout makes smaller curves easier to draw.
Coffee
Espresso + crema
Use a smooth, even crema surface in a cup with a rounded bowl. Swirl gently to level the coffee before you pour.
Milk
Cold, fresh milk
Whole milk is often a forgiving place to start. Plant-based options can work, though their texture varies by product.
Pitcher + machine
Clean, pointed spout
A steam wand helps make fine, pourable foam. Choose a pitcher size that lets the milk swirl freely without splashing.
03 / Texture is the paint
Steam glossy, flowing milk
Aim for milk that looks smooth and shiny, like wet paint—not stiff whipped foam. Fine bubbles should be mixed through the milk, with no large bubbles sitting on top.
Add a little air
Keep the wand near the surface briefly. Listen for a gentle hiss, not long sputtering.
Build a whirlpool
Lower the wand enough to keep milk circling as it heats and the foam blends in.
Tap + swirl
Tap out larger bubbles, then swirl until the surface looks even and glossy.
Pour soon
Use the milk before it separates into a thick cap and thin liquid.
Use the range as a guide, not a rule. A thermometer can help while learning. Avoid overheating: milk can taste flat or scalded.
04 / The pour sequence
Eight stages, one steady rhythm
The height change matters: start several centimeters above the cup to blend milk in, then bring the spout close so foam can spread on top.
Prepare espresso
Pull into a rounded cup and gently swirl the crema level.
Steam milk
Add a little air, then keep the milk moving in a whirlpool.
Settle + swirl
Pop large bubbles and remix the surface until glossy.
Start high
Pour a thin stream into the center to blend and raise the level.
Lower the spout
When partly full, move close and increase flow slightly.
Wiggle forward
Make small, regular side-to-side motions toward the far side.
Draw the stem
Lift slightly and pull a thin line through the leaves.
Stop at the rim
Cut off the stream cleanly before the cup reaches the brim.
05 / Read the result
Spot the problem. Adjust one thing.
Each pour gives you a clue about timing, milk texture, or movement. Make one small change on the next attempt so you can see what helped.
| What you see | What may be happening | Try this next |
|---|---|---|
| Milk sinks | The pour is still high, or the stream is too thin. | Lower the pitcher; add a little flow. |
| White blob | The spout is close too early, or milk is too thick. | Start high for longer; aim for glossy milk. |
| Blurry pattern | Crema may be thin, milk over-aerated, or pour too forceful. | Refine texture and soften the stream. |
| Uneven leaves | Wiggles may be too large, rushed, or irregular. | Slow down; use smaller repeated motions. |
| Pattern breaks apart | Milk may have separated while waiting. | Swirl again and pour soon after steaming. |
| Design off-center | The pitcher drifted away from the cup’s centerline. | Begin in the middle and track your position. |
What a Rosetta Looks Like—and What Makes It Form
A rosetta is a latte art pattern shaped like a feather or leaf, with curved white leaves and a narrow line running through the middle. You make it by pouring textured milk into espresso and moving the pitcher from side to side. A rosetta is a common latte design because the repeated curves look intricate even though they come from a few controlled movements.
Those leaves form when foamy milk reaches the coffee’s surface. As you wiggle the pitcher, the milk shifts from side to side and leaves curved bands behind. The final line through the middle gives the design its stem. The shape is a little like combing wet paint with the tip of a brush: the motion creates repeated marks, and the final stroke pulls them into one recognizable image.
A neat rosetta often has distinct, evenly spaced leaves, a visible center line, and a balanced outline. For example, if you pour toward one side of the cup, the feather may lean toward the rim. Start on the cup’s centerline and track the pitcher’s position as you work; small adjustments show up clearly in the finished pattern.
Latte art doesn’t prove a drink tastes good. Espresso quality, milk temperature, and milk texture affect flavor more than the design does. Still, learning to pour a rosetta teaches useful control: you practice changing height, managing flow, and moving with a steady rhythm.
Products Worth Considering

Breville Bambino Espresso Machine, Brushed Stainless Steel (BES450BSS)

De'Longhi Magnifica Evo Fully Automatic Espresso Machine with Manual Milk Frother, Silver
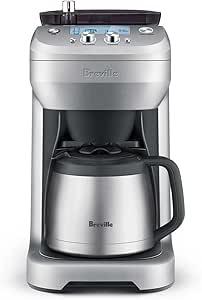
Breville Grind Control BDC650BSS Thermal Carafe Coffee Maker – Brushed Stainless Steel
As an affiliate, we earn on qualifying purchases.
Gather the Right Cup, Milk, and Pitcher Before You Pour
You can make a rosetta with espresso, glossy steamed milk, a pitcher with a pointed spout, and a cup with a rounded bowl. Each piece helps you control either the milk or the shape. A rounded cup gives the milk room to spread, while a fine spout makes it easier to draw smaller, clearer curves.
Whole dairy milk is often a forgiving starting point because it can form stable, creamy foam. Plant-based milk can work too, but its behavior varies by product; a barista-style oat or soy milk may pour differently from another carton of the same type. If your first attempt with an alternative milk looks soft or blurry, try adjusting the texture and pour speed before blaming your hand.
Use cold milk and a clean steaming pitcher. Cold milk gives you more room to add air and heat it evenly, while leftover milk or residue in a pitcher can make texture harder to judge. For instance, if you steam a small drink in a pitcher that is much too large, it may be difficult to form a stable whirlpool. Choose a pitcher size that lets the milk move freely without splashing out.
A steam wand makes the fine, pourable foam used in classic latte art. A jar or handheld frother can produce foam for other drinks, but often creates bubbles that are too large or stiff for a rosetta. Espresso crema provides the dark surface and contrast that help the white leaves show.
Steam Milk That Pours Like Glossy Paint
Milk for a rosetta should look smooth, glossy, and fluid, like wet paint rather than stiff whipped foam. Add a small amount of air near the beginning of steaming, then keep the milk moving in a whirlpool as it heats. The goal is fine foam mixed evenly through the milk, without large bubbles sitting on top.
Start with the steam wand near the milk’s surface and let in a brief, gentle hiss of air. Then lower the wand enough to keep the milk circling. If you hear loud sputtering for a long time, you’re probably adding too much air; if the milk stays flat and thin, you may need a little more. Imagine stirring cream into a sauce: steady motion blends it, while sudden splashes leave lumps.
Many baristas aim for about 55–65°C (130–150°F), though equipment and personal taste vary. A thermometer can help while you learn, and the milk should feel pleasantly hot rather than scalding. Overheating can flatten its flavor and make it taste cooked. If you’re making coffee for someone else, ask how hot they like it instead of treating one temperature as a universal rule.
After steaming, tap the pitcher lightly to pop larger bubbles, then swirl until the surface looks even. Pour soon, before the foam separates into a thick cap and thin milk. That short pause matters: a pitcher left on the counter while you search for a spoon can split into layers, making the leaves harder to draw.
Follow These Steps to Pour the Rosetta
The rosetta pour follows a clear sequence: prepare espresso, blend milk from above, lower the spout to lay down foam, wiggle toward the far side, and finish with a stem. Use each height change for a different job. The process rewards steady control, not a fast wrist.
- Prepare the espresso. Pull a shot into a rounded cup with a smooth layer of crema. Swirl the cup gently to even out the surface; a lopsided coffee surface can send your pattern off course.
- Start high. Hold the pitcher several centimeters above the cup and pour a thin, steady stream into the center. This blends milk into the espresso and raises the drink level without putting a white mark on top.
- Lower the spout. When the cup is partly full, bring the spout close to the surface. Increase the flow slightly so the white foam starts to spread across the coffee.
- Wiggle toward the far side. Move the pitcher in small, regular side-to-side motions while you slowly travel forward. The white curves stack into leaves, a bit like a row of tiny waves meeting the shore.
- Draw the stem and stop. As the cup nears full, lift the pitcher slightly and draw a thin line through the center toward the far edge. Cut off the stream at the rim.
For example, if the first white line appears only after the cup is nearly full, lower the pitcher earlier next time. If it spreads into a broad blob, start high for longer or use a gentler flow. Each attempt gives you one useful clue about timing or movement.
Leave enough room at the rim to stop cleanly. Pouring right to the brim can spill hot coffee and erase the design as you carry the cup. Serve promptly, and handle both the hot espresso cup and steamed milk with care.
Fix Blobs, Faint Leaves, and Crooked Stems
When a rosetta goes wrong, the pattern usually points to one part of the pour: height, flow, milk texture, or alignment. Change one thing at a time so you can tell what helped. A beginner who lowers the spout, speeds up, and wiggles harder all at once may get a different result, but won’t know why.
If the milk sinks beneath the surface, your pitcher may be too high or the stream too thin. Lower the spout and allow a little more flow when the cup is partly full. If you see a white blob instead of leaves, the pitcher may be too close too early, or the milk may be too thick to spread in fine layers. Start high, then bring the spout down once the cup has enough liquid.
Blurry leaves can come from weak crema, over-aerated milk, or a forceful stream. For example, milk with large surface bubbles may land as uneven white patches instead of crisp curves. Tap and swirl the pitcher, and pour with a controlled stream. If the leaves vary in size, slow your side-to-side motion and make smaller, more regular wiggles.
A broken pattern can mean the milk separated while you waited. Swirl it again before pouring, then work promptly. A design that leans to one side often starts off-center; align the spout with the middle of the cup and follow its centerline as you draw. Treat the result like feedback from a sketch: a crooked leaf isn’t wasted effort if it tells you where your hand drifted.
Practice the Motion Without Expecting Café Art on Day One
You can learn a rosetta by practicing its parts separately instead of judging yourself on one perfect cup. The milk texture, high pour, low pour, wiggle, and finishing line each ask for different control. If you practice them in sequence, you can spot which part needs attention.
Try pouring a thin stream from high into a cup of espresso, then pause and notice how the crema changes. On the next attempt, practice lowering the spout and making small side-to-side movements. Even if the result looks more like a striped leaf than a feather, you’re learning how your pitcher responds. A barista might repeat one stage during a quiet shift; at home, you can do the same with a small drink.
Keep a simple note after each pour: “milk too foamy,” “white mark appeared too late,” or “wiggle moved off-center.” That turns practice into a sequence of small adjustments rather than a daily test of talent. The timeline varies; some people find the rhythm quickly, while others need many tries to steam milk consistently.
Online videos and café demonstrations have made detailed latte art more visible, including layered rosettas and designs combined with hearts or tulips. Those variations build on the same basics: smooth milk, controlled flow, and deliberate movement. Don’t compare your first feather to a competition design with several layers. Focus on making the leaves clearer than they were in your last cup.
Know What a Rosetta Can—and Can’t—Tell You About Coffee
A rosetta shows that you coordinated milk texture, pitcher height, pour speed, and movement, but it does not certify that the coffee tastes excellent. A beautiful design can sit on espresso that tastes bitter or sour, while a tasty drink can have a plain surface. Flavor depends more on the espresso and the way you steam the milk.
That distinction matters when you order at a café. If your cappuccino has a clean, even rosetta, enjoy the craftsmanship, but judge the drink by its aroma, balance, and texture too. At home, you might make a neat feather with milk that feels too hot or espresso that tastes harsh. The art is one part of the cup, like a book cover is one part of a story.
The design is useful as practice because it makes pouring habits visible. Uneven leaves can reveal an inconsistent wiggle; a faint pattern can hint at weak contrast or milk that sank. Yet no single visual cue identifies every cause. A blurry rosetta might come from the crema, the foam, or a fast stream, so change one variable and try again.
If your main goal is better-tasting coffee, prioritize fresh espresso, milk at a comfortable temperature, and a texture you enjoy. If you also want the feather, use the pour as a skill-building exercise. The same glossy milk that helps the leaves spread can make the drink feel silky, even when the design still needs work.
Frequently Asked Questions
Is a rosetta hard for a beginner to learn?
A rosetta takes coordination, but you can learn it by practicing milk texture and pour stages separately. Your first patterns may look like blobs or striped leaves. Focus on one change per attempt, such as lowering the spout earlier or making smaller wiggles.
What milk works best for rosetta latte art?
Whole dairy milk is often forgiving because it can make stable, creamy foam. Some barista-style oat, soy, and other plant milks also pour well, but results vary by product. If the leaves look soft, try adjusting the steaming and flow before switching cartons.
Why do you start pouring high and then bring the pitcher close?
A higher pour mixes milk into espresso and raises the liquid level without leaving a white mark on the surface. A low pour lets foam spread across the top, where your side-to-side movement forms the leaves. The height change is the key switch between mixing and drawing.
How hot should milk be for a rosetta?
Many baristas aim for roughly 55–65°C (130–150°F), though taste and equipment differ. A thermometer helps while you learn, but avoid overheating milk until it tastes flat or scalded. Use a temperature that feels pleasant to drink.
Can you make a rosetta without espresso?
You can practice the pouring movement over another dark, foamy liquid, but espresso crema provides the contrast and surface for classic latte art. A cup with a rounded bowl also helps the milk spread into a balanced pattern. Without a steam wand, it can be hard to create the same smooth microfoam.
Does a rosetta make coffee taste better?
The design itself does not change flavor. Espresso quality, milk temperature, and milk texture matter more to how the drink tastes and feels. A rosetta is mainly visual, though the smooth milk needed for one can give the drink a silky texture.
Conclusion
Remember the pour as three motions: mix from high, draw from low, and finish with a fine line. Start with smooth milk and a centered cup, then let your wiggle stay small and steady.
Your first rosetta may look like a feather caught in a breeze. Keep the cup, milk, and movement consistent, and each new leaf will show you what to adjust.