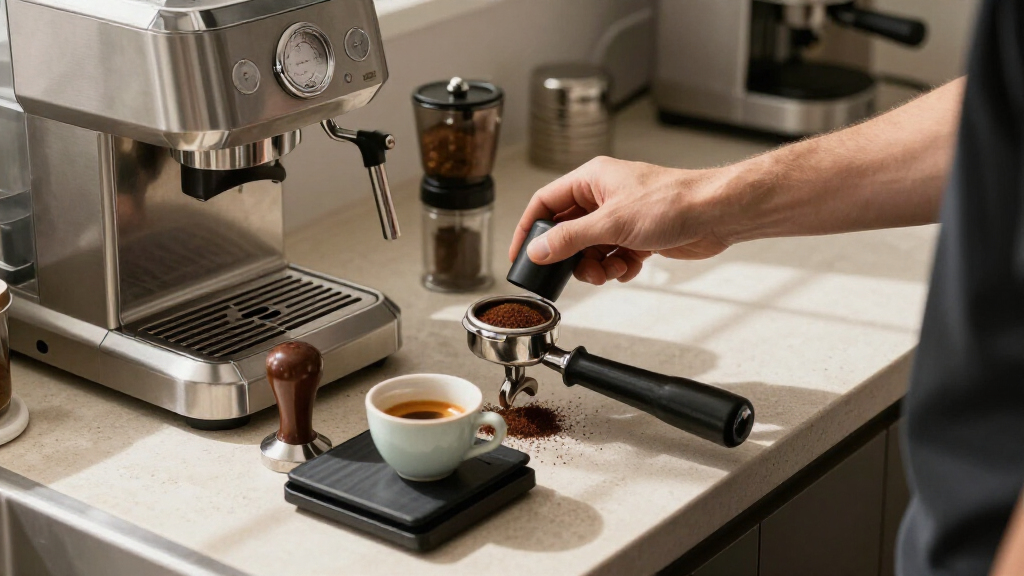

TL;DR
Inconsistent espresso is normal when you’re learning: grind, dose, yield, coffee freshness, water, and puck preparation all affect the cup. Start with a measured recipe such as 18 grams of coffee to 36 grams of espresso, then adjust one variable at a time and let taste—not a fixed shot time or crema—guide you.
Your espresso machine can make a shot that tastes sour on Monday and bitter on Tuesday, even when you swear you did the same thing. That’s normal for a new home barista: small changes in grind, coffee freshness, dose, and puck preparation can shift the whole cup.
This guide walks you through the first ten espresso mistakes and gives you a clear way to correct each one. You’ll build a repeatable routine, learn what your shot is telling you, and stop treating every uneven cup as proof that you’re doing it all wrong.
Use beans with a roast date when possible; resting time after roasting varies by coffee and roast.
Start with a measured 1:2 recipe, such as 18 grams in and about 36 grams out, then adjust to taste.
Change one variable at a time and log dose, yield, time, grind, and flavor.
Treat shot time and crema as clues, not proof that espresso is good or bad.
Distribute grounds evenly, tamp level, clean coffee and milk parts, and use water suited to your machine.
The First Ten Espresso Mistakes Every New Home Barista Makes
Sour on Monday, bitter on Tuesday — even when you swear you did the same thing. That’s normal. Grind, dose, yield, freshness, water, and puck preparation all shape the cup. This guide gives you a repeatable routine and a clear fix for each mistake.
Ten Mistakes, Ten Fixes
Using Stale Coffee
Coffee loses aroma after roasting; old beans make a flat, lifeless shot even with good technique. Look for a roast date and give fresh beans a short rest — the ideal rest varies by coffee and roast.
Fix → Check the roast date before grinding finerWrong Grind Size
Grind controls how fast water moves through the puck. Too fast means thin and sour; too slow means harsh and bitter. Adjust in small steps — a tiny grind change has a big effect.
Fix → Sour? Finer. Bitter? Coarser. Small steps onlyChanging Everything At Once
If you change grind, dose, and yield together, you’ll never know what helped. If the next cup improves — or gets worse — you won’t know which lever moved it.
Fix → Hold variables steady, adjust one, taste, logDosing By Eye
A small difference in grounds changes how the basket fills and how water flows. Weigh your dry coffee and finished espresso with a scale — tare the cup, stop near target yield.
Fix → 1:2 ratio as a launch point, not a ruleTreating Shot Time As The Goal
A 22-second shot that tastes sweet and balanced beats a 30-second shot forced finer until it chokes and turns bitter. Use time as a clue alongside dose and yield.
Fix → Taste decides; time is feedback, not a testTamping Like A Strength Test
Pressing as hard as possible is unnecessary. A level, repeatable tamp builds an even puck; a tilted press sends water through the bed unevenly even when dose and grind match.
Fix → Level and consistent beats hardLeaving Clumps In The Basket
Clumps let water find easy paths — channeling — extracting some areas fast while leaving others raw. The result tastes confusingly both sharp and harsh.
Fix → Break up clumps, distribute evenly, then tampNeglecting The Machine
Old grounds and coffee oils on the basket, portafilter, and shower screen taint fresh shots with stale flavors. Descale according to the maker’s guidance.
Fix → Clean coffee-contact parts after every sessionIgnoring Water
Water makes up most of the drink. Very hard or very soft water affects both flavor and machine health. Use clean, suitable water for your setup.
Fix → Follow machine guidance on water chemistryRushing Milk Steaming
Start with cold milk and a clean, correctly positioned wand. Stretch briefly, then create a smooth whirlpool. Scrape-later crusts are harder than wipe-now habits.
Fix → Stretch, whirlpool, purge and wipe immediatelyMeasure, Don’t Guess
“Start with a measured 1:2 recipe — 18 grams in, about 36 grams out — then adjust one variable at a time and let taste, not a fixed shot time or crema, guide you.”
Log every shot: dose, yield, time, grind setting, and flavor. That little log turns guesswork into a trail you can follow — the simplest way to make inconsistent espresso less mysterious.
The Shot Routine, Step By Step
Fresh Beans
Roast date checked, sealed storage, ground just before brewing.
Dose & Weigh
18 g in the basket, scale ready, cup tared.
Distribute & Tamp
Break clumps, level bed, comfortable repeatable press.
Pull & Stop
Stop near 36 g yield; note the time as a clue.
Taste & Log
Adjust one variable, then compare the next shot.
What Your Shot Is Telling You
| Symptom | Likely Cause | First Move | Verdict |
|---|---|---|---|
| Sharp, thin, sour — done in 20 s | Under-extraction · grind too coarse | Grind a touch finer, keep dose & yield steady | Adjust grind |
| Bitter, harsh — crawls out slowly | Over-extraction · grind too fine | Go slightly coarser, taste again | Adjust grind |
| Both sharp AND bitter, spurting | Channeling · clumps, uneven puck | Improve distribution, keep dose & grind steady | Fix the puck |
| 22 s but sweet and balanced | Nothing — time is a clue, not a rule | Leave it alone; log and repeat | Good shot |
| Flat, lifeless despite good recipe | Stale beans | Check roast date before changing settings | Fresh coffee |
| Great shot yesterday, off today | Puck prep or freshness drift | Check tamp level & routine before the grind | Compare & learn |
Remember: crema is a clue about freshness, not proof of quality. Judge the drink by its flavor. Sourness suggests under-extraction; bitterness suggests over-extraction — but roast style and coffee choice shape flavor too.
Choose coffee that still has flavor to give
Freshness matters because coffee loses aroma over time, and beans that have been sitting for ages can make a flat, lifeless shot even with good technique. Look for a roast date when you can, and give freshly roasted beans a short rest before brewing; the right rest varies with the coffee and roast.
For example, if a new bag tastes dull despite a sensible recipe, check its roast date before grinding finer or changing three other things. Crema can offer a clue about freshness, but crema alone does not prove quality. Judge the drink by its flavor.
Store beans sealed in a cool, dry place and grind just before brewing. There’s no single freshness countdown that fits every coffee, so taste a few days apart and see how yours develops.
Use the grind to steer a shot that tastes sour or bitter
Grind size controls how quickly water moves through the coffee, so it’s the first place to look when a shot runs too fast or too slowly. A quick, thin shot can taste sour; a very slow shot can turn harsh or bitter, though roast style and coffee choice also shape those flavors.
If your espresso tastes sharp and watery, make the grind a little finer, keep the rest of the recipe steady, and taste again. If it crawls out and tastes bitter, go slightly coarser. Make small adjustments; a tiny grind change can have a big effect.
Every grinder and coffee behaves differently, so there isn’t one universal setting for espresso. Keep notes on your setting and result. That little log turns guesswork into a trail you can follow.
Change one thing at a time so you can learn from each shot
The quickest way to lose track of a recipe is to change grind, dose, and yield all at once. If the next cup improves, you won’t know which change helped; if it gets worse, you won’t know what to undo.
Try this: your first shot tastes sour and finishes in 20 seconds, so you grind a touch finer while keeping the dose and yield the same. The next shot takes longer and tastes sweeter. You’ve learned something useful, even if it still needs a small tweak.
Write down the dose, yield, time, grind setting, and taste. Keep most of them steady while you adjust one. This is one of the simplest ways to make inconsistent espresso less mysterious.
Measure dose and yield instead of trusting the basket by eye
Weighing your dry coffee and finished espresso makes a shot easier to repeat. A useful starting recipe is a 1:2 ratio: 18 grams of ground coffee in, about 36 grams of espresso out. Different coffees and preferences call for different ratios, so treat that number as a launch point rather than a rule.
A small scale makes the routine clearer: tare your cup, start the shot, and stop it near your target yield. If you dose by eye, a small difference in grounds can change how the basket fills and how the water flows.
Suppose your 18-gram shot tastes too intense at 36 grams out. Try a little more yield, then taste. The goal is a cup you enjoy and can make again—not a number that wins a guessing game.
Read shot time as feedback, not a pass-or-fail test
A brew time around 25–30 seconds is a common starting reference, but it does not define a good shot by itself. Coffee, machine, basket, recipe, and grind all affect the clock, so taste should decide whether your espresso is working.
If your shot takes 22 seconds but tastes sweet and balanced, don’t force it to hit 30 by grinding finer. You might choke the flow and make it bitter. Likewise, a shot that reaches 30 seconds can still taste thin or harsh.
Use time alongside dose and yield as a clue. When that 18-to-36-gram shot suddenly takes much longer than usual, check whether the grind moved finer or the basket received more coffee before changing your whole setup.
Tamp level and steady; extra force won’t rescue the shot
A consistent, level tamp helps create an even puck, but pressing as hard as possible is unnecessary. Focus on a stable bed of coffee and a tamp that sits flat; repeatability matters more than muscle.
Imagine tamping one shot with the handle tilted, then the next with a straight press. Water may pass through those pucks differently, even if your grind and dose match. Settle the grounds evenly, hold the tamper level, and press with a comfortable, repeatable motion.
If one day’s espresso tastes different despite the same recipe, check your puck preparation before adding more pressure. Your tamp is part of a routine, not a strength test.
Spread clumps before they create easy paths for water
Clumps and uneven grounds can give water easier paths through the coffee, a problem called channeling. Water under pressure follows those weak spots, extracting some parts of the puck quickly while leaving other areas less extracted. The result can taste confusingly both sharp and harsh, so changing the grind alone may not solve it.
Before tamping, break up visible clumps and spread the grounds evenly across the basket. This gives water a more uniform bed to pass through and makes your recipe more predictable. A simple, repeatable distribution routine is enough; elaborate movements can add inconsistency without improving the coffee bed.
If you see spurting or your shot tastes both sharp and bitter, uneven flow may be part of the problem. Keep dose and grind steady, improve distribution, and compare the next shot. That comparison helps you tell whether puck preparation was contributing before you make further adjustments.
Clean the parts that touch your coffee and milk
Old grounds and coffee oils cling to the basket, portafilter, and shower screen, where they can leave stale, unpleasant flavors in a fresh shot. Clean the basket and portafilter regularly, keep the shower screen clear, and follow your machine’s instructions for maintenance.
After making a latte, wipe the milk wand and purge it promptly so milk residue doesn’t dry inside or on the tip. That quick habit is easier than scraping off a crust later. For example, build it into the same motion as putting your pitcher aside.
Descale according to the machine maker’s guidance and your water conditions. Cleaning removes coffee and milk residue; descaling addresses mineral buildup. Both help protect flavor and the machine.
Use clean, suitable water for better flavor and machine care
Water makes up most of the drink, so its taste and mineral content affect both your espresso and your machine. Use clean water that suits the machine, and follow the maker’s guidance; very hard or very soft water can cause flavor or equipment problems.
If your tap water tastes strongly of chlorine or minerals, that flavor can show up in your cup. Try water recommended for your machine and compare the result without changing your coffee recipe at the same time.
Water temperature and pressure also affect extraction, but home machines vary in how much control they give you. Start with the manufacturer’s instructions before chasing temperature changes to fix a shot that may simply need a grind adjustment.
Steam milk in two calm stages, then clean the wand
For smoother steamed milk, start cold, use a clean wand, stretch the milk briefly, then create a steady whirlpool. The first stage adds air; the whirlpool folds that air into the milk until it looks glossy and smooth.
Picture a morning latte: you place the wand tip near the surface just long enough to hear a gentle paper-tearing sound, then lower it slightly to spin the milk. Stop when the pitcher feels hot but comfortable to handle, and wipe and purge the wand right away.
Milk steaming takes practice, so don’t expect silky foam on the first attempt. If you make drinks for someone with allergies, check the milk and any alternative carefully for allergens and cross-contact, and keep the wand clean between different milks.
Keep a simple recipe card beside the machine
A short recipe card turns scattered advice into a routine you can actually use. Write down your coffee, dose, yield, time, grind setting, and one taste note; change one variable on the next shot and record what happened.
For instance: “18 g in, 36 g out, 24 seconds, sour finish.” On the next attempt, adjust the grind slightly finer and keep the other numbers steady. Now the cup teaches you something, even if you still need another small change.
This is why measurement and a grinder with fine adjustment often help more than buying extra accessories. Your recipe belongs to your beans and machine, so let it move when the flavor tells you to.
Frequently Asked Questions
What grind size should I use for espresso?
Start with a fine grind, then adjust in small steps until the shot flows and tastes balanced on your machine. If it runs quickly and tastes sour or thin, try finer; if it runs very slowly and tastes harsh, try coarser.
How much coffee should I put in an espresso basket?
Check the basket’s intended capacity, then weigh your dose for consistency. A common starting example is 18 grams in and about 36 grams out, but the right amount depends on your basket and recipe.
How long should an espresso shot take?
Roughly 25–30 seconds is a common starting reference, not a universal target. Machine, coffee, basket, dose, and yield all affect time, so use the clock alongside taste.
Why does my espresso taste sour or bitter?
Sourness can point to a shot that extracted too little, while bitterness can suggest too much extraction, but roast style and coffee choice also affect flavor. Adjust one variable at a time—often grind first—and taste again.
Does thick crema mean my espresso is good?
No. Crema’s appearance depends partly on coffee freshness and composition, so it is not a reliable quality score on its own. Judge the shot by its flavor and balance.
Conclusion
When a shot goes wrong, keep your recipe steady and change one thing at a time. Measure the coffee, taste the cup, and let that feedback guide your next small adjustment.
After a few mornings, the machine’s hiss and the first dark ribbon of espresso will feel less like a mystery and more like a conversation you know how to follow.