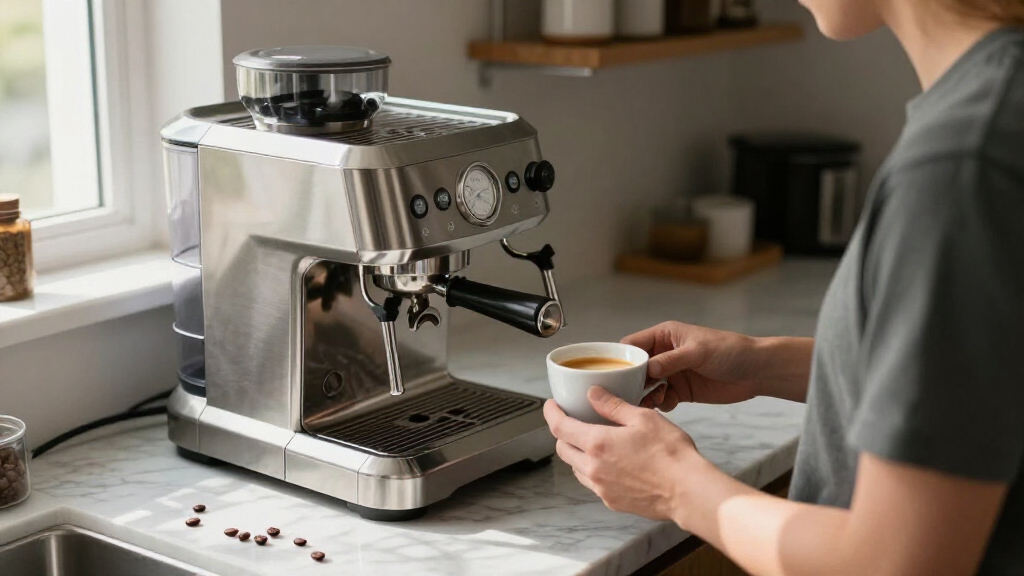

TL;DR

Get coffee and tea gear delivered free — and shop member deals
- Fast, free delivery on millions of items
- Access to Prime Big Deal Days deals on October 6–7
- Prime Video, Amazon Music and more included
Espresso depends on multiple variables working together, not just one rule of thumb. Busting common myths helps beginners dial in better shots faster. Focus on technique, fresh coffee, and small adjustments.
Pulling a perfect shot of espresso isn’t just about following a set of rules. It’s about understanding that espresso is a delicate balance of many factors working in harmony. Yet, many beginners get stuck chasing myths that lead to bitter, sour, or weak shots.
In this guide, you’ll learn which myths to ignore, why they’re misleading, and what real adjustments will actually improve your espresso. Get ready to turn your mornings from frustrating to flavorful—without falling for common misconceptions.
Ignore myths that suggest more pressure or finer grind alone guarantees better espresso.
Focus on technique—consistent dosing, tamping, distribution—and the quality of your coffee.
Timing is a guideline, not a fixed rule; taste and adjustment matter more than seconds.
Crema isn’t a quality indicator—judge your espresso by flavor, aroma, and mouthfeel.
Start with a simple, repeatable recipe and tweak one variable at a time for best results.
The beginner’s field guide · Coffee / 01
Espresso Myths That Keep Beginners Pulling Bad Shots
A great shot comes from several variables working together. Leave the rigid rules behind: build a repeatable recipe, make small adjustments, and let taste lead the way.
01 / The myth check
Six rules worth questioning
Each shortcut leaves out another part of extraction. Use the correction as a starting point, then adjust one variable and taste the result.
“Finer is always better.”
Finer grounds can slow a fast shot. Go too fine and water struggles to flow, risking a choked shot and harsh, uneven flavors. Adjust in small steps.
“Dark beans make the best espresso.”
Espresso is a brewing method, not a roast level. Dark roasts can be bold; lighter roasts can show brighter acidity and origin character. Choose for taste.
“Crema proves the shot is good.”
Crema can reflect freshness and pressure, but it does not measure flavor. Judge the cup by balance, sweetness, acidity, aroma, and body.
“More pressure means better.”
Many machines are designed around roughly 9 bars. Higher pressure cannot fix poor distribution or an unsuitable grind, and may encourage channeling.
“Every shot takes 30 seconds.”
Time helps compare shots; it is not a universal target. A 25–35 second window can start a recipe, but flavor decides the next adjustment.
“Tamp as hard as possible.”
A firm, level tamp creates a stable puck. Extra force adds little once the grounds are compressed; evenness matters more than brute strength.
02 / Read the shot
Use time as a clue. Use taste as the verdict.
A recipe helps you compare one attempt with the next. When a shot misses, change one thing at a time so you can tell what helped.
18 g in → 36 g out
A common 1:2 starting ratio, often reached in about 25–35 seconds. Coffee, grinder, basket, and machine all affect the result.
Follow the flavor
A quick, sour shot may benefit from a slightly finer grind or a longer yield. A bitter shot may need a coarser grind or a shorter yield. Change one variable, then taste again.
Keep the comparison fair: Hold dose and other settings steady while testing a single adjustment. A stopwatch gives context; it cannot tell you whether the shot tastes balanced.
03 / Diagnose the whole puck
Channeling has more than one cause
Water follows the easiest route through coffee. Clumps, cracks, uneven dosing, poor distribution, and a tilted tamp can all create weak paths—not just grind size.
Dose consistently
Use a repeatable amount of coffee for each shot.
Distribute evenly
Break up clumps and level grounds before tamping.
Tamp level
Make a stable, flat puck with firm, even pressure.
Adjust and taste
Change one recipe variable and compare the cup.
04 / More myths, quick answers
Good espresso does not require a perfect setup.
Equipment can add consistency and control, but it cannot replace a sound routine. Start with the tools you have and learn what the coffee needs.
Pressurized is not cheating
It can help with pre-ground coffee and entry-level grinders. A standard basket offers more control when grind and preparation are consistent.
A reading is not the whole story
The gauge may show pump or system pressure rather than pressure at the coffee puck. Know what your machine measures.
Price does not equal flavor
A capable grinder can improve consistency. Fresh coffee, clean equipment, and repeatable technique matter greatly too.
“Espresso beans” are still coffee
The term often describes a roast or blend chosen for espresso. Any coffee can be brewed this way; recipes vary by bean.
Very fresh can be tricky
Fresh beans release gas. That can make dialing in less predictable, so give the coffee time and follow how it extracts.
More control is optional
Flow and pressure profiling, lighter roasts, and longer ratios expand possibilities. A simple recipe remains a useful first step.
05 / Take it to the counter
A simple routine beats a stack of rules
Ignore claims that finer grind or higher pressure alone guarantees better espresso.
Prioritize fresh coffee, consistent dosing, even distribution, and a level tamp.
Treat shot time as a comparison point, not a fixed pass-or-fail standard.
Assess flavor, aroma, sweetness, acidity, and body instead of judging crema alone.
Begin with a repeatable recipe and change one variable at a time.
Keep the coffee you enjoy; different beans can call for different recipes.
Why Finer Grind Isn’t Always Better
Many believe that grinding finer will always improve espresso. While a finer grind can slow down a shot that runs too quickly, overdoing it causes problems. Excessively fine grounds can choke the machine, leading to uneven extraction and harsh flavors.
Think of it like squeezing a sponge: crush it too much, and water can’t flow. The key is small, incremental tweaks. Start with a slightly finer grind, then taste and adjust. Remember, a good shot depends on the right balance, not just the fineness of the grind.
Focusing solely on grind size without understanding its effects can lead to a cycle of trial and error. Too fine, and you risk over-extraction, which results in bitter, astringent flavors. Too coarse, and under-extraction produces sourness and weak body. The tradeoff is that fine-tuning requires patience and understanding of how small changes impact extraction. This nuanced approach prevents you from chasing extremes and encourages a more mindful, effective dialing-in process.
espresso coffee grinder for beginners
As an affiliate, we earn on qualifying purchases.
As an affiliate, we earn on qualifying purchases.
Dark Roasts Are Not Always the Best for Espresso
Many assume that dark, oily beans make the best espresso. But espresso is a brewing method, not a roast level. Dark roasts tend to taste bold and smoky, but lighter roasts can offer brighter acidity and more nuanced flavors.
Imagine brewing a light roast like making a delicate tea—more subtle, more complex. A dark roast might be like a strong coffee stout—bold but sometimes overwhelming. The choice depends on your taste and the coffee’s origin.
Understanding how roast level influences flavor helps you make better choices. Light roasts preserve the beans’ original characteristics—fruity, floral, bright—while dark roasts emphasize roasted notes like chocolate and smokiness. The tradeoff is that lighter roasts can be trickier to extract properly because of their density and acidity, requiring more precise control over grind and extraction parameters. Recognizing this allows you to match roast profiles to your brewing technique and flavor preferences, rather than relying on stereotypes about roast ‘strength.’
As an affiliate, we earn on qualifying purchases.
Crema Is Not a Quality Measure
Crema often gets mistaken for the sign of a good shot. But it’s more of a visual cue—indicating freshness and pressure, not flavor. A shot with thick, frothy crema can taste flat or sour, while a well-balanced shot might have little to no crema.
Picture a sparkling wine versus a still one. The bubbles don’t tell you about quality—only the experience. Similarly, crema isn’t the full story of a good espresso.
Focusing solely on crema can lead to misguided judgments about your coffee. For example, a shot with abundant crema might be over-extracted or lack complexity, while a shot with minimal crema can be rich and nuanced. Instead, prioritize tasting—look for balance, sweetness, acidity, and body. Recognizing that crema is just one aspect of visual appearance helps you develop a more sophisticated palate and avoid falling into the trap of equating foam with quality.
As an affiliate, we earn on qualifying purchases.
More Pressure Isn’t Always Better
Many think that increasing brew pressure will improve espresso. In reality, most machines are calibrated around 9 bars, and more pressure can cause issues. Excessive pressure may lead to over-extraction or channeling—where water finds weak spots in the puck.
Imagine trying to squeeze a sponge with a firehose; too much force ruins the flow. Modern espresso profiles often vary pressure intentionally, but fixed high pressure isn’t a magic fix.
Focusing on consistent tamping, grind size, and dose is more effective. High pressure can mask technique flaws temporarily, but it doesn’t address the root causes of extraction issues. The tradeoff is that relying solely on pressure can create a false sense of control, leading to inconsistent results. Proper technique ensures you’re optimizing the variables that truly influence flavor, rather than chasing a number that might do more harm than good.
As an affiliate, we earn on qualifying purchases.
Timing Isn’t a Hard Rule for Great Espresso
Many believe a shot should always take around 25-30 seconds. But timing is a guideline, not a rule. A shot that takes 20 seconds can taste fantastic, while a 35-second shot might be dull or bitter.
Think of timing like a recipe’s suggested baking time—use it as a starting point, then taste. Adjust based on how the coffee tastes, not just the stopwatch.
For example, if your shot is sour and quick, aim to extend the extraction slightly by grinding finer or increasing yield. If it’s bitter or over-extracted, stop earlier or use a coarser grind. The key is that timing alone doesn’t guarantee quality—flavor balance and personal preference are paramount. Small adjustments to timing should be guided by taste, not strict seconds, because every coffee and machine responds differently. Recognizing this tradeoff allows you to develop a more intuitive, responsive approach to dialing in your espresso.
Tamping Harder Won’t Make It Better
Many believe pressing down hard on the grounds improves extraction. But once you’ve compressed the coffee into a stable puck, extra force doesn’t help. Overly firm tamping can cause uneven flow, leading to channeling and weak spots.
Think of tamping like leveling a table—firm and even is best. The goal is a uniform surface, not crushing the coffee into a brick.
For example, if your shot is inconsistent, try a firm, level tamp rather than pressing as hard as possible. A good tamp is about control, not brute strength. Excessive tamping can increase resistance unevenly, causing water to find the path of least resistance and resulting in uneven extraction. The tradeoff is that over-tamping can also make it harder to achieve the right flow rate, leading to under- or over-extraction. Focus on consistent, even pressure—enough to create a flat, compact surface—rather than brute force, which can introduce more problems than it solves.
Channeling Isn’t Just a Grind Problem
Channeling occurs when water finds weak spots in the coffee puck, leading to uneven extraction. It’s often blamed solely on grind size but is also caused by uneven distribution and tamping.
Imagine pouring water over uneven terrain—water finds the easiest path. To prevent this, distribute grounds evenly, tamp firmly and level, and use tools if needed.
For example, a quick fix for channeling is to distribute grounds carefully using a finger or a distribution tool before tamping. This helps water flow evenly and improves shot consistency. Recognizing that channeling results from multiple factors encourages a holistic approach—paying attention to even distribution, proper tamping, and consistent grind size—rather than focusing on one variable alone. This comprehensive perspective reduces the likelihood of weak spots and promotes more uniform extraction, leading to better, more predictable shots.
Pressurized Baskets Are Not Cheating — They’re Useful
Some see pressurized baskets as a shortcut or cheat. But they’re helpful for beginners or with inconsistent grind sizes. They help create a more forgiving extraction and can compensate for less-than-perfect tamping or grind uniformity.
Think of them as training wheels—you can still make good espresso, but upgrading to a standard basket gives more control over quality as your skills improve.
For example, if your grinder can’t produce consistent grounds, a pressurized basket can help you avoid sour or bitter shots while you learn proper technique. They can also be useful in environments where conditions are less predictable, such as outdoor setups or busy cafes. Recognizing their role as a learning aid rather than a shortcut encourages a more patient, skill-building approach, leading to better long-term results.
The Pressure Gauge Isn’t the Full Story
The pressure gauge on your machine shows pump pressure, not the pressure experienced by the coffee puck. It’s useful for troubleshooting, but not a complete picture of shot quality.
Think of it like a car’s speedometer—helpful but not telling you everything about how the engine runs. Focus on consistency, taste, and shot timing more than the gauge alone.
For example, if you see a high pressure reading but the shot tastes off, check grind size and tamp instead of just trusting the gauge. Remember, the actual pressure during extraction is influenced by multiple variables, including puck resistance and machine calibration. Relying solely on the gauge can lead to misinterpretation and incorrect adjustments. Prioritizing sensory evaluation—taste, texture, and timing—provides a more accurate, holistic understanding of your espresso’s health.
Expensive Equipment Isn’t a Guarantee of Better Coffee
Many assume that a pricier machine or grinder automatically makes better espresso. But technique, fresh coffee, and cleanliness often matter more. A good grinder can dramatically improve consistency, regardless of price.
Imagine a chef using a simple knife vs. an expensive one—sharpness and technique matter more than cost. The same applies to espresso gear.
For example, a decent burr grinder from a reputable brand often delivers more consistent grounds than a fancy machine with a poor grinder. Focus on what truly impacts flavor—your process and coffee quality. Investing in good technique and fresh beans will always outperform spending solely on high-end equipment that isn’t used correctly or maintained well. It’s about maximizing your current tools before upgrading, ensuring you get the best possible results with what you have.
Any Coffee Can Be Brewed as Espresso
The myth that only special ‘espresso beans’ exist is false. Any coffee can be brewed as espresso if you adjust grind, dose, and extraction parameters. It’s about how you prepare it, not just the beans.
For example, a bright, fruity Ethiopian roast can become a vibrant shot with the right grind and timing. Conversely, dark roasts tend to be more forgiving because of their density and roasted profile, making them easier for beginners to dial in. Recognizing that all beans have potential for espresso—given proper technique—encourages experimentation and broadens your coffee horizons. The tradeoff is that some beans may require more precise adjustments to shine, but with patience, nearly any coffee can be transformed into a satisfying shot.
Recent Tech Advances Make It Easier, Not Easier to Fail
New tools like flow profiling, temperature control, and distribution aids give more control but can also tempt beginners to overthink. Remember, a simple, consistent process beats complex gear every time.
Imagine trying to tune a high-performance sports car before learning to drive—better to master the basics first. Focus on steady technique, fresh coffee, and recording your results.
For example, use a straightforward recipe and small adjustments rather than chasing every new gadget. Over-reliance on advanced technology can lead to analysis paralysis, where the focus shifts from understanding fundamental variables to obsessing over minute details. The tradeoff is that complex tech can sometimes obscure basic principles if not used thoughtfully. Developing a solid foundation in core skills ensures that you can leverage new tools effectively, rather than becoming overwhelmed or misled by their capabilities.
How to Dial in Your Espresso: The Simple Starting Point
- Start with a standard dose—say 18 grams of coffee.
- Use a brew ratio of 1:2—aim for about 36 grams of espresso.
- Begin with a shot time around 25–30 seconds.
- Adjust grind size to hit that timing; finer to slow, coarser to speed.
- Record your settings and tasting notes, then tweak based on flavor.
This method gives you a solid baseline. From there, small adjustments will improve your shot, not radical changes.
Frequently Asked Questions
What is a good espresso recipe for beginners?
Start with 18 grams of coffee and aim for a 1:2 ratio—about 36 grams of espresso. Use a brew time of 25–30 seconds as a guideline, then adjust grind size and yield based on taste. Record your settings and taste notes to learn what works best.
Why does my espresso taste sour?
Sour taste often means under-extraction. Try grinding a little finer, increasing the yield slightly, or ensuring your machine and coffee are properly heated. Taste is the best guide—adjust until the shot balances acidity with sweetness.
Why does my espresso taste bitter?
Bitter flavors usually indicate over-extraction or too fine a grind. Try grinding a bit coarser, stopping the shot earlier, or reducing the dose slightly. Remember, flavor depends on balanced extraction, not just time or pressure alone.
How can I fix a shot that runs too fast?
Finesse the grind to make it finer, increase the dose slightly, or tamp a bit more evenly. Small, incremental changes help slow the shot and improve flavor. Don’t rush—dialing in takes patience.
How fresh should espresso beans be?
Beans need time after roasting to release excess gas—about 3-7 days for optimal flavor. Fresh beans can be tricky to dial in, but once rested, they produce more consistent and vibrant shots. Store them in an airtight container away from light.
Conclusion
Pulling great espresso isn’t about chasing myths or magic variables. It’s about mastering the basics—using fresh coffee, consistent technique, and small adjustments based on taste. This approach turns the process into a craft, not a guessing game.
Next time you brew, remember: the best shot comes from understanding that espresso is a balance, not a battle of rules. Focus on steady progress, and your mornings will never be the same.
Fall Picks
fall essentials
As an affiliate, we earn on qualifying purchases.