
TL;DR

Get coffee and tea gear delivered free with Prime
- Fast, free delivery on millions of items
- Prime Video, Amazon Music and more included
- Member-only deals all year
Latte foam collapses because liquid drains from the thin films around its bubbles, while bubbles merge, rise, and pop. Fine, glossy microfoam tends to hold its texture longer than coarse bubbles, but all foam changes as your latte sits and you sip; that’s normal, not automatically a sign of spoiled milk or bad coffee.
You set down a beautiful latte, take two sips, and look back to find the foam already sinking. That quick change can feel like a barista mistake, but latte foam is a delicate structure, not a permanent lid. Its tiny bubbles are already draining and shifting while you drink.
Understanding why foam collapses helps you tell normal settling from foam that was too coarse or poorly steamed. You’ll learn what milk proteins do, why temperature and sipping matter, and how to get smoother foam at home without chasing a cap that never changes. The practical goal is fine, glossy microfoam that tastes good and holds together long enough to enjoy.
Foam naturally loses volume as liquid drains, bubbles merge, and bubbles pop.
Fine, glossy microfoam tends to feel smoother and hold together better than large, coarse bubbles.
Milk protein, fat, plant-drink ingredients, steaming technique, and temperature all affect the result; no single milk guarantees the longest-lasting foam.
At home, start with cold milk, add air gently, create a whirlpool, avoid overheating, and pour promptly.
Foam collapse alone does not mean milk is spoiled or that a latte was made badly.
Why does latte foam collapse before you finish?
Latte foam collapses because liquid drains from the thin films around its bubbles, and those bubbles gradually merge or burst. Milk proteins help hold air in place, but they cannot stop this movement indefinitely. A few minutes of sitting, a swirl of the cup, or several sips can make the foam settle faster.
During steaming, air enters the milk and proteins gather around the new air bubbles. These proteins, especially casein and whey proteins, help form the bubble walls. Think of each bubble as a tiny soap-film balloon: the wall holds for a while, but the liquid inside the surrounding foam keeps moving downward and back into the drink.
As those films thin, nearby bubbles can join into larger ones, a process called coalescence. Bigger bubbles tend to rise toward the surface and pop, leaving less foam behind. If you’re chatting over a latte for ten minutes, the shrinking cap is usually just the drink changing as expected.
This is why the answer to “why foam collapses” isn’t simply “bad milk.” Drainage, merging, and popping are ordinary parts of foam’s life. A latte is mostly liquid milk with a relatively thin layer of microfoam, so even attractive foam can look less substantial before you finish.
Products Worth Considering

DeLonghi Rivelia Automatic Espresso Machine Bundle with Grinder and Frother, Beige

Cuisinart 14-Cup Food Processor with 720-Watt Motor, Stainless Steel (DFP-14BCNY)

Cuisinart CPZ-120 Indoor Pizza Oven, Stainless Steel
As an affiliate, we earn on qualifying purchases.
How do milk proteins hold bubbles together?
Milk proteins help stabilize latte bubbles by gathering around the air–liquid boundary as you steam milk. They make the thin films between bubbles more resistant to breaking, though those films still drain over time. That balance is the reason properly textured milk can look glossy without behaving like a solid topping.
During steaming, the wand pulls air into the milk and mixes it through the liquid. Casein and whey proteins help coat the bubbles, while the movement from the steam wand distributes them. When you tap and swirl the pitcher, you break up bigger bubbles and make the milk look smooth, like wet paint rather than shaving cream.
Imagine two pitchers after steaming. One has a handful of large, visible bubbles that pop when you tap the counter; the other looks uniformly shiny, with no obvious bubbles. The second pitcher usually pours more smoothly and gives a more integrated mouthfeel because its bubbles are smaller and more evenly dispersed.
That doesn’t mean the longest-lasting foam is always the best foam. A very stiff cap may sit for a long time but feel dry and separate from the espresso. Fine microfoam can settle gradually and still make the latte taste silky. The useful test is the texture in the cup, not a foam layer that refuses to move.
What makes glossy microfoam last longer than big bubbles?
Glossy microfoam usually holds together better because it has small, even bubbles instead of a few large, fragile pockets of air. Smaller bubbles create a smoother texture and are less likely to rush to the surface and pop at once. They still drain and change, but the cup often stays pleasant for longer.
Coarse foam is easy to spot: it can look dry, lumpy, or like a layer of bubbles sitting above the milk. A spoonful may feel airy and quickly vanish. By contrast, well-integrated microfoam looks shiny in the pitcher, pours in a steady ribbon, and blends with espresso instead of landing as a separate mound.
For example, if your first sip has a thick, dry cap that breaks apart while the milk below feels thin, your steaming likely added too much air or didn’t mix the bubbles evenly. If the surface is smooth and the first sip feels creamy, the foam is doing its job even if its height changes by the time you reach the bottom.
There’s a tradeoff: more foam volume doesn’t mean better foam. Extra air can produce a taller drink that looks impressive for a moment but has coarse bubbles that collapse quickly. Baristas generally aim for a fine texture that supports pouring and flavor, rather than maximum height. That’s why foam is not a stable cap, even when the drink starts out looking perfect.
How do milk choice and temperature change the result?
Milk composition and steaming temperature both affect foam, but neither offers a guaranteed shortcut to a lasting cap. Protein helps stabilize bubbles, while fat contributes to creaminess and mouthfeel. The result depends on the milk and how you steam it, so “more fat means more foam” isn’t a reliable rule.
Whole milk often gives a rich, creamy texture, while lower-fat milk may produce foam that feels lighter. But a well-steamed pitcher of one isn’t automatically better than the other. If you make two lattes with the same espresso and technique, you may notice the difference more in the mouthfeel than in how long the visible layer lasts.
Heat matters, too. Steaming changes how milk proteins behave, and overheating can harm flavor and foam quality. Very hot milk can taste flat or scalded, while milk that hasn’t been properly heated and textured may lack a smooth, stable feel. A thermometer can help at home; many coffee recipes aim for roughly 55–65°C (131–149°F), though your equipment and preferred taste may call for small adjustments.
Plant-based drinks vary because their ingredients differ. Barista-style oat or soy drinks are formulated to steam more consistently, often using a balance of proteins, oils, and stabilizers. One oat drink may pour beautifully while another separates sooner. Check the carton’s storage directions, refrigerate it after opening, and judge foam by the actual result—not the plant name on the label.
How can you make smoother foam at home?
You can improve foam longevity by making smaller, more evenly mixed bubbles rather than simply adding more air. Start with cold, fresh milk and give it a clean pitcher; introduce air gently at the beginning, then move the wand to circulate and smooth the milk. This approach won’t freeze the foam in place, but it helps avoid a cap of large bubbles that disappears almost immediately.
- Start cold. Pour cold milk into a clean pitcher, leaving room for it to expand. Use only what you need for the drink.
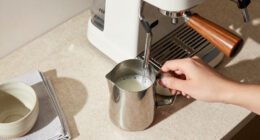
- Add air briefly. Keep the wand near the surface at the start so you hear a soft, controlled hiss rather than loud spluttering.
- Build a whirlpool. Lower the wand slightly and position it to circulate the milk. This breaks up larger bubbles and creates a smoother texture.
- Stop before overheating. Use a thermometer if you’re learning, and avoid heating milk until it tastes cooked. Temperature control supports flavor as well as texture.
- Tap, swirl, and pour promptly. A quick tap can pop large surface bubbles; swirling blends the milk. Pour soon after steaming, before it separates in the pitcher.
For instance, if you steam a small pitcher for a single latte and leave it on the counter while you pull another shot, the milk may separate before it reaches the cup. A quick swirl can bring it back together, but a long wait gives drainage more time to work. Serve promptly for the best texture.
Use clean equipment and fresh milk, and store milk according to its label—typically refrigerated at 4°C (40°F) or below. Foam collapse alone doesn’t tell you whether milk has spoiled. If milk smells sour, looks unusually lumpy, or was stored unsafely, don’t taste it to check; discard it. Milk is an allergen, and plant-based drinks may contain allergens such as soy, so check ingredient labels when serving others.
Why do sipping, pouring, and waiting speed up foam collapse?
Sipping and moving the cup speed up foam changes because they disturb the boundary between foam and liquid milk. Foam is already draining while the latte sits, and each tilt sends milk through the bubbles. A stir, a long walk with the cup, or a slow series of sips adds more movement.
The pour also shapes how the drink starts out. A steady pour can blend microfoam into the espresso, while a clumsy pour may leave a thick cap on top and thin milk below. That cap can look substantial at first, but it is still made of bubbles and liquid films. When you tip the cup, the foam shifts and mixes into the drink.
Picture a latte you carry from a busy café counter to an outdoor table. The walk itself won’t instantly erase good foam, but sloshing and repeated movement can disturb the layers. If you take it straight to your desk and let it sit, drainage still happens; if you keep swirling it, you add another source of disruption.
Time and movement work together, not as separate explanations. A latte left untouched for a few minutes can settle gently, while one you swirl repeatedly may lose its distinct foam layer sooner. Neither pattern proves the drink was made incorrectly. It simply explains why the foam looks different at the end than it did in the first photo.
How can you tell normal settling from a steaming problem?
Normal settling happens gradually; a steaming problem often shows up as coarse, dry bubbles that vanish almost at once. Some foam loss is expected in every latte because liquid drains and bubbles break. The useful clue is the texture at the start and how it tastes, not whether a cap remains untouched until the last sip.
Suppose your latte begins with a shiny surface, pours in a smooth ribbon, and tastes creamy. If the foam thins as you drink, that’s ordinary. Now suppose the pitcher is covered in large bubbles, the pour drops clumps into the cup, and the foam disappears before you finish the first few sips. That points more toward poor texturing or too much air than toward the natural settling process alone.
Foam collapse is not a dependable freshness test. Milk that is spoiled or stored badly should be assessed through clear spoilage signs and handling, not by how long its bubbles last. If it has an off smell or unusual texture, discard it; if the milk was left outside safe refrigeration for too long, follow food-safety guidance and don’t rely on reheating to make it safe.
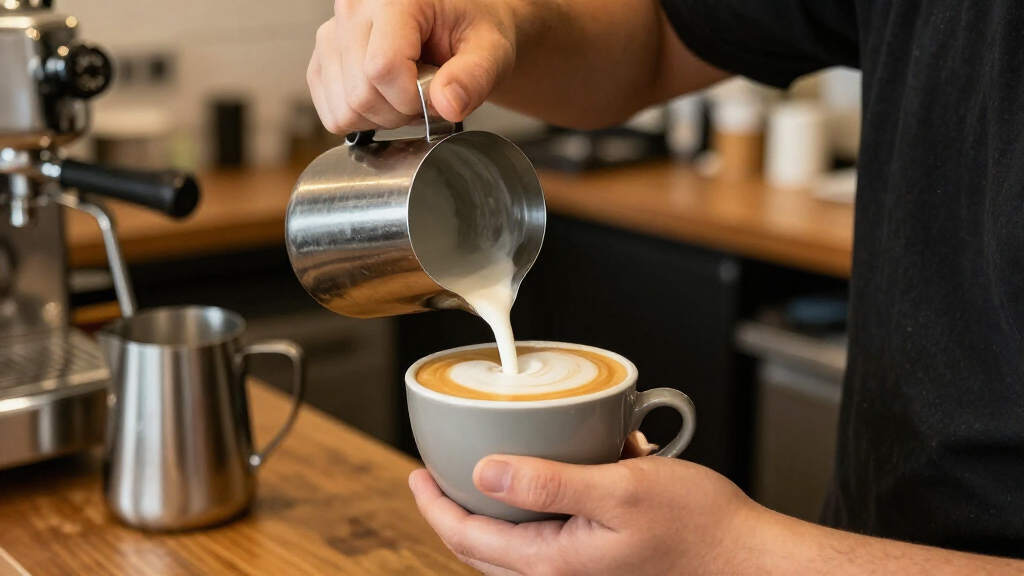
Latte art doesn’t promise longer-lasting foam, either. It shows that the milk and pour had a useful texture at that moment, but the finished pattern still changes as the drink sits. Think of the heart or rosetta as a snapshot, not a seal over the cup.
Frequently Asked Questions
Why does my latte foam disappear so fast?
Liquid drains from the thin walls around bubbles, and some bubbles merge or pop. Large, coarse bubbles may vanish especially quickly, while sipping and moving the cup can speed up mixing. A smooth, glossy surface at the start usually points to better-textured foam.
Does foam collapsing mean my milk is spoiled?
No. Foam naturally drains and settles, so collapse by itself is not a freshness test. Check for an off smell, unusual texture, or unsafe storage, and discard milk if you have a reason to suspect spoilage.
Does whole milk make better latte foam than skim milk?
Not in every way. Protein helps stabilize bubbles, while fat changes richness and mouthfeel, and steaming technique has a large effect on the result. Different milks can make good foam with different textures.
Why does barista-style plant milk foam better?
Barista-style plant drinks are formulated to steam and foam more consistently, often with ingredients that affect protein, fat, and stability. Results still vary between products, so use the carton’s storage directions and see how your chosen drink behaves in your machine.
Does hotter milk make foam last longer?
Not necessarily. Heat changes milk proteins, but excessive heat can hurt flavor and foam quality. Controlled steaming and even bubbles matter more than simply pushing the temperature higher.
Can latte art tell me whether foam will last?
Latte art shows that the milk was pourable and textured well enough to make a pattern at that moment. It does not guarantee the foam will stay unchanged; drainage and sipping still alter the drink.
Conclusion
Expect latte foam to change as you drink. The best fix for foam that disappears immediately is usually better texturing—small, glossy bubbles—not a taller cap or hotter milk. Start with cold milk, steam gently, and pour while the pitcher is smooth.
A latte is a living little mix of bubbles and milk, not a glass dome. Enjoy the silky first sip, even if the foam has settled by the last.