
TL;DR

Get coffee and tea gear delivered free with Prime
- Fast, free delivery on millions of items
- Prime Video, Amazon Music and more included
- Member-only deals all year
Latte art success is roughly 80% milk preparation: cold whole milk (3.25–4% fat), air injected in the first 3–5 seconds of steaming, a vortex to texture the foam, and a target temperature of 140–150°F (60–65°C). If the milk isn’t glossy and paint-like before you pour, no pouring technique will save the rosetta.
You’ve watched the tutorials. You’ve tilted the cup, wiggled the wrist, gone high then low. And still — a brown puddle with a white smudge where the heart should be.
Here’s the part nobody puts in the thumbnail: the pour only reveals what the steam wand already created. If your milk is bubbly, overheated, or sitting around separating, you could have the wrist of a champion barista and your rosetta will still look like a Rorschach test. Roughly 80% of latte art happens in the pitcher, not in the cup.
In this guide, you’ll learn the milk prep that actually matters: which milk to buy, what temperature to hit (and what happens when you blow past it), how to hear the difference between good air and bad air, and how to fix the most common failures. No gear roundups. Just the stuff that changes what lands in your cup tomorrow morning.
Use cold whole milk (3.25–4% fat, straight from the fridge at 34–40°F) — fat gives gloss, the ~3.3% protein content builds the foam structure.
Inject air only in the first 3–5 seconds (a quiet paper-tearing hiss), then submerge the tip to create a vortex — target 20–30% volume growth for latte art.
Stop steaming at 140–150°F (60–65°C); above 155°F sweetness declines, and above 170°F the foam collapses and the milk tastes cooked.
Knock, swirl, and pour within a minute — steamed milk separates in roughly 1–2 minutes, killing your texture.
Steam with beans 7–21 days post-roast so the crema gives your art a brown canvas worth drawing on — and practice with water plus a drop of dish soap to save mi…
Why Whole Milk Wins: The Fat and Protein Behind Glossy Foam
Latte art starts with what’s in the carton: whole milk at 3.25–4% fat is the gold standard because fat stabilizes foam and produces the glossy, creamy microfoam that latte art demands. Skim and 2% foam up faster — less fat means less resistance — but the foam is airier, drier, and collapses before you finish your pour. You get volume without structure. Think of the difference between whipped cream and shaving cream: both are mostly air, but only one holds a shape worth looking at.
Protein does the other half of the work. Milk contains about 3.3% protein, and the whey fraction — especially a protein called β-lactoglobulin — unfolds at around 140°F (60°C) and forms thin films around each air bubble. Those films are the walls of your microfoam. Imagine millions of tiny water balloons: the protein film is the rubber, and the air inside is the payload. Thin, flexible walls mean small bubbles that flex and flow; damaged or insufficient walls mean bubbles that pop and merge. No protein, no structure; no fat, no gloss and body.
This is also why fat-free milk is a trap for beginners. It seems easier — it foams in half the time — but that speed works against you. The window between “perfectly stretched” and “over-stretched meringue” shrinks from several seconds to barely one, and the resulting foam is so dry it sits on the espresso like a lid rather than folding into it. If you’re learning, whole milk doesn’t just give better results; it gives you more room to make mistakes while you calibrate your ear.
Temperature at the start matters too. Cold milk straight from the fridge (34–40°F / 1–4°C) buys you extra seconds of steaming time before you hit your target temperature. It’s simple physics: milk starting at 35°F takes twice as long to reach 145°F as milk starting at 70°F, and that extra runway is exactly when air injection and vortexing happen. Milk that’s already warm gives you almost no working window — the equivalent of trying to merge onto a highway with fifty feet of on-ramp.
Fill your pitcher with just enough milk for the drink plus a little margin — the surface should sit around the base of the spout groove. Overfill and you’ll spray the counter by second four; underfill and the vortex can’t form properly because there isn’t enough mass to keep spinning. For a standard 12 oz latte, that’s roughly 6–8 oz of milk in a 12 oz pitcher.
Plant Milks Ranked: Which Ones Can Actually Pour Art
Not all dairy alternatives behave like milk, and the differences are stark: barista-edition oat milk is the clear winner for latte art, while standard almond and soy milks often split, curdle, or produce foam that vanishes mid-pour. The secret behind “barista” formulations is added lipids and proteins that mimic what dairy fat and whey do naturally — stabilize bubbles and add creaminess. In other words, barista editions aren’t a marketing gimmick; they’re an engineered patch for the exact structural problem this article has been describing.
| Milk | Foam Quality | Art Definition | Notes |
|---|---|---|---|
| Barista oat | Excellent, glossy | Crisp, high contrast | Best dairy-free option; steams like whole milk |
| Barista soy/almond | Good when formulated | Decent | Standard versions often split in hot espresso |
| Regular almond | Thin, short-lived | Poor | Foam dissolves before the pour finishes |
| Coconut (carton) | Variable | Weak | Often separates at high heat |
Why does standard almond fail so spectacularly? It’s mostly water with a small fraction of almond solids and almost no protein to build bubble walls — so the foam you do get is structurally closer to soap suds than microfoam. A concrete scenario every dairy-free barista eventually hits: you steam regular almond milk, it looks acceptable in the pitcher, and then the moment it hits hot espresso the acidity and heat split it into curdled flecks floating in grey liquid. The rosetta you attempted is now a smudge on a science experiment. Barista almond avoids this with added stabilizers, but it still lags behind oat for texture.
Oat wins for a subtler reason: its natural starches and added lipids give the steamed milk a viscosity remarkably close to whole dairy, so the pouring skills you build transfer directly. The tradeoff is flavor — oat milk’s natural sweetness can read slightly cereal-like against a delicate single-origin espresso, so if your beans are floral and tea-like, a barista soy may actually complement them better. Match the milk to the coffee, not just to the leaderboard.
If you’re dairy-free, don’t fight the carton — buy the barista version. It costs a dollar or two more, and it’s the difference between a rosetta and a grey swirl. (And a note for allergy households: oat and almond milks carry their own allergen concerns, so check labels if you’re making drinks for others.)
How to Steam Milk in Four Steps (and What Each One Should Sound Like)
Steaming for latte art is a two-phase process — air in, then spin — and most of it is taught by ear. Here’s the sequence:
- Purge the wand. Blast steam for a second before the pitcher goes anywhere near it. Condensation and old milk in the tip end up in your drink otherwise — and sour milk residue in the wand is a genuine hygiene risk, not just a flavor problem.
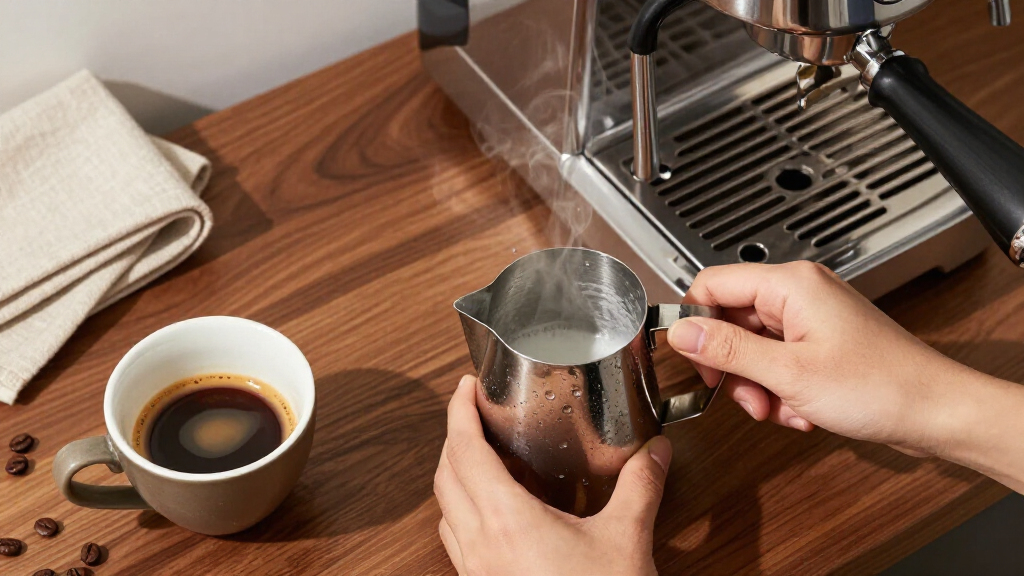
- Stretch (first 3–5 seconds only). Keep the steam tip just below the surface so it pulls in air. You want a subtle paper-tearing hiss — quiet, like tearing a sheet of paper. Loud splattering means the tip is too high; silence means you’re not adding air at all. Aim for a volume increase of about 20–30%, less than you’d use for a cappuccino.
- Texture (the vortex). Submerge the tip a centimeter deeper to create a whirlpool. The vortex shreds big bubbles into microfoam. Listen for the hiss disappearing into a low, steady rumble — that’s your milk spinning.
- Stop at 140–150°F (60–65°C). By touch, that’s a pitcher that’s hot but you can hold for a two-count. Clip a thermometer on until your hand learns the feeling.
On a home machine, the whole thing takes 5–10 seconds of air and roughly 20–40 seconds total for a small drink. Faster than most people expect — which is exactly why so much milk gets scorched.
The Temperature Cliff: What 155°F Does to Your Milk
Milk has a narrow sweet spot: 140–150°F (60–65°C) is where flavor, sweetness, and foam stability all peak. Push past about 155°F (68°C) and the sweetness starts dropping as sugars break down and proteins destabilize. Past 170°F (77°C), the foam structure collapses and you taste it — flat, cooked, vaguely cardboard-flavored milk that no amount of swirling rescues.
This is the single most common home mistake. People steam until the pitcher is too hot to touch at all, chasing “coffee shop hot,” and wonder why their art looks grey and their latte tastes burnt-sweet in a bad way.
Repeat after me: hot enough to enjoy, cool enough to drink immediately. A drink you can sip right away at 145°F is the professional standard, not a compromise.
There’s a bonus reason to stay in range: milk held above 140°F for extended periods keeps cooking itself, so temperature discipline also protects flavor if you’re pulling shots between steaming and pouring. And leftover steamed milk? Don’t re-steam it — the proteins have already done their unfolding once, and a second pass gives you flat, gritty foam and dull flavor. Steam fresh or not at all.
The Swirl Test: How to Know Your Microfoam Is Ready
Perfect latte-art milk has one texture: glossy, paint-like, “wet paint” consistency with no visible bubbles. Tilt the pitcher and it should move like heavy cream pouring off a spoon — shiny on the surface, uniform all the way through.
Here’s the pre-pour ritual every barista runs, and it takes about ten seconds:
- Knock the base of the pitcher firmly on the counter once or twice to pop any surface bubbles.
- Swirl the milk in a smooth circle — the surface should spin like wet paint, keeping its shine. If the shine breaks up into matte patches, keep swirling.
- Pour immediately. Milk starts separating within a minute or two of steaming. Foam rises, liquid sinks, and your texture is gone.
If you’re not ready to pour — maybe your espresso shot is still pulling — keep swirling. Motion is the only thing holding the emulsion together. Set the pitcher down and walk away, and you’ll come back to a foam layer sitting on top like a bad toupee.
Thickness matters as much as gloss. Foam that’s too thick sits on the espresso like meringue and won’t pour crisp lines. Too thin, and it won’t hold any form at all — your tulip smears into a ghost. The 20–30% volume gain from your stretching phase is the target that puts you in the middle.
Your Espresso Base Sets the Canvas (Yes, It Counts as Milk Prep Adjacent)
The espresso is the other half of the contrast equation: latte art is white foam on brown crema, and stale crema turns your canvas grey. Beans between 7 and 21 days post-roast produce the thick, reddish-brown crema that makes white lines pop. Older than that, the crema thins out and even perfect milk looks muddy against it.
Think of it like drawing on paper: fresh crema is a sheet of dark construction paper — every white chalk line reads sharply. Stale-crema espresso is that same drawing on wet newspaper; the ink bleeds, the contrast dies, and no amount of technique compensates. A concrete example: the same day-old bag of beans that poured a crisp, high-contrast rosetta on Monday will pour a washed-out, greyish heart by the following month, even if your milk prep is identical. Nothing about your technique changed — the canvas did.
Why the 7-day floor, though? Ultra-fresh beans (1–3 days off roast) are still degassing aggressively, and that rapid CO₂ release agitates the crema into a bubbly, unstable layer that breaks apart when milk hits it. The 7–21 day window is the plateau where degassing has slowed but oils and soluble compounds are still abundant — the sweet spot where crema is both thick and stable.
A well-extracted shot matters too, because extraction and crema quality are linked. Under-extracted shots are pale and sour-tasting with weak crema — the white foam has nothing dark to contrast against, so your art reads faint even when the milk is perfect. Over-extracted ones are dark and bitter with patchy foam on top, which gives you a canvas full of holes. Aim for a shot that pours like warm honey and settles into a rich, hazelnut-brown surface. The tradeoff to know: chasing a darker, “bolder” shot for stronger contrast usually backfires — bitterness rises faster than contrast, and you sacrifice the drink itself for the drawing on top.
And sequence your workflow around the milk, not the other way around: pull the shot, steam the milk while it settles, swirl, then pour within seconds of both being ready. Crema fades fast too — a shot sitting for two minutes while you fight with the steam wand gives you a dull canvas. Both elements are perishable; latte art is essentially a small logistics problem of getting two expiring ingredients to meet at their peaks.
Fix These Five Milk Failures Before Blaming Your Pour
Almost every bad pour traces back to a milk prep error, not a wrist error. Match your symptom to the fix:
| Symptom | Likely Cause | Fix |
|---|---|---|
| Foam full of big bubbles | Air added too long, too late, or no vortex | Air in first 3–5 sec only; submerge tip to spin |
| Art looks grey or muddy | Over-steamed milk, old milk, stale crema, or milk that sat too long | Stay under 150°F; steam fresh cold milk; fresh beans; pour promptly |
| White blobs, no definition | Foam too thick (over-stretched) | Aim for 20–30% volume growth, not cappuccino foam |
| Art vanishes immediately | Foam too thin, or low-fat milk | Add a touch more air; switch to whole milk |
| Foam separates before pouring | Milk sat still after steaming | Knock, swirl, and pour within a minute |
Here’s what a couple of these look like in real life, because the table alone can be abstract. Grey and muddy is the classic “I did everything the tutorial said” failure: you steamed to 160°F without realizing it, the milk hit the cup looking dull instead of glossy, and the white pattern blended into brown instead of standing on top of it. The lesson hidden in that symptom: grey art is almost never a pour problem — it’s a temperature or freshness problem wearing a pour problem’s clothes.
White blobs with no definition is its opposite number: the milk foamed so thick it behaves like melted marshmallow. You drop into the cup, the foam plops rather than flows, and instead of a tulip you get a stack of featureless white circles. That’s over-stretching — you kept the hiss going for ten seconds instead of four. The fix is purely about shortening the air phase, and once you feel the difference between 25% and 45% volume growth, you’ll never confuse them again.
Want to practice the steaming motion without burning through a gallon of milk? Steam water with a single drop of dish soap — it foams and textures just like milk, so you can drill the hiss-then-vortex pattern for free. Your neighbors may wonder about the dish soap lattes; your rosetta will thank you.
One last hygiene note: wipe and purge the steam wand immediately after every use. Dried milk inside the tip is a bacterial risk and it will eventually block the wand — a two-second habit that protects both your health and your machine.
Frequently Asked Questions
What’s the ideal milk temperature for latte art?
The target is 140–150°F (60–65°C). That range maximizes sweetness and foam stability — whey proteins have unfolded enough to stabilize bubbles, but sugars haven’t broken down yet. Above 155°F sweetness declines, and above 170°F the foam collapses entirely.
Why does my milk foam have big bubbles?
Three usual causes: you added air for too long (past the first 3–5 seconds), the steam tip sat too high and splattered, or you never built a vortex to shred the bubbles. Fix it by stretching briefly with a quiet paper-tearing hiss, then submerging the tip to spin the milk, and knocking the pitcher on the counter before swirling.
Can I make latte art with skim or 2% milk?
You can, but it’s harder. Lower-fat milks foam easily yet produce airier, less stable foam that struggles to hold crisp lines. Whole milk (3.25–4% fat) gives glossy, creamy microfoam — if you’re learning, whole milk removes one variable from an already tricky skill.
Which plant milk is best for latte art?
Barista-edition oat milk performs best — the added lipids and proteins mimic dairy’s foam-stabilizing role. Standard almond and soy milks often split or produce foam that disappears mid-pour, so look for “barista” on the label whatever the base.
Can I re-steam milk that’s already been steamed?
No. The proteins have already unfolded once, so a second steam pass gives you flat, gritty foam and dull, cooked flavor. Steam only what you need, fresh from the fridge — and practice your technique with water and a drop of dish soap if you’re burning through too much milk.
Conclusion
Next time a pour goes wrong, don’t rewatch the wrist tutorial. Ask what happened in the pitcher: Was the milk cold and whole? Did the air go in during the first five seconds? Did you stop at 145°F, swirl to wet-paint gloss, and pour immediately? Fix any one of those and your art improves overnight — fix all of them and even perfect pouring technique finally has something to work with.
The pour is just the reveal. The latte art was decided the moment your steam wand went quiet.
Halloween Picks
halloween
As an affiliate, we earn on qualifying purchases.