TL;DR

Get coffee and tea gear delivered free with Prime
- Fast, free delivery on millions of items
- Prime Video, Amazon Music and more included
- Member-only deals all year
After vacation, empty and rinse the water reservoir, refill it with fresh drinking water, inspect the machine, and flush the group head and applicable outlets according to the manual. Clean the coffee-contact parts, clear stale grounds from the grinder, then pull a test shot and adjust your grind if needed; descale only when your machine’s guidance and water conditions call for it.
Your espresso machine can look perfectly ready after a trip and still send stale water and old coffee residue into your first cup. A few calm checks can get the water flowing, freshen the coffee path, and help you spot a real problem before you start making drinks.
This guide walks you through what to do after vacation before pulling espresso again: inspect the machine, refresh the water, flush the outlets, clean the parts that touch coffee, and reset your expectations for the first shot. The exact procedure depends on your machine, so use its manual for filters, priming, backflushing, and descaling.
You probably don’t need a full overhaul just because you were away for a week. If the machine sat clean in a warm kitchen, your restart may take only a few minutes. A damp portafilter left in place, milk residue, a long absence, or freezing storage calls for a closer look.
Inspect for leaks, damage, and cold-storage problems before switching the machine on.
Empty and rinse the reservoir, then refill it with water suited to your machine.
Flush the group head and relevant outlets according to the manual; use the specified priming procedure if the machine ran dry.
Clean coffee-contact parts and clear stale grinder grounds before judging the first shot.
Adjust grind gradually after tasting a test shot; don’t descale or backflush unless your machine’s guidance calls for it.
Back from vacation?Restart your espresso machine safely
Refresh the water, clear stale coffee residue, and check that the machine works normally before brewing. Follow your machine’s manual for model-specific care.
A calm restart, in order
Work through the basics before judging your first shot.
Check for leaks, loose hoses, damage, and cold-storage concerns. Clean the drip tray and used-coffee container.
Empty and rinse the reservoir, refill with suitable fresh water, and check the filter or plumbing as directed.
Once heated, flush the group head and applicable outlets. Use the manual’s priming procedure if the machine ran dry.
Wash coffee-contact parts, clear stale grinder grounds, then pull a test shot and adjust the grind gradually.
What deserves a closer look?
Storage conditions and leftover residue can change how much attention the restart needs.
- Machine left clean and dry
- Fresh reservoir water and steady flow
- Removable coffee parts rinsed and clean
- Grinder cleared before dialing in
- Possible freezing or visible damage
- Leaks, burning smell, or unusual pump noise
- Machine ran dry or lost its water supply
- Milk residue or damp grounds left behind
Keep cleaning machine-specific
A restart is not automatically a full maintenance cycle.
Use water that suits the machine
Fresh water helps flavor, while mineral content affects scale. Check the manual for water and filter guidance.
Backflush only when recommended
Not every machine supports backflushing. Use only the procedure and cleaner specified by the manufacturer.
Skip unnecessary descaling
Descaling depends on water hardness, filter use, and machine guidance; incorrect treatment can cause problems.
Dial in with a test shot
Use your usual recipe as a starting point, then respond to what the coffee shows.
Watch the flow and taste before deciding what to change.
Bean age, humidity, and time away can affect extraction. A brief warm-up or a couple of test shots may be needed.
Start with a quick check before you switch the machine on
After vacation before pulling espresso again, inspect the machine and the space around it before you plug it in or start a brew cycle. Look for leaks, loose hoses, damage, and anything left in the drip tray; if the machine was moved or stored somewhere cold, let it reach room temperature first. This simple check can catch a loose connection before water reaches your counter.
Empty and wash the drip tray and used-coffee container, then check for old grounds around the group head and portafilter. A puck left damp in a basket can smell sour, and a full tray can spill as soon as you flush water through the machine. For example, if you returned from a long weekend to find the portafilter locked into the group, remove it and inspect the basket instead of assuming it is clean.
If the machine spent time in a cold garage or cabin, give it time to warm up naturally before powering it on. Freezing temperatures can damage water-filled components, so don’t run a machine that may have frozen; check the manual or contact a qualified technician. Also stop if you see a leak, smell burning, or hear the pump running strangely.
A quick inspection is not a substitute for service when something looks wrong. But when the machine is dry, undamaged, and at room temperature, you can move on to the part that most affects the first cup: fresh water.
Products Worth Considering

Instant Pot Duo Crisp 8-Quart 11-in-1 Air Fryer and Pressure Cooker

Vitamix 64 oz Low-Profile Blender Container with SELF-DETECT, BPA-Free

KitchenAid Artisan 5-Quart Tilt-Head Stand Mixer, Blue Velvet
As an affiliate, we earn on qualifying purchases.
Refresh the water instead of trusting what sat in the reservoir
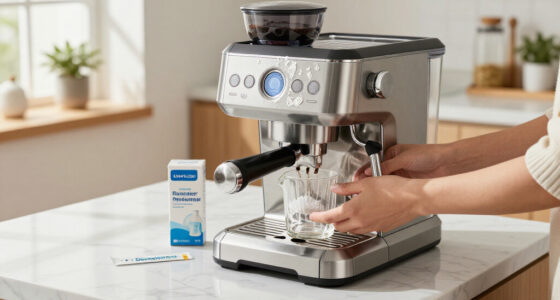
Empty and rinse the reservoir, then refill it with fresh drinking water before brewing. Water left standing can pick up stale tastes, and a clean-looking tank doesn’t tell you whether the water tastes fresh or whether its filter is still within the maker’s recommended service period. This is a small task with an outsized effect on the first cup.
Remove the reservoir and rinse it with clean water; if it needs washing, follow the machine’s instructions and use a method the manual allows. Refill it with water that suits your machine’s specifications. Water quality affects both flavor and mineral scale, but bottled, distilled, or softened water is not automatically right for every model. Check the manual for its hardness range or filtration advice.
If your machine uses a reservoir filter, reinstall or replace it according to the manufacturer’s directions. Don’t judge a filter by appearance: it can look spotless and still be past its recommended life. If your machine connects directly to the plumbing, check that the supply is open and inspect the connection for drips before you brew.
Imagine returning after ten days away and topping up the old reservoir without rinsing it. The machine might pull a shot, but the water has been sitting there the entire trip. A fresh fill removes that uncertainty and gives you a better starting point for judging the coffee.
Flush the group head and outlets before your first shot
Once the machine has fresh water, heat it as directed and run water through the group head and the outlets you plan to use. This flush moves standing water out of the internal pathways and lets you check whether the machine is drawing water normally. Use the manual’s procedure and amount, since a small home machine and a plumbed-in model may work differently.
Start with the machine at its normal brewing temperature, then run water through the group head into a cup or the sink. If your model has a hot-water outlet or steam wand, flush those too, following its instructions. For instance, if you regularly make a flat white, clearing the steam wand before steaming helps remove water that sat inside the wand while you were away.
If the machine ran dry, was drained, or lost its water supply, don’t assume a normal flush will prime it. Follow the manufacturer’s priming directions instead. If the pump runs unusually, water does not flow, or the machine leaks, stop and troubleshoot using the manual rather than repeatedly running the pump.
A flush is a practical reset, not a promise that every part is clean or serviced. You are clearing water from the pathways and checking basic function. Once flow looks steady and the machine heats as usual, turn to the coffee-contact parts before you start pulling espresso again.
Clean the parts that can make your espresso taste stale
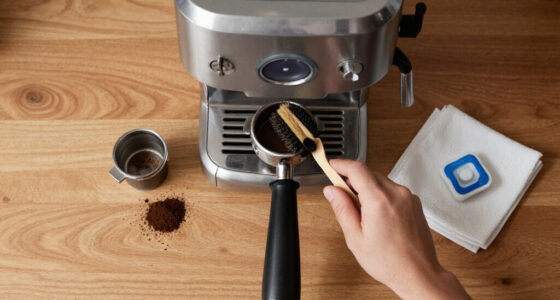
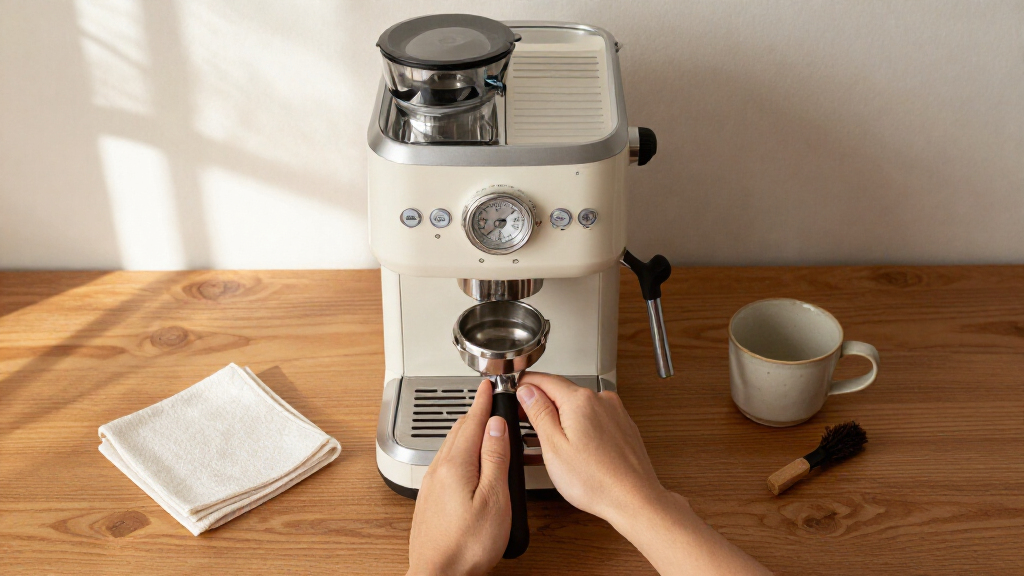
Wash the portafilter, basket, drip tray, and any removable brew parts before making coffee. Brush loose grounds away from the group head and wipe the shower screen as your manual recommends; old coffee oils can leave a bitter, stale smell even when the machine looks tidy. These are the surfaces most likely to carry yesterday’s coffee into today’s shot.
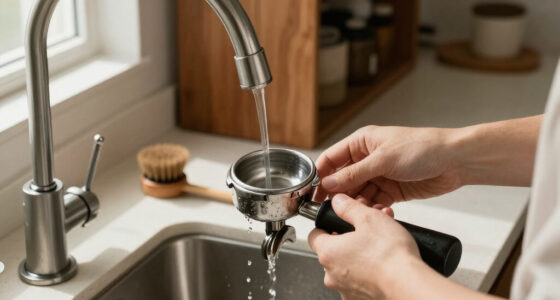
For example, a portafilter left on the counter may seem harmless, but a film of coffee oil can cling to the basket and affect the taste of a fresh shot. Rinse removable parts and dry them with a clean towel. Avoid soaking or applying cleaner to components unless the maker says they can take it.
Backflushing is not a universal restart step. Some machines support it, while others do not; use a cleaning product and procedure only when the manufacturer recommends them. A machine-specific cleaning prompt can help, but it doesn’t replace the manual or a quick visual check for old grounds.
Milk equipment needs its own attention if you left milk residue behind. Clean the wand using the machine’s usual procedure before steaming milk, and discard any milk that was left out. Old milk residue is a hygiene issue, not just a flavor problem, so don’t try to cover it with a new drink.
Reset your grinder and beans before judging the machine
Before pulling espresso again, clear old grounds from the grinder’s chute and any accessible burr area using the manufacturer’s directions. If grounds sat in the chute during your trip, grind a small amount and discard it; those leftovers can taste flat and muddy a fresh dose. Don’t take apart the grinder unless its manual explains how.
Beans left in a hopper may not become unsafe during a short absence, but they can lose freshness and change how a shot behaves. If you returned after a few weeks and the beans smell muted, taste stale, or have been exposed to heat and sunlight, use fresher beans when you can. Coffee is a food product, so store it dry and sealed, away from heat and moisture; discard it if it shows signs of mold or has been contaminated.
A familiar recipe may also need a small grind adjustment. Bean age, humidity, and grounds retained in the grinder can change how quickly water passes through the coffee. Imagine your usual shot suddenly running in 20 seconds instead of 30: that alone doesn’t prove the machine is broken. Check the beans, dose, and grind first.
Keep changes small and adjust one variable at a time. If you change the beans, grind, dose, and tamp all at once, you won’t know which change helped. A clean grinder and a fresh dose give your test shot a fair chance.
Pull a test shot and adjust without chasing every difference
Start with your usual dose and recipe, then watch the shot’s flow and taste before deciding what to change. A first shot after time away may run differently because the machine is warming, the beans have aged, or the grinder retained stale grounds. One imperfect shot is not a diagnosis; look for a pattern across a couple of shots.
Use this simple sequence to get a useful baseline:
- Warm the machine as the manual directs, and flush the group head if that is part of its normal routine.
- Prepare a fresh dose using your regular basket, dose, and distribution method.
- Pull one shot and note its flow, time, and taste without changing several settings at once.
- Make one small grind adjustment if the shot runs unusually fast or slow, then taste again.
Say your usual shot is about 30 seconds, but the first one runs quickly and tastes thin. If the dose and puck preparation were normal, adjust the grind a little finer and pull another. If flow remains erratic, check that the basket is seated, the group head is clean, and water flow is steady before assuming a fault.
Keep hands and face clear of hot water and steam while testing. Espresso machines operate at high temperatures, and steam can burn quickly. When you are making drinks with milk, keep milk refrigerated until use, steam only what you need, and discard milk that has been left out too long.
Know when a short restart is enough—and when it isn’t
A machine left clean and dry for a few days usually needs less attention than one stored with damp grounds, milk residue, or a full reservoir for a long stretch. The length of your trip matters, but so do storage conditions, water hardness, and whether the machine was drained or disconnected. Choose maintenance based on those details rather than on a calendar alone.
Use the machine’s reminders and manual as your guide for filter changes and descaling. Newer models may show filter-life or cleaning prompts, but an indicator does not replace a leak check or fresh-water rinse. Descaling too often, using the wrong product, or following another model’s instructions can cause problems; don’t descale automatically just because you returned from vacation.
A useful rule of thumb: a week away in a warm kitchen with a clean machine calls for fresh water, a flush, and clean coffee parts. A long absence in a hard-water area, or a machine that ran dry or sat in freezing conditions, deserves closer attention and manufacturer-directed maintenance. If scale is already affecting flow, follow the machine’s specific descaling schedule instead of improvising.
Consider two machines on the same counter: one was emptied and wiped before a three-day trip; the other has a full tank, a used puck, and milk splashed around its wand after several weeks away. They should not get the same restart routine. Match the care to what actually happened, and call a qualified technician if the machine leaks, smells burnt, or refuses to prime.
Use this quick checklist when you want coffee without guesswork
The most reliable routine keeps the essentials in order: inspect, refresh, flush, clean, and test. It takes only a few minutes when the machine is in good shape, and each step answers a different question: Is it safe to run? Is the water fresh? Do the outlets flow? Are old residues out of the way? Does the shot behave normally?
- Inspect: Check for leaks, damage, loose hoses, and cold-storage concerns; empty the drip tray and used-coffee container.
- Refresh: Rinse the reservoir, add fresh drinking water, and check the filter or plumbed-in connection.
- Flush: Run water through the group head and applicable outlets according to your manual.
- Clean: Wash removable coffee-contact parts, clear loose grounds, and clean milk equipment if needed.
- Test: Clear stale grinder grounds, pull a shot, and make small adjustments only after you taste it.
Picture a Monday morning after a week away: you rinse the tank, warm the machine, flush the group head, and notice water flowing steadily. You wash a portafilter basket that has a faint coffee smell, clear a little old grind from the chute, then pull a test shot. That routine gives you a much better read than pushing the brew button immediately and blaming the machine for a flat first cup.
Keep the manual handy for anything beyond those basics. Your model may have a unique priming method or may not support backflushing at all. A short checklist helps you restart confidently; it is not a reason to ignore a warning light or keep operating a machine that shows signs of damage.
Frequently Asked Questions
Do I need to flush my espresso machine after a week away?
Usually, yes: run fresh water through the group head and any outlets you use, following your machine’s manual. This clears water that sat in the pathways and lets you check that flow looks normal. The recommended procedure varies by model.
Should I descale before using the machine again?
Not just because you were away. Descale according to the machine’s schedule and guidance, taking your water hardness and filter use into account. Using the wrong descaler or an unnecessary cycle can cause problems in some machines.
Can I use the water that was left in the reservoir?
For the best taste, empty and rinse the reservoir, then refill it with fresh drinking water. Check your manual for the water type and hardness range your machine accepts. Don’t assume that distilled, bottled, or softened water suits every model.
Do I need to backflush after a vacation?
Only if your machine supports backflushing and its manufacturer recommends it. Use the specified method and compatible cleaner. For other machines, clean the parts the manual identifies instead.
Why does my first shot run too fast or too slowly?
Bean freshness, retained grounds, grind size, and normal puck preparation can all affect flow. Pull another shot after checking your dose and distribution, then change one variable—usually grind—at a time. A single unusual shot does not automatically mean the machine has a fault.
What should I do if the machine won’t draw water after the trip?
Check that the reservoir is full and seated correctly, or that the plumbed-in supply is open. If the machine ran dry or lost water, follow its priming instructions. Stop if the pump sounds unusual, the machine leaks, or you smell burning, and contact the manufacturer or a qualified technician.
Is it safe to turn on a machine that was stored somewhere freezing?
Let a cold machine return to room temperature before powering it on. If water inside may have frozen, don’t run it until you have checked the manufacturer’s instructions or spoken with a qualified technician, since ice can damage internal components.
Conclusion
After vacation, give your espresso machine fresh water, a clear flush, and clean coffee-contact parts before you ask it for a great shot. Then test the coffee and make small adjustments instead of treating one odd extraction as a machine failure.
Follow your own manual for anything model-specific, and stop if you find a leak, burning smell, or suspected freeze damage. A few quiet minutes of care can turn the first morning back into the warm hiss of steam and the dark, sweet smell of espresso.