
TL;DR

Get coffee and tea gear delivered free — and shop member deals
- Fast, free delivery on millions of items
- Access to Prime Big Deal Days deals on October 6–7
- Prime Video, Amazon Music and more included
Espresso pressure develops as the machine pushes water against a coffee puck whose resistance depends on grind, dose, distribution, tamp, freshness, and changing structure during extraction. A familiar 9-bar reading cannot tell you whether water flows evenly, so judge pressure alongside flow, shot time, beverage mass, preparation, and taste.
You can watch an espresso machine climb to 9 bar, hear the pump settle into its familiar hum, and still pull a sour, thin shot. That is not a contradiction. Pressure tells you something about the machine and the puck, but it does not tell you whether water traveled evenly through every part of the coffee.
Think of the puck as a wet, changing filter. The pump pushes water toward it; the grounds resist that flow. Grind size, dose, distribution, tamp, freshness, and even the puck’s swelling and erosion during the shot all shape that resistance. That is how puck resistance shapes espresso pressure, and why the reading can change as the shot runs.
This guide explains how pressure, flow, and resistance interact throughout extraction, what your gauge can and cannot tell you, and which adjustments make sense when a shot tastes wrong. You’ll also get a repeatable troubleshooting routine, with practical examples you can use at the machine.
A finer grind usually increases puck resistance and slows flow, but the machine’s design affects the pressure reading.
A larger dose in the same basket generally adds bed depth and resistance; an overfilled basket can disrupt the puck.
A 9-bar peak does not prove even extraction: channels can create fast, uneven paths through the coffee.
Tamp level and consistently; once the bed is firmly consolidated, grind and distribution usually matter more than extra tamping force.
Track dose, beverage mass, shot time, flow, and taste before changing pressure settings.
Espresso mechanics · pressure / flow / taste
How Puck Resistance Shapes Espresso Pressure
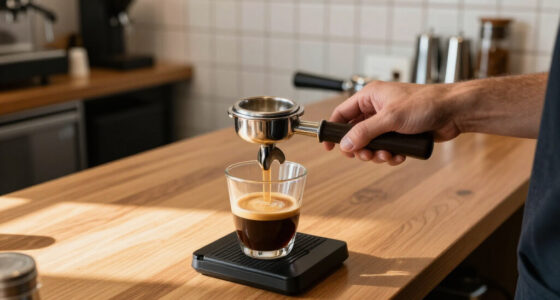
The pump pushes water toward a wet, changing bed of coffee. Grind, dose, puck preparation and extraction all shape how that water moves. A familiar pressure reading is useful—but it cannot tell you whether the flow was even or the shot tastes balanced.
A conventional target, not a quality guarantee
A repeatable starting point for a recipe
Weigh output to compare shots clearly
Pressure · flow · time · mass · taste
01 · What shapes resistance
The puck is a changing filter
Puck resistance is the coffee bed’s opposition to water flow. It depends on particle size, arrangement, depth and condition—and it keeps changing once brewing begins.
Grind
Finer grounds usually narrow the pathways between particles, increasing resistance and slowing flow. Coarser grounds generally let water pass more readily.
Dose + basket
More coffee in the same basket generally makes a deeper bed. An overfilled basket can contact the shower screen and disrupt the puck.
Distribution
Clumps or uneven patches create easier routes for water. A crack can become a channel that leaves nearby coffee less extracted.
Tamp
A level, consistently consolidated bed matters. Once it is firmly compacted, extra tamping force usually matters less than grind and distribution.
Freshness
Coffee changes as it ages. The same grinder setting may not produce identical flow day to day, so use the cup and your notes.
Wet puck
The bed absorbs water, swells and releases soluble material. Fast flow can erode weak areas and change resistance as extraction proceeds.
Change the bed, change the flow
At a given flow, a finer grind tends to create more resistance and raise pressure. Coarser coffee tends to lower resistance and allow faster flow. The machine’s pump and controls shape the reading too, so this relationship is a guide—not a fixed pressure formula.
Keep the comparison fair: hold dose and yield steady, make one small adjustment, then compare shot time, flow and taste.
Typical tendency · machine dependent
Illustrative direction only; no universal pressure value follows from grind size alone.
03 · Read the shot, not just the gauge
Why 9 bar can still taste wrong
Pressure is measured at a point in the machine. Gauge location, machine design and flow affect what it shows. A normal-looking peak cannot confirm even water movement through the coffee bed.
| What you observe | What it may mean | What to check next |
|---|---|---|
| Near 9 bar, thin or sour cup | Possible uneven flow — a channel can coexist with a familiar peak | Distribution, puck level, stream and beverage mass |
| Shot runs much faster than usual | Lower resistance — grind may be too coarse or the puck may have a weak path | Grinder setting; keep dose and yield steady |
| Pressure drops during extraction | Changing system — puck resistance or pump control may have shifted | Flow, shot time and whether the stream suddenly gushes |
| More tamping force, little change | Expected once consolidated — preparation evenness matters more | Level tamp and consistent distribution |
Remember: a gauge is a useful clue about your setup, not a direct score for extraction quality.
Pressure + flow + time + mass + taste
04 · A repeatable routine
Diagnose before you adjust
A consistent baseline makes cause and effect easier to see. Change one variable at a time so you can tell whether the cup improved.
Set a baseline
Use the same coffee dose and basket. For example, start with 18 g in and aim for 36 g out.
Watch the flow
Note when drops begin and whether the stream stays steady, gushes or sprays.
Record the result
Write down pressure, shot time, beverage mass and taste. A sudden flow change can suggest a weak spot.
Change one thing
If the shot is unusually fast and thin or sour, try slightly finer. Keep the rest steady and taste again.
05 · Follow the system
From puck prep to the cup
Pressure and resistance interact throughout extraction. Read the whole chain to understand what the gauge can—and cannot—tell you.
What Does Puck Resistance Actually Mean?
Puck resistance is the coffee bed’s opposition to water flowing through it; it comes from the grounds’ size, arrangement, depth, and condition as they become wet. The pump supplies water, but pressure at the coffee bed depends on the machine and the resistance the water meets. That resistance is not a fixed setting or a property of the pump alone.
Imagine water traveling through a wide, open gravel path, then through a tightly packed bed of fine sand. The gravel lets water through easily; the sand slows it down. Espresso grounds behave more like a complex bed of tiny particles than a single uniform filter. Finer grinding generally narrows the routes between particles, raising resistance at a given flow and often slowing the shot.
The bed changes as it extracts, too. It absorbs water and swells, soluble material washes out, and fast-moving water can erode weak areas. So that resistance comes from both how you prepared the dry coffee and what happens after brewing begins. A shot that starts smoothly can develop a faster path as the puck breaks down.
For example, if you use the same dose and basket but grind noticeably coarser, water usually passes through more readily. Your shot may run faster, and the pressure may respond differently depending on the machine’s pump and controls. That is why a pressure gauge is best read as part of a system, not as a direct score for how good your espresso will taste.
espresso grinder with adjustable grind size
As an affiliate, we earn on qualifying purchases.
As an affiliate, we earn on qualifying purchases.
How Grind and Dose Change Pressure and Flow
Grind and dose shape espresso pressure by changing how difficult it is for water to cross the coffee bed. Finer grounds usually create more resistance and a slower flow; a larger dose in the same basket usually makes a deeper bed and also adds resistance. The result depends on the machine, basket, and preparation—not on grind or dose in isolation.
Say your usual 18-gram dose takes 30 seconds to yield 36 grams of espresso. If you keep everything else steady and move the grinder substantially finer, the shot may take longer because the tighter bed restricts flow. If you instead use a coarser grind, water may rush through and the yield may arrive sooner. The taste helps you decide whether that change improved the cup; shot time alone cannot declare a winner.
Dose has a similar tradeoff. More coffee in the same basket tends to increase bed depth and resistance, but packing too much coffee can bring the puck into contact with the shower screen or disrupt its surface. That can damage the bed before or during brewing. A dose that suits one basket may overfill another, so check your basket’s intended range and look for a clear shower-screen imprint as a warning.
Freshness also enters the picture. Coffee changes as it ages, and its behavior during brewing can shift, so the same grinder setting does not guarantee identical flow every day. Make a small adjustment at a time, keep your dose and yield consistent, and compare the cup. A practical record—dose, grinder setting, shot time, beverage mass, and taste—can reveal patterns a gauge alone misses.
espresso tamper with consistent tamping
As an affiliate, we earn on qualifying purchases.
As an affiliate, we earn on qualifying purchases.
Why a 9-Bar Reading Does Not Guarantee a Good Shot
How puck resistance shapes espresso pressure is only part of the story: the pressure reading does not show whether water is moving evenly through the coffee. A machine may reach a familiar peak near 9 bar while water finds a crack or low-resistance path through the puck. That channel can pull some coffee too hard while leaving nearby grounds under-extracted.
Imagine a garden hose feeding a flat sponge. If the sponge has a hole, water rushes through the opening instead of spreading evenly across the material. In a puck, a crack, clump, or poorly distributed patch can act like that hole. Pressure can look normal—or even climb—while the resulting espresso tastes thin, sharp, or strangely bitter in different sips.
Pressure is measured at a point in the machine, and gauge location matters. A gauge may show pressure on the pump or boiler side rather than the exact pressure at every point in the coffee bed. Pressure at the puck also depends on flow and the machine’s design. Treat a gauge as useful information about your setup, not a perfect window into the coffee.
That is why pressure, flow, and resistance interact throughout a shot. Two shots can reach similar peak pressure but produce different flows and flavors. If a high reading comes with a sour cup, don’t assume you need even more pressure. Check distribution, puck level, grind, shot time, and beverage mass before blaming the machine.
As an affiliate, we earn on qualifying purchases.
How to Read Pressure as Your Shot Develops
Espresso pressure changes during extraction because the puck gets wet, swells, releases soluble material, and may erode or channel. The machine’s control system can also change pump output. A pressure rise, plateau, or drop is not automatically a sign of trouble; it needs to be read alongside flow, time, and taste.
- Start with a repeatable recipe. Keep the coffee dose and basket the same, and weigh the beverage. For example, 18 grams in and 36 grams out gives you a clear starting comparison.
- Observe the flow as well as the gauge. Note when the first drops appear, whether the stream stays steady, and whether it suddenly gushes or sprays. A sudden change can signal a weak spot in the puck.
- Record shot time and taste. If a shot runs much faster than your usual recipe and tastes thin or sour, consider increasing resistance with a slightly finer grind—while keeping other variables stable.
- Change one variable, then compare. Avoid adjusting grind, dose, tamp, and pressure all at once. One change lets you see whether the cup improved.
For a kitchen example, suppose a shot begins with a slow, even dark thread, then turns pale and watery early. The gauge may not explain that sudden blonding, but the flow gives you a clue that extraction is changing. Record the result, inspect your puck prep, and repeat before making a larger adjustment. You are looking for a pattern, not one dramatic needle movement.
As an affiliate, we earn on qualifying purchases.
Why Even Puck Preparation Beats a Harder Tamp
Even puck preparation matters more than tamping as hard as possible because water exploits uneven or weak areas. Tamping consolidates the grounds and helps create a level bed. Once the coffee is firmly and evenly compressed, pushing harder generally changes resistance less than adjusting grind size or fixing poor distribution.
Think of tamping like closing the lid on a level box of sand. Pressing down evenly makes a stable surface; pressing one side harder can leave the bed sloped. Water does not politely correct that slope. It follows the easier routes, so a lopsided tamp or clumps in the grounds can create uneven flow and inconsistent extraction.
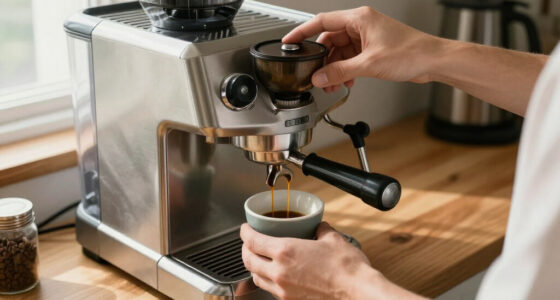
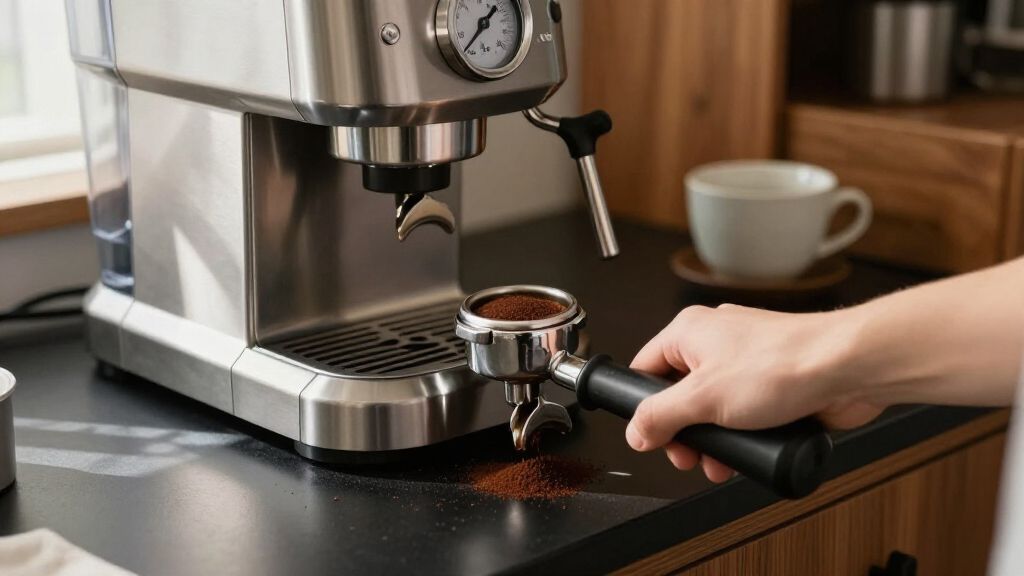
A useful routine is simple: distribute the grounds across the basket, break up visible clumps if your setup permits, level the surface, and tamp straight down with consistent pressure. For instance, if espresso sprays from one side of the portafilter, check whether the grounds piled against one basket wall or whether your tamp tilted. Repeating the same tidy preparation can be more revealing than tamping harder.
Pre-infusion can help wet the puck more gently before higher pressure develops. That may support more even wetting, but it cannot fix poor distribution, a badly chosen grind, or a damaged puck. Treat it as one tool in the process, not a repair button. If your machine offers it, compare shots with the same dose and grind, changing only the pre-infusion approach and judging the cup.
When Pressure Profiling Helps—and When to Leave It Alone
Pressure profiling changes how pressure or flow develops during the shot, rather than holding to one familiar pattern. Some machines let you use adjustable pressure, flow profiling, or pre-infusion. Lower pressure or a declining profile can suit particular coffees and recipes, but no single profile works best for every roast, basket, or puck.
The tradeoff is control versus consistency. A gentler start may help wet the grounds before stronger flow begins; a changing profile may bring out a different balance of texture and flavor. But if your dose, grind, and distribution change from shot to shot, profiling adds another moving part. A new curve can make the espresso taste different without showing you whether the original problem was channeling or simply a grind that ran too fast.
Suppose your espresso tastes harsh even though your preparation and recipe are consistent. A lower-pressure experiment may be worth testing if your machine supports it. Pull one shot with your usual profile and another with a changed profile, keeping dose, grind, yield, and coffee constant. Compare taste and flow, rather than assuming the lower gauge reading is automatically better.
The practical shift in espresso discussion is to treat pressure as one variable in a brewing system, not a quality score. Start with repeatable puck preparation and a recipe you can measure. Explore pressure changes after you have a clear reason, and keep notes so you can return to the cup you prefer.
A Simple Troubleshooting Routine for Pressure Problems
Diagnose pressure by checking the whole shot, not by reacting to one number. Start with dose, grind, distribution, flow, time, beverage mass, and taste; then decide whether the gauge points to a machine issue or simply reflects a change in puck resistance. This routine keeps you from chasing pressure while ignoring the coffee.
- Weigh your dose and yield. Use the same basket and a consistent recipe so each shot has a fair comparison.
- Inspect the puck preparation. Look for clumps, an uneven bed, an angled tamp, or signs that the basket was overfilled.
- Watch the shot. Note whether flow starts evenly, runs too fast, stalls, or suddenly changes direction.
- Adjust grind before pressure settings. For a conventional setup, a small grind change is a practical first test when flow and taste suggest the bed offers too little or too much resistance.
- Change pressure only for a clear reason. Compare profiles while holding the other variables steady.
For example, if your gauge reading drops and the espresso also gushes into the cup, check for a coarser grind, lower dose, or channeling before assuming the pump has failed. If the shot stalls despite careful preparation, a grind that is too fine may be the simpler explanation. A gauge matters, but the cup and the flow tell you what the coffee experienced.
Frequently Asked Questions
Does a finer grind always increase espresso pressure?
Usually, finer grounds increase resistance and slow water flow, which can raise pressure under a given machine setup. The exact reading depends on the machine and how it controls flow. Make a small grind adjustment and compare shot time, beverage mass, and taste.
What pressure should espresso be brewed at?
Around 9 bar is a familiar reference, not a guarantee of a good shot or a universal target for every recipe. Machine design, puck resistance, and pressure control all affect the result. Judge the cup and repeatability, not the number alone.
Why does my pressure rise while my espresso tastes sour?
High pressure can coexist with uneven extraction, especially if water channels through a crack or weak spot and bypasses other areas. Check distribution, level tamping, grind, shot time, and yield before increasing pressure. A gauge does not show how evenly water contacted the coffee.
Will tamping harder make my espresso pressure higher?
Usually not by much once the puck is evenly compacted. A firm, level tamp helps create a stable bed, but extra force tends to matter less than grind size, dose, and distribution. Focus on tamping consistently rather than trying to press as hard as possible.
Can pre-infusion prevent channeling?
Pre-infusion can support gentler, more even puck wetting, but it cannot reliably correct clumps, uneven distribution, or a poorly chosen grind. Treat it as a helpful option, not a substitute for careful preparation. Compare shots with other variables held steady.
Does my pressure gauge show the exact pressure at the coffee puck?
Not necessarily. Gauge readings depend on where the sensor sits and how the machine is built; some readings reflect pump- or boiler-side pressure rather than every point in the puck. Use the gauge as a machine reading and interpret it alongside flow and taste.
Conclusion
Remember the relationship, not just the number: the pump pushes water, and the puck resists it while changing throughout the shot. A pressure gauge can help you spot patterns, but it cannot tell you whether water reached the coffee evenly or whether you liked the result.
Keep your recipe steady, watch the flow, and change one thing at a time. The best espresso is not the shot with the most impressive needle reading; it is the one whose puck lets water move evenly enough to leave a balanced, fragrant cup.
Fall Picks
fall essentials
As an affiliate, we earn on qualifying purchases.