TL;DR

Get coffee and tea gear delivered free with Prime
- Fast, free delivery on millions of items
- Prime Video, Amazon Music and more included
- Member-only deals all year
A group gasket seals the portafilter against the espresso machine’s group head during brewing. Recurring leaks around the portafilter, visible cracks or flattening, and a changed fit can point to wear, but clean the basket rim and gasket area first because coffee residue can cause similar leaks. Check your machine’s manual for safe inspection and model-specific replacement guidance.
A thin stream of coffee running over the side of your portafilter can turn a calm morning shot into a sticky cleanup. The group gasket may be worn, but coffee grounds caught on the basket rim can create the same mess.
This small seal has an important job: it sits between the espresso machine’s group head and portafilter, containing brewing pressure while the shot runs. In this guide, you’ll learn the warning signs every home barista should watch for, how to check the area safely, and when a replacement or repair makes sense.
You’ll also see what a gasket problem does not explain. A sour or weak espresso shot can send you adjusting the grind for an hour, but taste alone is poor evidence of a failed seal. Start with the leak, the fit, and what you can see.
A recurring leak around the portafilter rim is a stronger gasket clue than a sour, bitter, or weak shot.
Clean coffee grounds from the basket rim and accessible gasket area before concluding the seal has failed.
Inspect only when hot components have cooled, and never force a portafilter that will not engage normally.
Use your exact machine model and manual to check gasket fit, replacement steps, and service guidance.
Seek service if water reaches electrical areas, the leak is substantial, or a new gasket does not resolve the problem.
Group Gasket Warning Signs Every Home Barista Should Know
A worn group gasket can let water escape around the portafilter. Clean the sealing area and check the fit before blaming the seal.
What the gasket does
The gasket seals the portafilter against the group head during brewing, helping contain pressure.
Liquid at the rim
Recurring water or coffee escaping around the portafilter is a stronger warning than a bad-tasting shot.
Handle feels different
A gasket may change how the handle engages, but locking position varies by machine.
Cracks or flattening
When the machine is cool, inspect only the gasket area that is safely accessible.
Rule out residue first
Coffee grounds on the basket rim or gasket can break the seal and mimic gasket wear.
- Clean the basket rim and accessible gasket area.
- Confirm the basket is seated and use your normal dose.
- Check that the portafilter engages without excessive force.
- A damaged or incorrectly fitted basket.
- A loose or misaligned group-head component.
- Water escaping elsewhere on the machine.
Check safely in five steps
Wait for hot components to cool before inspecting.
Look for residue on the basket rim and accessible gasket surface.
Use a suitable cloth or brush; avoid sharp tools.
Seat the basket, use a normal dose, and do not force the handle.
A recurring rim leak suggests a sealing or engagement issue; another leak location may have a different cause.
What a Group Gasket Does During a Shot
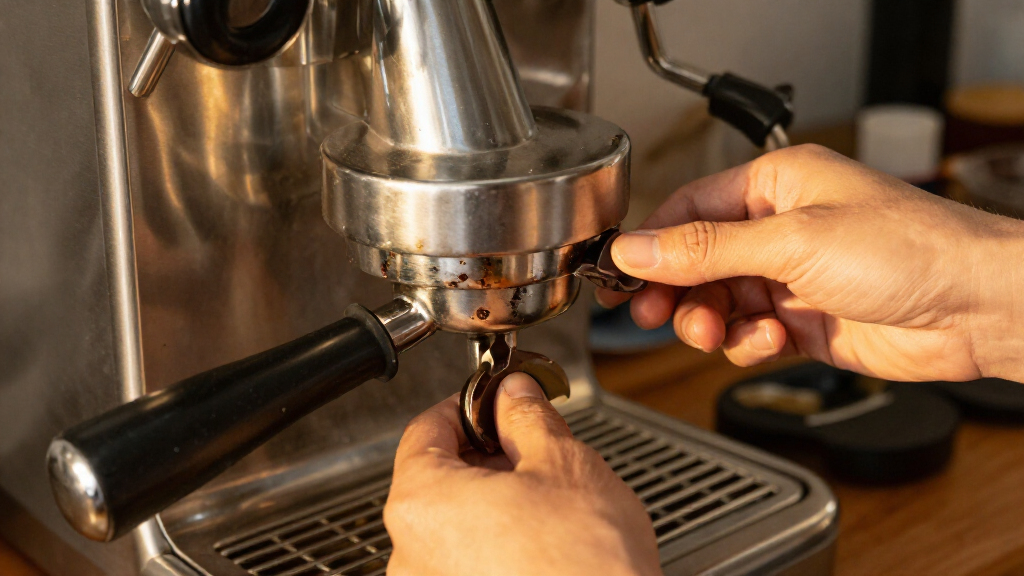
A group gasket is a replaceable seal that sits between an espresso machine’s group head and the portafilter, helping contain brewing pressure during a shot. It compresses as you lock the handle into place, closing the small gap around the basket. Think of it as the rubber washer in a garden hose connection: modest in size, easy to overlook, and responsible for keeping water where it belongs.
That seal does not control your grind size, water temperature, or pump pressure. If your espresso tastes sharp, bitter, or watery but no water escapes around the handle, the gasket is not the first suspect. A barista who changes the grinder because the shot runs fast may solve the taste issue; replacing the group seal would not.
A gasket can still affect brewing when it no longer seals reliably. Water may escape around the portafilter during extraction, making the counter messy and shots inconsistent. But a leak can come from other places too, including a loose or damaged group-head component or a fault elsewhere in the water path.
Machine designs and service procedures vary. Some home machines use rubber or silicone gaskets; others have different group designs. The exact model manual and parts diagram are your best guides to fit and access. The handle angle that feels normal also varies, so one particular locking position is not a universal pass-or-fail test.
Products Worth Considering

Breville Bambino Espresso Machine, Brushed Stainless Steel

KitchenAid KF6 Fully Automatic Espresso Machine, Stainless Steel

Ninja Luxe Café Mini Espresso and Drip Coffee Machine, ES301
As an affiliate, we earn on qualifying purchases.
Five Leak and Fit Changes That Point to Gasket Wear
The Group Gasket Warning Signs Every Home Barista Should Know include recurring leaks around the portafilter, visible damage, and a changed fit that persists after you clean and assemble the basket correctly. These clues raise suspicion; no single one proves the gasket has failed. Watch the machine over a few shots, because one stray coffee ground can briefly impersonate a worn seal.
- Water or coffee escapes around the rim. A leak here is the classic clue, especially when liquid appears outside the portafilter rather than from the spouts.
- The handle feels unusually tight or loose. A hardened, swollen, cracked, or compressed gasket can change how the portafilter engages. Compare the feel with the machine’s usual behavior, not someone else’s handle angle.
- The leak returns after cleaning. Grounds on the basket rim or sealing surface may break the seal. If you clean both and the leak keeps returning with normal assembly, wear becomes more plausible.
- You can see cracks, flattening, or a brittle surface. Inspect only when the machine is cool, and only where the design gives you safe access.
- The trouble becomes more frequent. Keep a short note: did the leak begin after a basket change, a cleaning, or a larger coffee dose?
For example, if your handle suddenly needs force to lock and water escapes at the rim on three clean, normally dosed shots, stop forcing it and inspect the fit. An unusual handle angle on its own tells you less; machines differ, and baskets or doses can affect engagement too.
Rule Out Coffee Grounds Before You Buy a Part
A recurring leak around the portafilter is more suggestive of a sealing problem when the basket rim and accessible gasket area are clean and the basket is assembled correctly. Coffee residue is a simple culprit: one small fleck on the rim can create a channel for pressurized water. Clean first, then see whether the same leak returns under normal brewing conditions.
A leaking portafilter does not automatically mean a bad gasket. The basket may be damaged or seated incorrectly, the portafilter may not be fully engaged, or an excessive dose may keep it from locking normally. A loose, misaligned, or damaged group-head component can also cause trouble. If water comes from a different point on the machine, the fault may be elsewhere in the water path.
Try a practical example: your 18-gram basket leaks after you switch coffees, and you notice grounds dusting its rim. Wipe the rim and group area with a suitable cloth or brush, reseat the basket, and brew again with your normal dose. If the leak disappears, residue was a better explanation than a worn seal.
Use a simple comparison to keep the clues straight:
| What you notice | What to check first |
|---|---|
| Leak around portafilter rim | Clean basket rim and gasket area; confirm the basket is seated |
| Handle suddenly hard to lock | Check dose, basket fit, and whether anything obstructs engagement |
| Water from another machine location | Check the manual and seek service if the source is unclear |
| Sour, bitter, or weak shot without a leak | Review grind, dose, distribution, and temperature |
Check the Gasket Safely in Five Steps
To check a possible gasket problem, let hot components cool, clean the accessible sealing area, and test with a correctly assembled basket and a normal dose. A careful check can reveal whether residue or fit is the issue before you consider removing a part. Your espresso machine gets hot and uses pressure, so a little patience beats forcing a stubborn handle.
- Turn the machine off and let it cool. The group head and portafilter can stay hot after brewing. Do not reach into a hot group.
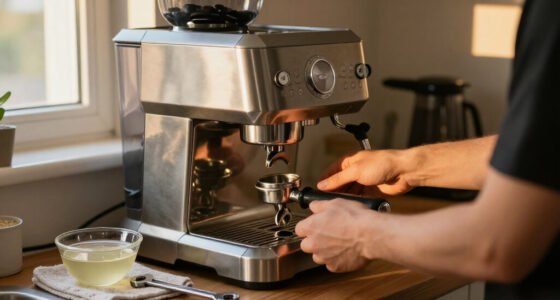
- Remove the portafilter and inspect what you can see. Look for coffee residue around the basket rim and accessible gasket surface.
- Clean gently. Use a suitable cloth or brush. Avoid sharp tools that could gouge the group head or damage the seal.
- Reassemble and test normally. Seat the basket, wipe its rim, use your usual dose, and lock the portafilter without excessive force.
- Watch where the water appears. A recurring leak at the rim points toward a sealing or engagement problem; water elsewhere calls for a different diagnosis.
Imagine your portafilter refuses to turn as far as usual after you prepare a larger dose. Stop before applying extra force. Clear grounds, check that the basket is seated, and try a normal dose once the machine is safe to use. If the handle still will not engage normally, consult the manual or arrange service.
Some machines let you inspect or remove the gasket easily; others need model-specific tools or care. Check the manual before removal. If you cannot see the gasket without prying, leave it in place and ask a qualified technician rather than risking damage to the group head.
Replace the Seal Only When the Evidence Fits
Replace a group gasket when it is visibly damaged or worn, or when it no longer seals reliably after cleaning and correct assembly. There is no single replacement interval that fits every home machine. Use, heat, cleaning habits, coffee residue, water conditions, and gasket material all affect how long the seal lasts.
A gasket is an inexpensive seal with an important job, but “inexpensive” does not mean interchangeable. Parts can differ in dimensions, material, and fit. Check the exact machine model in the manufacturer’s parts information or a reputable supplier’s catalog before ordering. A similar-looking ring can still fail to seal.
For instance, a home barista who makes two shots each morning may see different wear from someone who runs a small café service on the same model. Follow the maker’s guidance and inspect periodically instead of replacing parts on a calendar copied from another machine. A cracked or flattened seal that leaks repeatedly offers a clearer reason to replace it.
DIY replacement depends on access and the machine design. Follow the model-specific manual, and avoid sharp tools or force. If a new gasket does not stop the leak, or the leak seems to come from inside the machine, seek professional service; the fault may involve a group-head component or another internal seal.
Know When to Stop Brewing and Call for Service
Stop using the machine and seek service if a leak is substantial, water reaches electrical areas, or the machine behaves abnormally. A small rim leak still deserves attention, but those signs raise the stakes beyond a messy counter. The group gasket may not be the cause, and continued use will not help you identify an internal fault.
Pay attention to the leak’s location and pattern. A dribble that appears only around the portafilter during extraction suggests a seal or engagement issue. Water beneath the machine, around a steam control, or near electrical parts points elsewhere. A technician can inspect internal components without guesswork or unsafe disassembly.
Suppose your machine starts leaking underneath after a gasket replacement. That result does not prove the new part is faulty; water may be escaping from another connection. Turn the machine off, unplug it if you can do so safely, and arrange service rather than opening the casing. Machine layouts vary, and internal repair can expose hot or electrical parts.
Keep useful details for the service visit: the model number, where the water appears, whether the leak happens only during a shot, and what cleaning or replacement you tried. A short note can save time, especially if the leak appears intermittently. Your goal is a reliable seal and a safe machine, not a forced repair.
Build a Quick Gasket Check Into Your Coffee Routine
A quick gasket check works best as part of your normal cleanup: wipe the basket rim and accessible group area, then watch for recurring leaks or changes in fit. You do not need a complicated schedule or a new tool for every shot. A clean sealing surface makes it easier to spot genuine wear before a small problem becomes a repeated morning annoyance.
For example, after pulling your last shot, you notice damp coffee residue clinging to the basket rim. Wiping it away takes seconds, and the next brew starts with a cleaner seal. If water still escapes around the portafilter after repeated clean setups, note when it happens and check the gasket according to your machine’s manual.
Use these habits to keep the clues clear:
- Wipe the rim before locking the portafilter in.
- Use a normal dose when checking fit, so excess coffee does not obstruct engagement.
- Notice patterns across more than one shot instead of treating one stray leak as a diagnosis.
- Check model guidance before removing a seal or ordering a replacement.
The gasket quietly does an important job, much like a door seal keeping rain out of a room. You only tend to notice it when water finds a way through. Routine cleaning gives you a clear view of whether the seal itself needs attention.
Frequently Asked Questions
How can I tell if my group gasket is bad?
Look for recurring leaks around the portafilter, visible cracks or flattening, or a changed fit that continues after you clean and assemble the basket correctly. These signs suggest wear, but none proves the gasket is at fault on its own.
Can coffee grounds cause a leak that looks like gasket failure?
Yes. Grounds on the basket rim or gasket area can interrupt the seal and let water escape around the portafilter. Clean both accessible surfaces, reseat the basket, and test again with your usual dose.
How often should I replace a group gasket?
There is no universal replacement schedule; wear depends on use, heat, cleaning, residue, water conditions, and material. Follow your machine maker’s guidance and replace the gasket when it is damaged or no longer seals reliably.
Can I keep using my espresso machine if it leaks?
A minor leak at the portafilter rim still needs attention, since it can make brewing messy and point to a part that needs care. Stop using the machine if the leak is substantial, water reaches electrical areas, or the machine behaves abnormally.
Can I replace the group gasket myself?
Often, but the process depends on your machine’s design and access. Follow the model-specific manual, avoid sharp tools and force, and seek service if the gasket is difficult to reach or replacement does not stop the leak.
Does a bad gasket make espresso taste sour or bitter?
A leaking seal can disrupt brewing or make shots inconsistent, but taste alone does not identify gasket failure. Grind size, dose, distribution, and temperature are more direct places to investigate when the machine is not leaking.
Conclusion
Remember the clearest clue: a leak that keeps returning around a clean, correctly assembled portafilter deserves a gasket check. Cool the machine, clean the sealing area, test with a normal dose, and follow your model’s manual before removing or replacing parts.
Your espresso machine should end the morning with a clean counter, not a coffee-colored puddle creeping toward the edge. When a leak persists or appears somewhere else, let a qualified technician find its path.