
TL;DR

Get coffee and tea gear delivered free with Prime
- Fast, free delivery on millions of items
- Prime Video, Amazon Music and more included
- Member-only deals all year
Milk usually screeches, splutters, or turns foamy because of how steam, air, and heat move through it. Keep a steam wand just below the surface to add air, then lower it to create a smooth whirlpool; on the stove, use gentle heat and stir often. For espresso, aim for about 55–65°C (130–150°F), and clean the wand after each use.
A milk pitcher can suddenly sound like a tiny kettle, then spit a hot drop across the counter. Those squeals and splutters usually come from steam, trapped air, or uneven heating—not a mystery inside the milk.
Once you know what each sound and texture points to, you can adjust your steam wand, pan, or frother and get milk that tastes sweet and pours smoothly. Here’s how to tell normal steaming from a technique or equipment problem, and how to fix it.
A persistent espresso wand squeal often means the wand touches the pitcher or the milk is not swirling smoothly.
Heat stovetop milk gently and stir often to limit hot spots, skins, splutters, and boil-overs.
Add air briefly with the wand tip just below the surface, then lower the tip to create a whirlpool and break up large bubbles.
For espresso, about 55–65°C (130–150°F) is a useful milk temperature range, though equipment and preference vary.
Clean and purge steam wands after use, and check milk labels for allergens when serving others.
Why Your Milk Screeches, Splutters, or Turns Foamy
A milk pitcher can suddenly sound like a tiny kettle, then spit a hot drop across the counter. Those squeals and splutters come from steam, trapped air, or uneven heating — not a mystery inside the milk. Learn what each sound and texture means, and how to fix it.
What Each Sound Is Telling You
The Screech
A persistent, piercing squeal means the wand is touching the pitcher, or the milk isn’t swirling smoothly. A brief soft chirp while adding air is normal — a sustained sharp squeal is not. Shift the pitcher slightly until the sound settles into a gentle hiss.
→ “SCREEEE!” = adjust the wandThe Splutter
Steam bubbles trapped under a surface skin — or under milk stuck to a pan bottom — grow and burst with a sharp pop. Fast, uneven heating makes bursts likelier. Use low–medium heat, stir the bottom and corners, and lift the pan off the burner when it trembles.
→ “PFFT-PFFT!” = lower the heatThe Gulping Foam
If the milk sounds like it’s gulping air, you’ve added too much too quickly — the result is large, dry bubbles sitting on top. Listen instead for a soft hiss at the start, then a smooth rolling sound. Tap and swirl the pitcher to disperse what’s left.
→ “GLUG-GLUG” = too much airHow to Steam Milk into Smooth, Glossy Foam
Start Cold
Cold milk in a clean pitcher, with room to expand. A thermometer helps while you learn.
Add Air
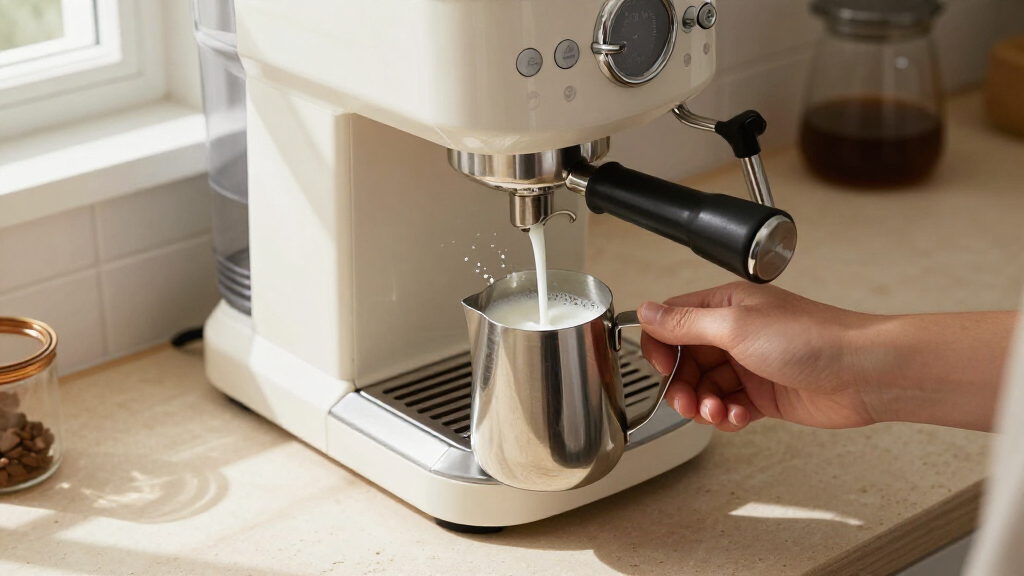
Tip just below the surface, steam on. Listen for a gentle hiss as air enters the milk.
Whirlpool
Lower the tip slightly once the milk expands. Aim for a steady roll — not squealing or spitting.
Stop in Range
Finish around 55–65°C (130–150°F) for most espresso drinks. Never let it boil.
Purge & Wipe
Wipe and purge the wand promptly. Swirl the pitcher before pouring to reunite milk and foam.
Different Milks, Different Foam
Foam depends on proteins, fats, and sugars — so not every milk behaves the same under steam. Keep your technique steady while swapping the milk (or vice versa) to isolate the cause of weak foam or big bubbles.
Proteins stabilize bubbles
Milk proteins gather around air bubbles and hold them in place — that’s why milk keeps its foam while bubbles in plain water collapse in seconds.
Fat = richness, less stability
Fat adds a smooth, rounded mouthfeel but can make foam less stable. Skim foams abundantly but lighter; whole foams softer but tastes fuller.
Find the Sweet Spot Before It Boils
| Milk | What You May Notice | Try This |
|---|---|---|
| Whole dairy milk | Rich, rounded mouthfeel; the foam may feel less stiff than skim’s. | Add air gently and keep the milk swirling in a whirlpool until glossy. |
| Skim dairy milk | Can produce abundant, lighter foam — sometimes with larger bubbles. | Mix the foam into the milk with a swirl before pouring. |
| Plant-based milk | Results vary widely; some drinks may split in acidic coffee or foam poorly. | Choose barista-style versions; change one variable at a time to compare. |
Keep Hot Drops in the Pan
Heavy Bottom Wins
A heavy-bottomed pan spreads heat more evenly than a thin one, limiting hot spots where protein sticks and steam bursts. On a smooth pan, faint squeaks can come from milk moving across the surface.
Disrupt the Skin
Spluttering worsens when steam gathers under a surface skin. Stir while heating — sweeping the spoon across the bottom and into the corners — to disrupt that layer. If you’d rather not stir, keep heat low and stay close.
Lift Before the Tremble
Milk can climb quickly once it approaches a boil. When a pan starts to tremble or steam heavily, lift it off the burner — never leave heating milk unattended.
Pause, Don’t Push Through
If hot milk is spitting toward you, stop the steam or lower the heat, let the movement settle, then adjust the pan or wand before continuing. Stir along the bottom rather than scraping a scorched patch.
Why your milk screeches—and when to adjust the wand
Milk usually screeches during espresso steaming when the wand, pitcher, and milk vibrate against one another. The wand depth and angle matter: a tip at the wrong height can make the milk shudder instead of swirl. A short chirp can happen as you introduce air, but a squeal that continues often means the wand is touching the pitcher or the milk is not moving smoothly.
Listen for the difference between a brief, soft hiss and a sharp, persistent squeal. If you’re steaming a small pitcher before work and hear a piercing tone, check that the wand tip isn’t pressed against the side. Shift the pitcher slightly and adjust the tip until the sound settles into a gentle hiss.
On the stovetop, faint squeaks may come from milk moving against a smooth pan, or from a thin layer of protein sticking to a hot patch. A heavy-bottomed pan spreads heat more evenly than a thin one. If the milk starts to catch, turn down the burner and stir along the bottom rather than scraping forcefully at a scorched patch.
A clean wand also helps steam flow consistently. After steaming, purge the wand and wipe it with a clean, damp cloth, following your machine’s instructions. Dried milk can partly block the tip, changing the steam flow and making the next pitcher harder to control.
Why milk splutters and how to keep hot drops in the pan
Milk splutters when steam bubbles escape suddenly, often from beneath a surface skin or from milk stuck to the bottom of a pan. As milk heats, its water becomes steam; if that steam gets trapped, a bubble can grow and burst with a sharp pop. Fast, uneven heating makes those sudden bursts more likely.
On the stove, use low to medium heat and stir frequently, sweeping the spoon across the bottom and into the corners. A heavy-bottomed pan helps limit hot spots. If you’re heating a mug’s worth for cocoa, stay close and lift the pan off the burner when it starts to tremble or steam heavily; milk can climb quickly once it approaches a boil.
With a steam wand, spluttering often means the tip is too high and is pulling in air in big gulps. Start with the tip just below the milk’s surface so it adds air gently, then lower it slightly to create a whirlpool. That rolling motion helps break large bubbles apart before they can spit onto your hand or counter.
Pause if hot milk is spitting toward you. Lower the heat or stop the steam, let the movement settle, then adjust the pan or wand before continuing.
A skin can make spluttering worse because steam gathers underneath it. Stirring while the milk heats disrupts that layer. If you prefer not to stir, keep the heat low and watch closely; don’t leave a pan of milk unattended.
How milk foam forms—and why big bubbles turn dry
Milk foam forms when air or steam gets trapped in liquid, while milk proteins gather around bubbles and help hold them in place. That’s why a jug of well-steamed milk can keep its foam while bubbles in plain water collapse quickly. Fat adds a rich, smooth mouthfeel, though it can make foam less stable.
Silky espresso foam comes from adding air early, then mixing it into the milk. Keep the tip near the surface briefly to introduce small bubbles; lower it afterward so the milk rolls in a whirlpool. If you hold the tip at the surface for too long, you get large, dry bubbles that sit on top instead of blending into a glossy texture.
Think about a cappuccino you made at home that poured out in clumps. If the milk sounded like it was gulping air, you probably added too much too quickly. Next time, listen for a soft hiss at the start, then a smooth rolling sound as the milk circulates; tap the pitcher lightly on the counter and swirl it to disperse any remaining large bubbles.
Milk choice changes the result. Dairy milk and plant-based drinks differ in protein, fat, and sugar, so they don’t all foam the same way. Barista-style plant drinks are designed to steam and pour more like dairy milk, but the exact result depends on the product, coffee acidity, temperature, and technique.
How to steam milk into smooth, glossy foam
To make smooth espresso foam, add a little air at the beginning, then keep the milk moving in a whirlpool as it warms. This two-part method makes small, blended bubbles rather than a cap of stiff foam. Follow these steps with your machine’s instructions in mind:
- Start with cold milk in a clean pitcher, with enough room for it to expand. A thermometer can help while you learn.
- Position the tip just below the surface and turn on the steam. Listen for a gentle hiss as air enters the milk.
- Lower the tip slightly once the milk has expanded a little. Aim for a steady whirlpool, not spluttering or a loud squeal.
- Stop around 55–65°C (130–150°F) for many espresso drinks. Preferences and equipment vary, so treat this as a useful range rather than a rigid rule.
- Wipe and purge the wand promptly, following the machine’s cleaning instructions.
For example, if your latte milk looks shiny at first but separates into bubbles before you pour, you may have added too much air or let it sit too long. Swirl the pitcher before pouring to bring the milk and foam together. If the texture still looks stiff and dry, use less time at the surface next round.
Milk that’s too hot can taste flatter and lose its pleasant texture. A thermometer gives you a reliable reference while learning; experienced baristas may judge by the warmth of the pitcher. Whatever method you use, stop before the milk boils.
What changes when you use dairy, skim, or plant-based milk
Different milks foam differently because their proteins, fats, and sugars differ. The simplest way to troubleshoot is to change one variable at a time: keep your technique steady while trying another milk, or keep the milk steady while adjusting the wand. That makes it easier to find what’s causing weak foam or large bubbles.
| Milk | What you may notice | Try this |
|---|---|---|
| Whole dairy milk | Rich, rounded mouthfeel; the foam may feel less stiff. | Add air gently and keep the milk swirling. |
| Skim dairy milk | Can produce abundant, lighter foam. | Mix the foam into the milk with a swirl before pouring. |
| Plant-based milk | Results vary; some drinks may split in acidic coffee or foam unevenly. | Try a barista-style version and avoid overheating it. |
Imagine that your oat drink pours smoothly into one coffee but separates in another. The coffee’s acidity and the milk’s formulation can both affect the result, so changing the steaming technique may not solve every split. Try a different temperature or product and judge it by both texture and taste.
If you’re serving milk to someone else, check the carton for milk or other listed allergens, especially with plant-based drinks that may contain ingredients such as soy or nuts. Barista-style formulas can include added oils or stabilizers; read the label if you have an allergy or dietary restriction.
How to tell a technique problem from a machine problem
A brief squeal or one rough pitcher usually points to wand position or milk movement; repeated problems may call for a closer look at the machine. If steam flow seems uneven, check the wand tip for dried milk and clean it according to the manual. Don’t poke into or dismantle a hot wand.
Suppose the same pitcher technique suddenly produces weak steam and a sputtering sound. After the machine has cooled as directed, inspect the visible tip and clean the parts the manufacturer says are user-serviceable. If the flow remains blocked, or the machine makes a new persistent noise, consult the manual or a qualified repair service.
Automatic frothers can reduce the amount of technique involved, but their presets still depend on clean equipment and suitable milk. A frother that leaves residue can heat unevenly, and a preset may not suit every plant drink. Rinse removable parts after use and follow the cleaning guidance for your model.
Unusual milk texture alone does not diagnose a machine fault. Look for a pattern: a sound that only occurs when the wand touches the pitcher is different from a new rattle that continues regardless of how you position it. Note when the sound starts, whether steam flow changes, and whether cleaning the tip helps.
How to heat and store milk safely at home
Heat milk gently, stay nearby, and refrigerate leftovers promptly. Sudden boil-overs happen because steam and foam can lift the milk quickly, while scorching can leave bitter, stuck-on patches. A low burner, frequent stirring, and a pan with a thick base make stovetop heating easier to control.
For espresso, the 55–65°C (130–150°F) range gives you a practical stopping point without pushing the milk toward a boil. If you don’t have a thermometer, stop when the pitcher feels hot but still manageable, and learn how that sensation corresponds to your usual setup. Don’t use the same touch estimate for every pitcher or machine without checking it occasionally.
Return unused milk to the refrigerator rather than leaving it on the counter while you make another drink. Follow the storage directions on the carton and discard milk that smells sour or looks unusually changed. Fresh milk should smell clean; odd heating noises don’t make spoiled milk safe to drink.
When a pan does boil over, turn off the heat and let it settle before moving it. Wipe the stovetop only after the pan and surface are safe to handle. A minute of patience beats a splash of hot milk on your wrist.
Frequently Asked Questions
Is milk that squeals or splutters safe to drink?
A brief squeal or splutter during heating usually points to the technique, steam, or pan, not a safety problem by itself. Check that the milk smells and looks normal, and avoid drinking it if you suspect it has spoiled or it tastes scorched.
Why does milk form a skin when heated?
Heat changes proteins near the surface, and evaporation concentrates them there, forming a thin milk skin. Stir while heating to disrupt the layer, or remove it before serving if you prefer.
Why does milk boil over so suddenly?
Steam bubbles and foam can lift milk rapidly once it gets hot, so it may rise before you have time to react. Use gentle heat, frequent stirring, and close attention, and move the pan off the burner as soon as it starts to rise.
Why does my espresso milk have large bubbles instead of silky foam?
Large bubbles often mean the steam wand added too much air too quickly or stayed near the surface for too long. Add air briefly, then lower the tip to make a steady whirlpool that mixes the bubbles into the milk.
Can I re-steam milk that has already been heated?
Repeated heating can make milk taste flat and damage its texture, so it’s usually better to steam a fresh portion. If you do reheat milk, avoid bringing it to a boil and don’t leave it sitting out while you decide.
Conclusion
When milk squeals, splutters, or separates into big bubbles, check wand position, heat, and cleanliness first. Add air gently, keep the milk moving, and stop heating before it boils.
A quiet hiss, a smooth whirlpool, and a glossy pour are good signs; let those be the sounds and shine of your next cup.
Fall Picks
fall essentials
As an affiliate, we earn on qualifying purchases.