
TL;DR

Get coffee and tea gear delivered free — and shop member deals
- Fast, free delivery on millions of items
- Access to Prime Big Deal Days deals on October 6–7
- Prime Video, Amazon Music and more included
Espresso’s sweet spot is a narrow, coffee-specific range where grind, dose, yield, and puck preparation produce a balanced-tasting shot. Use a repeatable starting recipe, change one variable at a time, and let taste—not shot time alone—guide your adjustments.
A grinder adjustment so small you can barely see it can turn espresso from sharp and watery to round and syrupy. That narrow change is why the sweet spot in espresso extraction feels smaller than you expect: a shot can move from balanced to noticeably harsh with just a little shift in grind or flow.
That does not mean you need a laboratory, an expensive machine, or one perfect recipe. You need a repeatable starting point, a way to measure the coffee going in and the espresso coming out, and the patience to change one thing at a time. A scale and timer help you repeat a result; your palate tells you whether you want to keep it.
Here’s how extraction changes flavor, why familiar brew ratios are useful but not universal, and how to troubleshoot your next shot without getting trapped by the timer. You’ll also learn why an espresso can taste sour and bitter together, and what to adjust first.
Start with a repeatable baseline such as 18 grams of coffee to about 36 grams of espresso, then treat it as a test recipe rather than a rule.
Change one variable at a time so you can tell whether grind size, yield, or preparation improved the shot.
Use sour, thin, bitter, and drying flavors as clues, not certain diagnoses; uneven extraction can create sour and bitter notes together.
Record dose, yield, time, and taste, but judge the espresso by the cup rather than a target shot time.
Keep puck preparation consistent and use clean-tasting, machine-appropriate water when troubleshooting inconsistent shots.
Extraction field guide · 01 / Espresso
The Sweet Spot in Espresso Extraction Is Smaller Than You Think
A tiny change in grind or flow can take a shot from sharp and watery to round and syrupy. Find balance with a repeatable starting recipe, one adjustment at a time, and your palate in the lead.
Read the cup
Flavor gives clues, not a diagnosis
The sweet spot is the narrow range of conditions that makes a particular coffee taste balanced to you. Roast, water, equipment, puck preparation, and personal preference all shape that range.
Often under-extracted
Sharp · sour · thinMay suggest too little extraction, especially alongside fast flow.
TEST: A LITTLE FINERYour target
Balanced to youSweet, rounded, or lively—keep the character you enjoy.
TASTE → DECIDEOften over-extracted
Harsh · bitter · dryMay suggest too much extraction, especially with slow flow.
TEST: A LITTLE COARSERKeep in mind
Bright roast character, water chemistry, and uneven flow can overlap with these flavor clues. If sour and bitter show up together, suspect uneven extraction as one possibility; check puck consistency before treating a single taste as proof.
Build a baseline
A recipe is a starting line, not a verdict
Dose, yield, and time help you repeat a shot and compare changes. The same numbers can taste different across coffees, grinders, baskets, machines, and water.
A familiar first test
18 : 36
18 grams of dry coffee to about 36 grams of espresso. That is a 1:2 brew ratio by weight—a useful reference, not a universal ideal.
Measure in · measure out| What you notice | Possible clue | Small first test |
|---|---|---|
| Fast flow, sharp and thin | Could be too little extraction | Grind slightly finer; hold dose and yield steady |
| Slow flow, dry finish | Could be too much extraction | Grind slightly coarser; compare the cup |
| Sour and bitter together | Uneven flow is one possibility | Keep puck prep consistent; change one factor |
| Bright but enjoyable | Could be the coffee’s character | Keep the recipe if you like the taste |
Dial in with intent
Change one thing, then taste again
A scale and timer make it easier to reproduce a result. You do not need expensive equipment to learn what changed; a clear comparison is the useful tool.
Set the dose
Choose a repeatable amount
Use what your basket handles well, such as 18 grams, and keep it steady.
Set the yield
Start around 1:2
For 18 grams in, aim for about 36 grams out. Stop by weight.
Pull and record
Note time and taste
Record the result, but do not treat a target time as a quality score.
Adjust the grind
Make a small move
Try finer for fast, thin flow or coarser for unusually slow, drying flow.
Keep the test clean
Hold other factors steady
Keep dose and target yield fixed while comparing the grind change.
Taste and refine
Change yield later
If flavor needs a different balance, test a new yield after the grind test.
The useful chain
Small steps make better evidence
A slight grinder adjustment may be only one click on a sensitive grinder. There is no universal click size, so start small and let the next cup tell you whether to continue.
Keep puck prep consistent
Even grounds, level tamp, clean basket
Distribute grounds evenly, tamp level, and avoid spilling coffee around the basket. Inconsistent preparation can hide whether a grind adjustment helped.
Keep the goal in view
The best extraction is personal
A lively, fruit-forward shot may suit one coffee and drinker; another person may prefer a rounder cup. More control can help you compare, but it does not create one ideal point for every bean.
What the espresso sweet spot means for your cup
The espresso sweet spot is the narrow range of brewing conditions that makes a particular coffee taste balanced to you. It depends on grind size, dose, beverage yield, water, equipment, and puck preparation—not a universal setting that works for every bag. A recipe that tastes mellow with one coffee can taste tart or flat with another.
During brewing, hot water dissolves a range of compounds from the coffee puck. The order and balance of those compounds affect whether your shot tastes sweet and rounded or sharply sour, bitter, and dry. Under-extracted espresso often tastes sharp, sour, or thin; over-extracted espresso may taste harsh, bitter, or drying. Those are clues, not proof. Roast style, water chemistry, and uneven flow can create overlapping flavors.
For example, imagine you pull a shot with a new medium-roast coffee and get a bright, lemony taste that disappears quickly. A small grind adjustment finer may slow the water and shift the balance toward more sweetness. But if the new shot tastes chalky and astringent, you may have moved too far. The sweet spot is more like a tight curve than a wide target: a little to either side, and the cup changes.
That’s why “the best extraction” needs a framing for a specific coffee and drinker. You might prefer a lively, fruit-forward shot in a small cappuccino, while someone else wants a rounder espresso to sip straight. The practical goal is not to erase every bright or bitter note; it is to find a balance you enjoy. To find it, first make your shots repeatable.
As an affiliate, we earn on qualifying purchases.
Why a repeatable recipe beats a magic number
The Sweet Spot in Espresso Extraction Is Smaller Than You Think because a recipe only describes the conditions you used; it cannot promise a flavor. Dose, yield, and time let you reproduce a shot and compare adjustments, but the same numbers can taste different across coffees, grinders, baskets, machines, and water. A recipe is a starting line, not a verdict.
A common starting point is 18 grams of dry coffee to about 36 grams of espresso, or a 1:2 brew ratio. That means you aim to collect roughly twice the dry coffee dose as liquid espresso by weight. If an 18-gram dose yields 36 grams in 28 to 32 seconds, you have a useful first record. You do not have proof that the shot tastes balanced just because the timer falls in that range.
Suppose one coffee tastes dense and pleasantly sweet at 36 grams, while another tastes too intense at the same yield. You could try stopping the second shot at 40 grams, keeping the dose and grind fixed, then taste the difference. A longer yield can make the espresso less concentrated, but it can also bring out flavors you dislike. It depends on the beans and your palate.
Modern scales, timers, and grinders make this kind of comparison easier, while flow- and pressure-profiling equipment gives some brewers more control. Still, more control does not create one ideal extraction point. A basic scale that reads in 0.1-gram increments is often more useful than a complicated setup if you are still changing several variables at once. Record what you did, then let the cup decide what comes next.
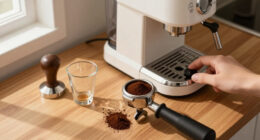
espresso grinder with precise adjustment
As an affiliate, we earn on qualifying purchases.
As an affiliate, we earn on qualifying purchases.
How to dial in a shot without changing everything
To dial in espresso, keep your dose steady, weigh the espresso, and adjust one variable at a time based on taste. This makes each shot a useful test instead of a confusing mix of changes. Start with a familiar brew ratio, then use grind size to bring the flavor into balance before testing a different yield.
- Choose a repeatable dose. Use the amount your basket handles well, such as 18 grams, and keep it consistent between shots.
- Set a starting yield. Try around 36 grams out for an 18-gram dose. Put a scale under the cup so you can stop the shot by weight.
- Record the time and taste. Note the result, but treat the timer as context rather than a quality score.
- Change grind size slightly. If the espresso gushes out and tastes thin or sharply sour, go a little finer. If it drips slowly and tastes dry or harsh, try a little coarser.
- Pull another shot and compare. Keep the dose and target yield fixed for this test. Change the yield later if the flavor needs a different balance.
Picture a weekday morning: your 18-gram dose produces 36 grams in 20 seconds, and the shot tastes like tart juice with little sweetness. A small move finer may bring the time closer to your usual range and make the cup rounder. If the next shot instead crawls out and dries your tongue, you have a clear sign to ease back.
Grinder adjustment size varies by grinder, so there is no reliable universal number of clicks. Start with a small step; for a very sensitive grinder, that may be one click. Keep puck preparation steady too: distribute the grounds evenly, tamp level, and avoid spilling coffee around the basket. Otherwise, a messy puck can hide whether the grind change helped. The aim is a clean comparison, not a perfect-looking logbook.
As an affiliate, we earn on qualifying purchases.
What sour, bitter, and mixed flavors can tell you
Flavor gives you a direction for your next test, but it does not diagnose extraction on its own. Sour or thin espresso can point toward too little extraction, while bitter, harsh, or drying espresso can point toward too much. These are helpful patterns, not rules: roast character, water, and uneven puck flow can imitate them.
If your shot tastes sharply sour and runs very quickly, a slightly finer grind is a reasonable first experiment. If it tastes bitter and leaves a dry, rough coating on your tongue, try a small move coarser or review whether the shot is running unusually slowly. Change just one of those factors, then taste again. A naturally bright light roast may still taste more acidic than a dark roast even when both are brewed well.
Sour and bitter at the same time often points to uneven extraction rather than one simple under- or over-extracted shot. Water can rush through a weak spot in the coffee puck, pulling a concentrated stream through one area while barely reaching another. The result can combine sharpness with harshness, like a song playing two conflicting notes at once.
For instance, if one side of the basket starts flowing much earlier, check whether your grounds are clumped or distributed unevenly before blaming the recipe. A consistent tamp and careful distribution can help the water move through the puck more evenly. Taste after each change, and avoid making a large correction based on one sip: an espresso’s heat, milk, and even a small difference in preparation can change what you notice. The cup is feedback, not a courtroom verdict.
As an affiliate, we earn on qualifying purchases.
How grind, yield, and shot time pull in different directions
Grind size, yield, and shot time influence one another, but none tells the whole story alone. A finer grind usually slows water and can increase contact with coffee; a larger yield sends more water through the puck and changes the espresso’s strength and flavor. Time records how long a shot took, yet it cannot tell you whether water traveled evenly or whether the result tastes good.
Here is a practical comparison for an 18-gram dose. These examples are starting points, not guaranteed flavor outcomes, and the same shot time can taste different with another coffee or setup.
| What you change | What you measure | What to watch for |
|---|---|---|
| Grind finer | Shot time and flow | Slower flow; may help a fast, thin shot, but too fine can taste harsh or restrict flow |
| Grind coarser | Shot time and flow | Faster flow; may help an overly slow shot, but too coarse can taste weak or sharp |
| Increase yield | Espresso weight out | Less concentrated cup; flavor balance may shift, not always toward sweetness |
| Keep a 1:2 ratio | 18 grams in, about 36 grams out | A repeatable baseline, not a universal recipe |
Try the comparison with your own coffee: pull 18 grams in and 36 grams out, then note the time and taste. If the flow looks steady but the espresso feels too concentrated, test a slightly larger yield without touching the grind. If it gushes out and tastes hollow, test a finer grind while holding the yield. That lets you learn which variable matters most to your cup.
There is a narrow range where these changes may improve balance, but the exact range shifts with the coffee and gear. A grinder with larger jumps may make fine adjustment frustrating, while a very precise grinder can make small steps easier. Either way, time supports your judgment; it does not replace it.
Why beans, water, and puck prep move your target
The target moves because coffee beans and brewing conditions are not interchangeable. Roast level, age, water composition, basket shape, grinder consistency, and puck preparation all affect how a shot flows and tastes. That is why the same dose and ratio can produce a sparkling, sweet espresso one day and a muted or rough one with another bag.
For example, a lighter roast may taste lively and can respond well to a different ratio or grind than a darker roast, but there is no single rule that every light roast needs more water or a finer setting. Start from your baseline and taste. If the coffee seems hard to extract at that setting, test one modest adjustment rather than copying a recipe designed for different beans.
Water matters because its mineral content affects both extraction and flavor. You do not need to become a water chemist to notice a difference: if your tap water tastes strongly of chlorine or leaves heavy scale in the kettle, it may not be a good brewing choice. Use potable water that tastes clean, and follow your machine’s instructions for suitable water and descaling. Water that is too mineral-heavy can cause scale; very low-mineral water may not make coffee taste lively.
Puck preparation matters for a different reason. If grounds sit in clumps or you tamp at an angle, water may find an easier path through the puck. A quick, consistent routine—break up clumps, distribute grounds evenly, tamp level—can make results more repeatable. This is a useful lesson when espresso tastes both sour and bitter: before making a dramatic recipe change, look for signs of uneven flow and keep your preparation steady.
How to use measurements without letting them run the show
Measurements help you repeat a shot, while taste decides whether you want to drink it again. A scale is useful because a visual guess about espresso volume can be misleading: crema makes a small shot look larger, and the crema settles with time. Weighing the dry dose and liquid yield gives you a clearer record than relying on a fill line or a timer alone.
Set up a simple note for each coffee: bean name or roast date if available, dose, yield, time, grind setting, and a few flavor words. “18 grams in, 36 grams out, 29 seconds; syrupy, cocoa, slight drying finish” tells you much more than “good.” If the next shot runs fast and tastes thin, you can compare it against the earlier cup instead of guessing from memory.
But do not let a timer bully your palate. If a shot reaches 36 grams in 24 seconds and tastes balanced, there is no prize for forcing it to 30 seconds. If a shot takes 32 seconds but tastes sharply sour and hollow, the time has not made it successful. Time is a repeatability tool, not a score for your espresso.
Home brewers with basic equipment can use this method just as well as people with flow profiling or pressure control. Use a kitchen scale that can handle the cup, stop the shot at your chosen weight, and change one setting between tests. The useful numbers narrow the search; the taste tells you when to stop. If you enjoy the cup black, that is your benchmark. If you usually add milk, taste the shot in the drink you actually make.
Frequently Asked Questions
What does the sweet spot mean in espresso extraction?
The sweet spot is the range of grind, dose, yield, and preparation that makes a particular coffee taste balanced to you. It changes with the beans, equipment, water, and personal preference, so no single recipe works for every setup.
What dose and brew ratio should I start with?
A practical starting point is 18 grams of coffee to about 36 grams of espresso, a 1:2 ratio. Keep the dose and yield steady while you adjust grind size, then change the ratio if the flavor still needs a different balance.
Does a longer shot time mean higher extraction?
Not by itself. Time records how long the shot ran, but it does not show whether water flowed evenly through the puck or whether the espresso tastes balanced. Use time alongside dose, yield, flow, and taste.
Why does my espresso taste sour and bitter at the same time?
Uneven extraction is one possible reason: water may rush through some parts of the puck and barely reach others, creating conflicting flavors in one cup. Check for clumps, uneven distribution, or a tilted tamp, and make your next test with puck preparation kept consistent.
Should I change grind, dose, or yield first?
Keep your dose fixed and use grind size as the first adjustment while holding the target yield steady. Once the flow is repeatable, test a slightly different yield if the shot tastes too concentrated or its flavor balance still needs work.
Can I dial in espresso without expensive equipment?
Yes. A basic scale and timer make it much easier to repeat a dose, weigh the espresso, and compare shots, but expensive profiling tools are not required. Taste carefully and change one variable at a time.
Conclusion
Start with a repeatable dose and yield, then make one small change at a time. Use the timer to keep track, not to decide whether your espresso deserves a passing grade. Your coffee, equipment, and preferences set the sweet spot; your taste tells you when you have found it.
A good shot is not a magic number on a screen. It is the moment the cup tastes balanced enough that you pause before taking the next sip.
Halloween Picks
halloween
As an affiliate, we earn on qualifying purchases.