
TL;DR

Get coffee and tea gear delivered free with Prime
- Fast, free delivery on millions of items
- Prime Video, Amazon Music and more included
- Member-only deals all year
Flow rate is how fast espresso leaves the group head, measured in grams per second, and it reveals what’s happening inside the puck in real time. A typical espresso flows at roughly 1–2 g/s for most of the shot, and changes in that number explain sour, bitter, and unbalanced shots better than timing alone. Adjust your grind, dose, and pressure to steer flow rate, and you can fix shots before they finish.
Your espresso shot can taste perfect on Monday and terrible on Thursday, with the same beans, the same machine, the same grinder. The culprit is usually something you’ve never measured: flow rate, the speed at which liquid actually leaves your portafilter.
Most home baristas obsess over dose, yield, and shot time. Those matter. But they’re the scoreboard, not the game. Flow rate is the game — it’s what’s happening inside the puck, second by second, while your shot runs.
In this guide, you’ll learn what flow rate is, what the numbers should look like, how to read a flow curve like a pro, and the three levers that actually change it. No fancy gear required for most of it — a scale that reads to 0.1 g and a little attention will get you 90% of the way there.
Flow rate is measured in grams per second, and a healthy espresso ramps from slow drips to roughly 1.5–2 g/s — not a constant speed.
A sudden mid-shot flow spike (e.g., 1 g/s jumping to 3 g/s) is the fingerprint of channeling, even when total shot time and yield look perfect.
You can measure flow rate with any 0.1 g scale by recording weight every 5 seconds and dividing the gain by the seconds elapsed.
Grind size is the strongest flow lever; fix distribution (WDT, level tamp) before grinding finer when you see spikes.
Coffee flows faster as it ages — expect to grind slightly finer week over week, and rest espresso beans 7–14 days for predictable behavior.
Flow Rate Explained: The Espresso Variable Hiding in Plain Sight
Two shots can share the same dose, yield, and total time yet taste strikingly different. Flow reveals how water moved through the puck along the way—and gives you another useful clue for dialing in.
A shot’s flow profile can change even when its final yield and duration match another shot.
Flow is the pace of water
Espresso flow rate describes how quickly water passes through the coffee puck, commonly in grams per second. A flow profile shows how that pace changes during extraction. Average flow gives an overall pace; the profile shows the changing story shot by shot.
Rate through the puck
Flow adds detail that a final yield alone cannot show. A scale tells you how much espresso collected, not whether water arrived steadily or surged near the end.
Shape across time
The puck wets, swells, and shifts as a shot develops. A flow profile records those changes as a curve, where flow may rise, fall, or stay relatively even.
Clue, not score
A smooth graph does not promise sweetness, and a changing line does not prove something went wrong. Read it alongside preparation, repeatability, and taste.
Some machines measure flow with a meter; others estimate it from pump behavior or control it through their design. The displayed value may not be a direct measurement at the puck.
Related does not mean interchangeable
Flow, time, ratio, and pressure interact, but each describes a different part of the shot. Matching one number does not prove that two shots behaved alike.
| Variable | What it tells you | Example |
|---|---|---|
| Flow rate | How quickly water passes through the puck | A changing rate during the shot |
| Flow profile | How flow rate changes over time | Gentle start, then faster flow |
| Brew ratio | Beverage mass divided by dry coffee dose | 18 g coffee : 36 g espresso = 1:2 |
| Shot time | Elapsed time to reach a chosen yield | 36 g collected in 30 seconds |
| Pressure | Force applied to move water through the puck | A machine setting or reading |
One may flow slowly at first and quickly later; another may stay more even. Dose, yield, ratio, and duration can match while the water’s pace—and the cup—differs.
A profile describes what happened
A changing line can be normal
Water may begin as slow drops, build into a steady stream, and speed up as resistance changes. The curve alone cannot tell you whether the espresso tastes good.
Look for patterns you can repeat
If flow suddenly gushes from one side while the rest drips, uneven preparation or a channel may be involved. If the profile varies shot to shot, check distribution, tamping, and grinder consistency.
Use flow to ask better questions
A faster or rising flow can mean water meets less resistance; a slower flow can reflect a finer grind or a puck that resists water more. Neither is automatically better. Grind, dose, distribution, tamping, temperature, pressure, freshness, and flow all shape extraction and flavor.
A coarser grind may lower resistance, but channeling can also give water an easy route through the bed. If the cup tastes thin or sharply sour, treat the pattern as a clue and inspect preparation.
A very fine grind may contribute to slow flow. If the cup tastes harsh or drying, consider the whole recipe and puck—not the flow reading alone. Slow does not guarantee sweet.
Make the cup your final judge. Note whether it tastes sweet, balanced, thin, sour, bitter, or drying, then compare those notes with what you observed during extraction.
Change one thing at a time
Keep dose and target yield steady, record what the shot does, and change only one factor before tasting again. Your goal is a repeatable shot that tastes good—not a graph that looks impressive.
Set a baseline
Choose a dose and yield you can repeat, such as 18 g in and 36 g out.
Record the shot
Note yield and time; observe whether the flow changes during extraction.
Adjust one factor
Try a grind or flow setting change while holding the rest steady.
Taste and repeat
Compare flavor and consistency. Keep the change only if it helps.
What Flow Rate Actually Is (And Why It’s Not the Same as Shot Time)
Flow rate is the speed at which espresso exits your group head, measured in grams per second (g/s). It’s not your total shot time, and it’s not your yield — it’s the instantaneous pace of extraction, which changes constantly during a shot. A 30-second shot can hide wildly different flow stories.
Think of it like driving. Shot time is how long the trip took. Yield is how far you went. Flow rate is your speedometer — and a speedometer tells you far more about what’s going wrong than your arrival time ever will. If you drove 30 miles in 30 minutes but spent 20 of them stopped and the last 10 flooring it, the average looks fine and the experience was terrible. Espresso works the same way.
Here’s a concrete example. Two shots both finish in 28 seconds and both weigh 36 g. Shot A drips slowly for 10 seconds, then ramps smoothly to 1.8 g/s. Shot B sits dead for 15 seconds, then suddenly gushes at 3 g/s to catch up. Same numbers on paper. Shot A tastes balanced and sweet; Shot B tastes sour up front and hollow in the finish, because the water punched a hole through the puck instead of flowing evenly through it.
Another everyday version of this: the Monday-versus-Thursday problem. On Monday your local roaster’s beans are dialed in at 18 g in, 36 g out, 30 seconds, tasting like blueberry and chocolate. By Thursday, the same recipe pulls in 26 seconds with a pale, fast stream — the beans have aged, resistance has dropped, and flow crept up without you noticing. The recipe didn’t change; the flow did.
That’s the whole point of watching flow: it exposes problems that shot time completely hides.
The Numbers That Matter: What a Healthy Shot Looks Like in Grams Per Second
A healthy espresso typically flows at 0.5–1 g/s in the first seconds after the first drip, ramping to roughly 1.5–2 g/s through the body of the shot. Before the first drip appears, flow is effectively zero — and that pre-infusion pause is normal, even desirable.
For a standard double shot — say 18 g of coffee yielding 36 g in 28–32 seconds — your average flow works out to about 1.2 g/s. But averages mislead. What you want is a smooth ramp: slow start, steady acceleration, no sudden jumps. Picture a garden hose filling a bucket: the bucket weight climbing steadily and predictably is a healthy puck; the bucket suddenly getting a splash dump halfway through is water finding a shortcut.
Espressoguide’s extraction testing points to a simple diagnostic pattern: a sudden flow spike mid-shot almost always means channeling — water found a crack or a weak spot in the puck and started racing through it. A shot that never accelerates past 0.5 g/s usually means your grind is too fine, or your puck is so dense that water can’t move through it evenly.
Here’s a quick reference table for interpreting what you’re seeing, with real-shot examples:
| Flow pattern | Likely cause | Real-shot example | What the shot tastes like |
|---|---|---|---|
| Under 0.5 g/s, shot crawls past 40 seconds | Grind too fine, or overdosed basket | 4 g in the cup at 20 seconds, only 12 g at 40 — the shot is choking | Harsh, bitter, drying |
| First drip after 10+ seconds, then smooth ramp to ~2 g/s | Healthy extraction with proper pre-infusion | First drips at 9 seconds, 36 g out at 30 seconds, no jumps | Balanced, sweet, clear |
| Sudden jump from 1 g/s to 3+ g/s mid-shot | Channeling or puck fracture | Scale reads 14 g at 15 seconds, then 28 g at 20 — you didn’t change anything, the puck did | Sour edges, hollow body, inconsistent from shot to shot |
| Blonde liquid above 2.5 g/s early in the shot | Grind too coarse, or underdosed | Pale stream by second 12, 36 g reached at just 20 seconds | Thin, sour, watery |
One caveat: these are ranges, not laws. A turbo shot deliberately runs coarse and fast at 3+ g/s — some cafés pull an 18 g in, 40 g out shot in just 15 seconds and it’s delicious, bright, and tea-like. A dense, dark roast might behave better slightly slower. Use the table as a starting map, then let taste be the judge.
How to Measure Flow Rate With Just a Scale (No Smart Machine Needed)
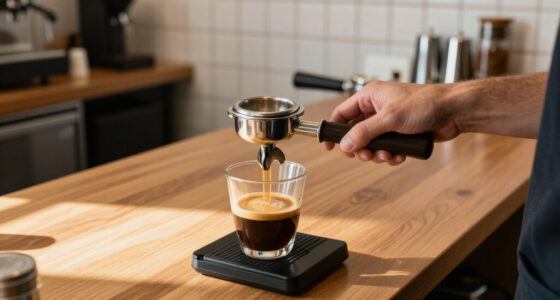
You measure flow rate by putting your scale under the cup, starting a timer, and reading the weight at regular intervals — every 5 seconds is plenty. The math is simple: divide the weight gain by the seconds elapsed, and you have g/s for that window.
Say your scale reads 4 g at 10 seconds, 13 g at 15 seconds, and 23 g at 20 seconds. Between 15 and 20 seconds you gained 10 g in 5 seconds — that’s 2 g/s. Do this for three or four windows across the shot and you’ve drawn a rough flow curve by hand. Here’s what a full shot looks like written out on a sticky note: 0 g at 8 s (still dripping), 5 g at 12 s, 14 g at 17 s, 24 g at 22 s, 34 g at 27 s, stop at 36 g. Windows: 1.8, 1.8, 2.0, 2.0 g/s. That flat, steady ramp is exactly what you want to see.
- Tare your scale with the cup on it.
- Start the timer the moment you hit the brew button.
- Write down the weight every 5 seconds until you reach your target yield.
- Subtract each reading from the next to get grams per 5 seconds, then divide by 5 for g/s.
- Look for the pattern: smooth ramp is good, sudden spikes mean channeling.
Modern smart scales and apps like those built into flow-profiling tools do this automatically and draw the curve for you, which is genuinely fun — watching the line bend in real time as you adjust your grinder is like finally getting glasses after years of squinting. But a $20 scale and a sticky note on the drip tray will teach you the same fundamentals. A sticky note from a real dial-in session might read: “Mon: 0 g at 10 s — too fine. Wed after coarser grind: 3 g at 10 s, 12 g at 15 s — better.” Two lines, and you already know which direction to move.
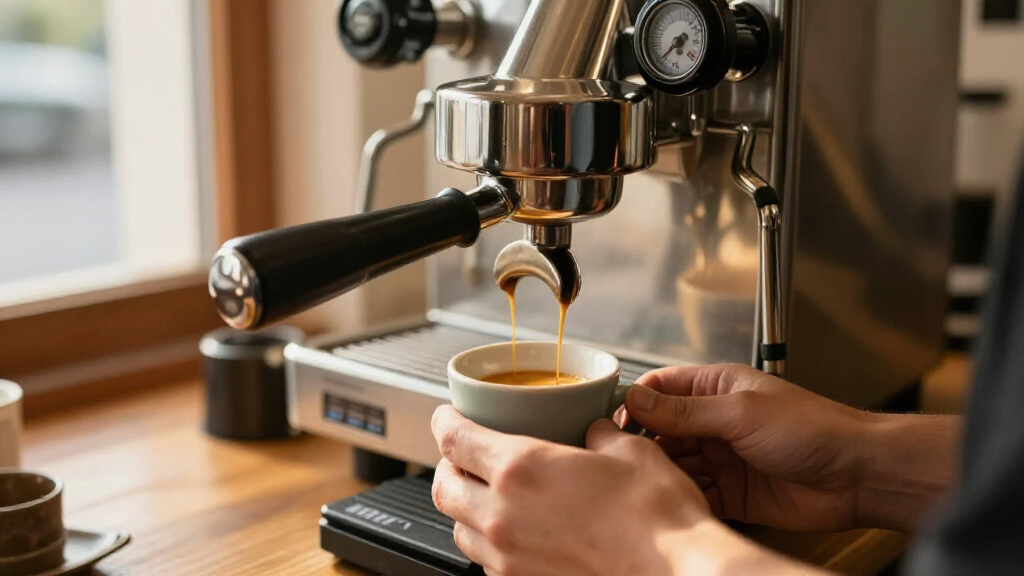
If you want a low-tech sanity check without any math: watch the stream itself. A healthy shot starts as slow, dark drips — the color of molasses — and thickens into a thin, steady, mouse-tail stream that gradually lightens toward amber near the end. A fast, jumpy, pale stream from the start means your flow is too high, full stop.
Why Flow Spikes Ruin Your Shot Before You Can Taste It
A flow spike happens when water finds a path of least resistance through the puck and accelerates through it — and it’s the most common cause of the “same recipe, different shot” mystery. Once a channel opens, most of the water rushes through that one spot while the rest of the coffee stays under-extracted.
The result is a shot that’s simultaneously over- and under-extracted. The channelized zone gets scoured — harsh, bitter notes leach out. The untouched zones barely get wet — sour, salty, weak flavors remain. Layer them together and you get that muddled, vaguely unpleasant cup that’s hard to describe because it’s two bad shots in one.
An analogy: imagine watering a flowerpot with cracked, dry soil. Instead of soaking evenly, the water carves one channel down the side and pours out the bottom within seconds, while the rest of the soil stays dusty. Your puck is the flowerpot, and espresso is the soil that should soak evenly.
The sneaky part is that channeled shots often finish on time and on weight. Your recipe says 18 g in, 36 g out, 29 seconds — check, check, check. Everything looks right. Only the flow curve betrays the problem: that sudden lurch from 1 g/s to 3 g/s at the 15-second mark is the fingerprint of a crack opening up. Say your buddy pulls the same recipe on the same machine and their shot tastes great while yours is muddled — when you both log the flow, the difference is obvious in seconds: theirs ramps smoothly, yours lurches.
Shot time tells you what happened. Flow rate tells you how it happened — and the “how” is what you can actually fix.
Channeling comes from a few usual suspects: an uneven tamp, a clumpy grind distribution, a cracked puck from knocking the portafilter, or a bed that wasn’t leveled before tamping. Fixing distribution — with a good WDT (weed the grounds with fine needles) routine — does more for flow consistency than any grinder upgrade.
The Three Levers That Actually Change Flow Rate
Grind size, dose, and pressure are the three variables that meaningfully steer flow rate — everything else is fine-tuning. If your flow is wrong, one of these three is why.
Grind size is the big one. Finer grounds pack tighter, creating more resistance and slowing flow. Coarser grounds open the channels wide and speed it up. A single grind adjustment can shift your flow by 0.3–0.5 g/s across an entire shot — which is often the difference between sour and sweet. If you change nothing else, change this. Real-world example: your shot hits 36 g in 22 seconds and tastes sour, so you nudge the grinder three clicks finer. The next shot runs 30 seconds at the same 36 g — that half-second-per-gram slowdown is grind size doing its job.
Dose works through resistance too. More coffee in the same basket means a taller, denser puck, and water takes longer to push through it. Going from 17 g to 18.5 g in an 18 g basket can stretch a shot by 4–6 seconds at the same grind. Useful when you’re already at the finest usable setting and still flowing too fast — but watch headspace: cramming 20 g into a small basket can choke the shot or press the puck against the shower screen.
Pressure is the lever most home machines don’t give you — but if yours does, it’s powerful. Pump pressure and pre-infusion pressure shape how water enters the puck. A gentle pre-infusion at 2–4 bar lets the puck saturate and swell before full pressure hits, dramatically reducing early channeling — think of gently pre-wetting a sponge before pressing down, versus slamming it dry. Machines with profiles can ramp pressure to slow the end of the shot, taming that blonde, watery finish.
- Flow too fast and shot tastes sour? Grind finer first.
- Flow too slow and shot tastes bitter? Grind coarser first.
- Flow spikes mid-shot? Fix distribution (WDT, level tamp) before touching the grinder.
- Can’t grind finer without stalling? Add dose in small 0.5 g steps.
- Machine has pre-infusion or pressure control? Lengthen pre-infusion to smooth the ramp.
Change one variable at a time and re-measure. If you adjust grind, dose, and pressure together, you’ll never know which fix worked — and you’ll be lost next week when the beans age two days and everything shifts anyway.
What Your Flow Curve Is Telling You About Freshness and Crema
Flow rate isn’t just a diagnostic for today’s shot — it’s a running log of your coffee’s condition. Fresh beans flow slower; stale beans flow faster. As coffee degasses over one to three weeks, it releases CO₂, loses resistance in the basket, and its cell structure breaks down. The same grind setting that choked a 3-day-old roast will pull a fast, thin shot from a 3-week-old bag. It’s like a fresh sponge versus a worn-out one: the new sponge holds water back; the old one lets it pour straight through.
CO₂ is also why fresh coffee can fake a flow problem. Carbon dioxide escaping under pressure creates bubbles and resistance that slow early flow and produce that thick, hazelnut-colored crema. A shot from beans roasted yesterday might stall for 12 seconds before the first drip — not because your grind is too fine, but because the puck is fizzing like a shaken soda. Open a bottle of soda that’s been shaken: the escaping gas creates resistance and chaos before liquid flows normally. Same physics, tiny scale.
This is why baristas rest beans. Espresso typically performs best 7–14 days after roast date, when degassing has settled enough for extraction to behave predictably. Track your flow across a bag’s life and you’ll see the pattern yourself: shots get faster week over week, and you’ll need marginally finer grinds to keep the same flow curve. A bag that averaged 1.3 g/s in week one might average 1.7 g/s at the same setting by week three — that’s your cue to grind finer.
Practical move: note the flow rate of your dial-in shot on the bag with a marker — “Oct 12, 18 g / 36 g, ~1.4 g/s mid-shot.” When you open a new bag of the same coffee, you have a baseline. If the new bag flows 0.4 g/s faster at the same setting, you’ve learned something in thirty seconds that would otherwise take three wasted shots to discover.
One Week of Watching Flow: What Changes When You Start Tracking It
Here’s the honest, practical payoff. When you start tracking flow rate — even roughly, with pen and paper — three things happen within about a week of normal brewing.
First, your dial-ins get faster. Instead of adjusting the grinder, pulling a shot, tasting, and guessing, you pull a shot, look at the flow, and know immediately whether the grind moved. Most dial-in problems announce themselves in the first 10 seconds of flow data. Example: Monday morning, new bag, first shot shows 6 g in the cup at 10 seconds — too fast. One click finer, second shot shows 1 g at 10 seconds — dialed in by shot two instead of shot five.
Second, your shots get more consistent. Channeling hides when you only watch the clock. Once you watch the ramp, you notice that your Tuesday shots spike and your Saturday shots don’t — and you trace it to a rushed tamp before work. The Tuesday log reads “1 g/s to 3 g/s jump at 15 s” while Saturday’s reads “smooth 1 to 2 g/s ramp,” and the difference in the cup suddenly has a visible explanation.
Third, you stop chasing recipes blindly. A recipe that says “18 g in, 36 g out, 30 seconds” is a snapshot of someone else’s coffee, machine, and grind. A target flow curve — slow drips for 8–10 seconds, smooth ramp toward 2 g/s — travels across beans and gear far better than any fixed recipe. When you switch from a medium Ethiopian roast to a dark Brazilian, the old recipe fails immediately, but the target flow curve gets you close on the first shot. You start brewing to a pattern instead of a script.
The single biggest upgrade in espresso isn’t gear. It’s feedback — and flow rate is the cheapest, richest feedback you’ll ever get.
You don’t need to log every shot forever, either. Track flow closely for a week or two, build the intuition, and then check in whenever something tastes off. The skill stays.
Common Flow Rate Mistakes (And the Easy Fixes)
Most flow rate problems come down to five avoidable mistakes. Each has a fix that takes less time than pulling the wasted shot.
- Judging by time alone. A 28-second shot can be channeled garbage. You taste sour-and-bitter mud, glance at your notes: “28 s, 36 g — should be fine.” Watch the ramp, not just the clock.
- Grinding finer to fix channeling. Channeling is a distribution problem; finer grinds often make cracks worse. Your shot spikes mid-pour, you go finer, and the next spike comes even earlier. Fix your WDT and tamp first.
- Chasing flow with dose. Adding coffee to slow a fast shot works, but it changes extraction chemistry too — an 18 g recipe jumped to 19.5 g suddenly tastes different even when the timing matches. Change grind before dose.
- Ignoring bean age. Yesterday’s roast will flow strangely no matter what you do. You’ll chase grind settings all week chasing a moving target. Rest beans 7–14 days for espresso.
- Changing multiple variables at once. You grind finer AND add 0.5 g AND extend pre-infusion; the shot improves and you have no idea why — so you can’t repeat it tomorrow. Adjust one thing, re-measure, repeat. Otherwise you’re running an experiment with no control group.
One bonus mistake: trusting the stream’s color as your only signal. Blonde flow late in the shot is normal — that’s the puck running out of solubles, like the last squeeze of a wet towel. Blonde flow in the first 10 seconds means something’s genuinely wrong, usually a coarseness or channeling issue. Context turns a color into information.
Frequently Asked Questions
What is a good flow rate for espresso?
A well-extracted espresso typically flows at about 1–2 grams per second through the body of the shot, after a slow drip phase during pre-infusion. A standard 18 g in, 36 g out shot finishing in 28–32 seconds averages around 1.2 g/s. What matters most is the pattern — a smooth ramp with no sudden spikes — rather than any single number.
Do I need a smart scale or profiling machine to track flow rate?
No. Any scale that reads to 0.1 g and a timer will work. Write down the beverage weight every 5 seconds, subtract each reading from the next, and divide by 5 to get grams per second for each window. Smart scales and apps automate this and draw the curve for you, which is convenient, but the underlying skill is the same.
Why did my espresso suddenly start flowing faster with the same settings?
The most common cause is bean age. Coffee loses CO₂ and resistance as it degasses, so the same grind setting produces faster shots one to three weeks after roasting. Humidity, a warmer grinder, and a slightly lower dose from scooping inconsistencies can also contribute. When flow drifts up, grind marginally finer to restore your target curve.
What causes flow rate to spike in the middle of a shot?
A mid-shot spike usually means channeling — water cracked through the puck at a weak point and is racing through it. Causes include clumpy grind distribution, uneven tamping, an unleveled puck, or a knock that fractured the bed. The fix is better distribution (WDT with fine needles and a level tamp), not a finer grind, which can make cracks worse.
Is a slow espresso shot always bad?
No — slowness only matters relative to taste. A shot that drips for 10–12 seconds before flowing is normal, especially with pre-infusion or very fresh beans high in CO₂. But a shot that crawls under 0.5 g/s and runs past 40 seconds is usually over-extracted: harsh, bitter, and drying. That’s a sign to grind coarser or reduce your dose slightly.
Conclusion
Here’s the crisp version: stop judging your espresso by its finish time and start judging it by its pace. A smooth flow ramp — slow dark drips for the first 8–10 seconds, steady acceleration toward 2 g/s, no sudden lurches — is the shape of a good shot, whatever the clock says. Grab your scale, note the weight every 5 seconds tomorrow morning, and you’ll likely diagnose in one shot what you’ve been guessing at for months.
Your espresso machine has been showing you this data every single morning, one drip at a time. All you had to do was start counting.
Halloween Picks
halloween
As an affiliate, we earn on qualifying purchases.