
TL;DR
An espresso recipe gives you starting parameters: how much dry coffee to use, how much espresso to brew, and a time range to observe. Weigh the dose and yield, keep other variables steady, then adjust grind or yield in small steps based on taste. A good shot matters more than matching a time target exactly.
A recipe that says 18 g in, 36 g out can sound like a strict test. It is more useful as a starting point: a way to make one shot repeatable, then adjust it until the cup tastes right.
Once you know how to read dose, yield, ratio, and brew time, you can follow a café recipe without copying it blindly. You will also know what to change when your espresso runs fast, tastes sharp, or leaves a dry bitterness on your tongue.
Dose is the weight of dry coffee in the basket; yield is the weight of espresso in the cup.
A 1:2 ratio means 18 g of coffee to about 36 g of espresso, measured by weight.
Brew time is useful only alongside dose, yield, equipment, and the recipe’s timing method.
Hold dose steady and change one variable at a time; adjust grind or yield in small steps based on flavor.
Recipes shift with beans and equipment, so let your palate confirm when the shot tastes balanced.
A practical guide to dialing in
How to Read an Espresso Recipe Like a Barista
A recipe is a repeatable starting point, not a strict test. Weigh the coffee and espresso, keep your setup steady, then make small changes guided by taste.
Dry ground coffee in
Espresso out by weight
A useful starting relationship
Common range; taste decides
Four numbers, one connected shot
Read the recipe as a set of starting parameters. Some details describe the shot; others describe the equipment or timing method used to make it.
Dose
Dry coffee grounds, weighed in grams. Match the recipe to the basket’s intended capacity.
Yield
Espresso collected in the cup. Use a scale instead of judging the level by eye.
Brew time
A clue about flow. Check whether timing starts at the pump or uses another convention.
Grind size
Finer generally slows flow; coarser generally speeds it up. Settings vary by grinder.
Temperature and pressure can affect extraction too. For a first dial-in, hold them steady while you focus on dose, yield, grind, and taste.
Measure what goes in and what comes out
A ratio compares dry coffee with brewed espresso by weight. Some water remains in the coffee puck, so the drink yield is not the machine’s total water use.
| Dry coffee dose | 1:2 starting yield | What it means |
|---|---|---|
| 16 g | 32 g espresso | One part coffee to two parts espresso by weight |
| 18 g | 36 g espresso | A common recipe starting point |
| 20 g | 40 g espresso | Useful when the basket and recipe call for a larger dose |
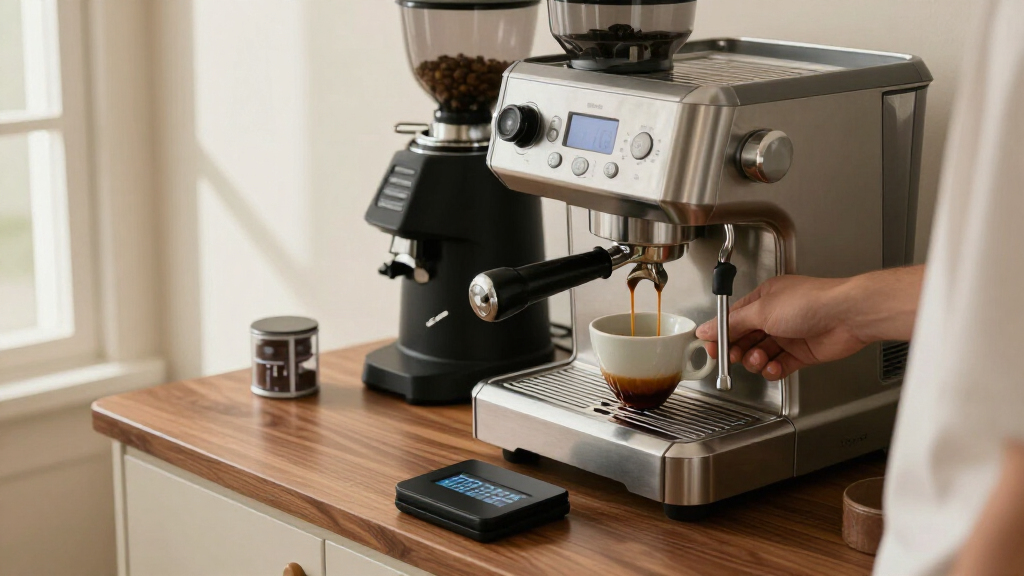
Tare the cup on a small scale, then stop the shot near the target yield. For an 18 g dose at 1:2, aim for about 36 g in the cup.
Time is a clue, not a score
Many recipes land around 25–35 seconds, but equipment, ratio, coffee, and timing method all change what that number means.
Compare like with like
Some recipes start the clock when you activate the pump. Others treat pre-infusion—the low-pressure wetting period—differently.
A fast shot can suggest checking grind or puck preparation. A slow shot can still taste pleasant. Let flavor judge the result.
Make one small change, then taste again
Use the intended dose first. Keep it steady while you adjust grind or yield in small steps, then compare the next cup.
Try finer or longer
Make a small move finer to slow the flow, or let the shot reach a slightly higher yield. Taste again before making another change.
Try coarser or shorter
Make a small move coarser to speed the flow, or stop at a slightly lower yield. These are starting points, not guaranteed fixes.
Changing dose and grind together makes the result hard to interpret. Keep the recipe’s dose, adjust one thing, and record what changed.
A repeatable barista sequence
Your first shot gives you a reference—even when the cup needs work. A simple routine makes each next adjustment easier to understand.
Weigh the dose
Match the recipe and basket.
Prepare the puck
Distribute and tamp consistently.
Weigh the yield
Tare the cup; stop near target.
Taste and note
Record flavor and approximate time.
Adjust one thing
Make a small change and repeat.
“18 g in, 36 g out, 27 seconds; sharp; ground a little finer.” Dose, yield, time, and taste are easier to act on when written down.
Read the whole recipe before you touch the grinder
To read an espresso recipe like a barista, treat it as a group of connected starting parameters, not a list of independent rules. Most recipes name the coffee dose, espresso yield, and brew time; some also give a grind setting, temperature, or pressure. Together, those details help you repeat a shot and decide what to adjust.
Imagine a recipe card beside your machine: 18 g dose, 36 g yield, around 30 seconds. The first two numbers describe how much coffee goes into the basket and how much espresso should land in the cup. The time gives you another clue about flow, but it cannot tell you on its own whether the shot tastes good.
A recipe is a useful baseline because it pins down a starting point. If you change the dose, grind, and yield all at once, the next shot may taste better, but you will not know why. Hold most things steady, then make one small adjustment and taste again.
Think of the recipe as a map drawn for a particular coffee, grinder, basket, and machine. Your setup may follow the same route at a different pace; that is normal. Start by identifying which figures are targets and which are simply notes about the original setup.
Use dose and yield to understand the 1:2 ratio
An espresso ratio compares the weight of dry ground coffee with the weight of the espresso in your cup. A 1:2 ratio means twice as much espresso out as dry coffee in, so a dose of 18 g gives you a starting yield of about 36 g. This is one of the clearest ways to read an espresso recipe.
The ratio describes coffee in and espresso out by weight; it does not describe all the water that left the machine. Some water stays in the puck, the compressed bed of coffee in the basket. That is why a scale under your cup tells you more than the espresso level against a cup marking.
For example, put a small scale beneath your cup and tare it to zero. If your recipe calls for 18 g in and 36 g out, stop the shot when the display approaches 36 g. A 30 g drink from that dose is a shorter ratio, while a 45 g drink is longer.
A longer yield can make some coffees taste clearer or sweeter, while a shorter yield can give a darker coffee more concentrated weight. Those are tendencies, not guarantees. Your palate and the particular beans get the final vote.
| Dry coffee dose | 1:2 starting yield | What the ratio means |
|---|---|---|
| 16 g | 32 g espresso | One part coffee to two parts espresso by weight |
| 18 g | 36 g espresso | A common recipe starting point |
| 20 g | 40 g espresso | Useful when the basket and recipe call for a larger dose |
Treat brew time as a clue, not a score
Brew time tells you how long the shot ran, but its meaning depends on the dose, yield, machine, and timing method. Many recipes land around 25–35 seconds, yet a shot outside that range can still taste balanced. Time helps you spot changes in flow; taste tells you whether the result works.
Check how the recipe starts the clock. Some count from pressing the pump button, while others may leave out pre-infusion, the low-pressure wetting period before the main flow begins. A 30-second shot on one timer may not match a 30-second shot measured another way.
Say your recipe calls for 36 g out in about 30 seconds, but your machine reaches that yield in 20 seconds. That fast flow suggests a useful check: is your grind too coarse, or did coffee channel through an uneven puck? The timer points toward a question; it does not diagnose the cause by itself.
The opposite can happen too. A slow shot may take longer than the suggested window and still taste pleasant. If it is sweet and smooth, the number alone is no reason to throw it away.
Follow a simple sequence for your first shot
- Match the dose to the basket and recipe. Weigh the dry coffee rather than guessing with a scoop.
- Prepare the puck consistently. Distribute the grounds evenly and tamp in your usual way, so preparation stays steady from shot to shot.
- Set a cup on a scale and tare it. Start the machine and note the timing method the recipe uses.
- Stop near the target yield. For 18 g in at a 1:2 ratio, aim for about 36 g out.
- Taste before you adjust. Note the flavor, texture, and whether the shot ran noticeably fast or slow.
- Change one thing in a small step. Adjust grind or yield, then repeat and compare.
That sequence makes your first shot a useful reference, even if it is not delicious yet. Picture two cups side by side: one tastes sour and thin, and the next tastes rounder after a slightly finer grind. Because you changed one variable, you have learned something you can use.
A scale that fits beneath your cup and responds quickly makes this process easier. It does not need a special espresso label; it needs to let you track the dose and catch the yield close to your target. Cup markings and scoopfuls are harder to repeat reliably.
Keep a brief note of each change: dose, yield, approximate time, and taste. “18 g, 36 g, 27 seconds; sharp; ground a little finer” is more helpful tomorrow than trying to remember which way you moved the dial.
Adjust grind or yield to fix the taste
Grind size is a common adjustment for controlling how quickly water flows through the coffee. A finer grind generally slows the shot, while a coarser grind generally speeds it up; grinder numbers do not transfer between machines. If the flavor seems off, keep the dose steady and try a small grind change or adjust the yield.
If a shot tastes sharply sour or thin, you can try grinding a little finer or letting the yield run a little higher. If it tastes harsh, dry, or overly bitter, try a slightly coarser grind or a lower yield. These are starting points, not automatic fixes: a poor distribution or a different coffee can lead to similar impressions.
For instance, imagine 18 g of fresh coffee running to 36 g in 19 seconds and tasting thin. First confirm that the recipe’s dose and yield are right; then make a small move finer and pull another shot. If the next cup tastes sweeter and runs more slowly, you have evidence that the adjustment helped.
A too-high or too-low dose can also alter how water passes through the basket. Use the dose the basket and recipe call for before chasing time with the grinder. Changing dose and grind together muddies the result, like changing two ingredients in a cake and then guessing which one made it better.
Use the numbers to repeat the shot; use taste to judge it. A target time is a guide, not a quality score.
Expect a recipe to change with your beans and machine
An espresso recipe can behave differently when you change coffee, basket, grinder, or machine. Roast style, bean age, processing, and solubility affect how readily coffee extracts, while pre-infusion, pressure, and temperature affect the brewing conditions. A recipe gives you a starting point for your setup; it cannot guarantee the same cup everywhere.
Lighter roasts often respond well to longer ratios or higher temperatures that can bring out sweetness and clarity. Darker roasts may taste more balanced with shorter ratios or lower temperatures. Those are broad tendencies: if your light roast already tastes dry, pushing the yield higher may make the problem worse.
Grinder settings are especially personal. A recipe that says “setting 4” only makes sense on the grinder used to write it. If your grinder is different, use the stated dose and yield as reference points, then adjust grind by the flow and flavor in your own cup.
Even a familiar coffee shifts as it ages. If yesterday’s 18 g dose ran neatly to 36 g and today’s shot rushes through, check your preparation and beans before assuming the written recipe has changed. Freshness and small differences in puck distribution can affect flow.
Use these checks when a shot misses the target
When the numbers look wrong or the espresso tastes off, first check whether you measured the dose and yield and followed the recipe’s timing convention. Then make one small adjustment and taste again. This keeps you from treating one confusing shot as proof that the entire recipe has failed.
- Shot runs fast: Check grind size, dose, distribution, and whether the basket matches the recipe.
- Shot runs slowly: Check for an overly fine grind or a puck that resists water unevenly.
- Shot tastes sour or thin: Try a small grind adjustment or a slightly higher yield, then taste.
- Shot tastes harsh or dry: Try a slightly coarser grind or lower yield; consider whether the roast suits that approach.
- Good numbers, bad taste: Trust the cup enough to adjust. Numbers make a shot repeatable; they do not replace your judgment.
If the same recipe tastes different with another coffee, that is ordinary. Beans vary in roast, origin, processing, freshness, and how readily they extract. Start from the new coffee’s recipe and dial it in again.
A larger yield also does not automatically mean more caffeine. Caffeine depends on the dose, beans, extraction, and serving size, so espresso weight alone cannot tell you exactly how much caffeine is in your cup.
Remember three numbers and trust your palate
When you read an espresso recipe, look first for dose, yield, and brew time. The dose and yield give you a repeatable ratio; the time helps you observe flow. Grind is a common tool for changing that flow, but your grinder’s settings belong to your grinder alone.
Keep the dose steady, weigh the drink, and make one modest change when the taste asks for it. A sour shot might call for a finer grind or more yield; a dry, harsh shot might call for a coarser grind or less yield. Taste each result before moving on.
The recipe gives you a starting line, not a finish line. When the espresso in your cup tastes balanced, that is a better signal than a timer landing on an exact second.
Frequently Asked Questions
What does 1:2 mean in an espresso recipe?
It means one part dry coffee to two parts espresso by weight. With 18 g of coffee, aim for about 36 g of espresso.
Recipes vary: many start timing when you activate the pump, while some use a different convention or leave out pre-infusion. Check the recipe’s method before comparing your shot time with its target.
What is a good espresso brew time?
Many recipes fall around 25–35 seconds, but there is no universal ideal. The right time depends on the coffee, ratio, machine, and timing method; judge the shot by its taste as well as its flow.
Should I change grind size or dose first?
Start with the dose the recipe and basket call for, then adjust grind size to affect flow. Changing both dose and grind at once makes it hard to tell which change helped.
Why does the same recipe taste different with another coffee?
Coffees differ in roast, origin, processing, freshness, and how readily they extract. Keep the recipe as a reference, then adjust grind or yield to suit the new beans and your taste.
Conclusion
Start with the recipe’s dose and yield, weigh your shot, and let time describe the flow rather than grade it. Make one small change, taste again, and keep the version that brings out the coffee’s sweetness.
The best recipe is the one that turns your next cup into the one you want to drink.