TL;DR

Get coffee and tea gear delivered free — and shop member deals
- Fast, free delivery on millions of items
- Access to Prime Big Deal Days deals on October 6–7
- Prime Video, Amazon Music and more included
Espresso is harder than it looks on social media because small changes to grind, dose, water, coffee freshness, and puck preparation can quickly change the flavor. A familiar starting recipe is 18 grams of coffee yielding 36 grams of espresso in about 25–35 seconds, but taste—not a timer, crema, or latte art—tells you whether the shot works.
A perfect espresso video can make a coffee shot look like a magic trick: beans tumble into a grinder, a tamper presses once, and honey-colored coffee streams into a cup. The part you don’t see is often the most useful part: weighing, adjusting, tasting a sour shot, and cleaning up before trying again.
Espresso is a small, tightly controlled extraction. A few seconds or a slightly different grind can shift a cup from bright and balanced to sour, bitter, or thin. That sensitivity explains why copying a setting from a clip rarely gives you the same result at home.
You’ll learn which variables actually matter, why the grinder often deserves as much attention as the machine, and how to build a simple routine that makes progress easier to taste. You don’t need to chase latte art or buy the most expensive equipment. You need a repeatable process—and the patience to change one thing at a time.
Use 18 grams in and about 36 grams out in 25–35 seconds as a starting point, then let taste guide your adjustments.
Change one brewing variable at a time and record dose, yield, time, and flavor so you can repeat improvements.
Prioritize consistent grinding and even puck preparation; an expensive machine cannot correct uneven grounds or channeling.
Treat crema and latte art as visual details, not reliable proof that an espresso tastes good.
Build cleaning into your routine, wipe the steam wand after use, and follow your machine’s care instructions.
Why a 20-second clip hides the hardest part
Espresso is harder than it looks on social media because a short clip can show the cleanest few seconds while hiding the preparation and failed attempts around them. The stream into the cup is only the visible finish; getting that stream to taste balanced may take weighing, grinding, adjusting, and trying again.
Imagine watching someone pull one beautiful shot in a sunlit kitchen. The video may not show the shot before it that ran too fast, the grinder adjustment, or the quick rinse and wipe afterward. A finished clip works like a movie montage: it compresses the slow, ordinary work that made the polished moment possible.
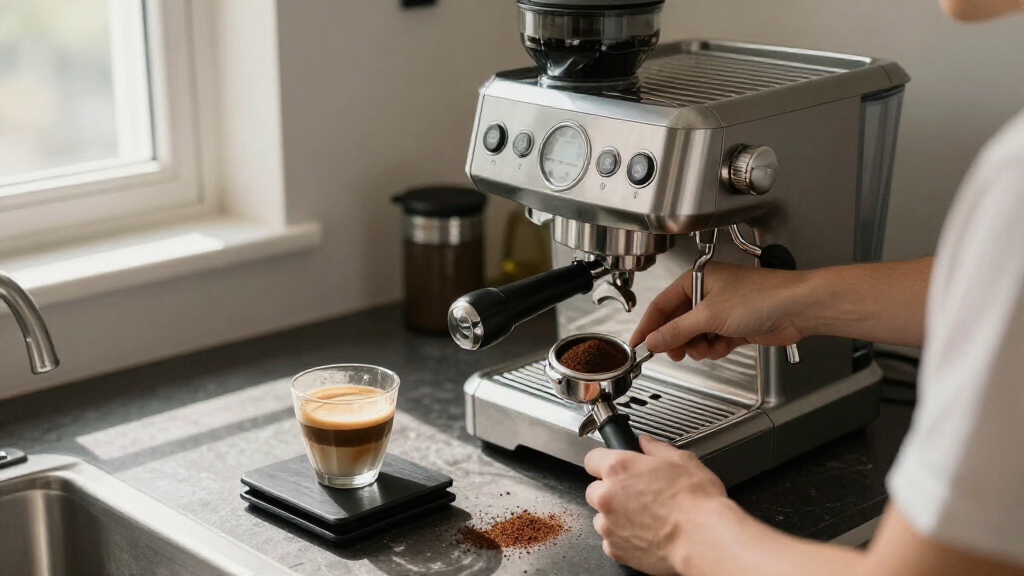
The process includes more than pressing a button. You dose the coffee, distribute it evenly, tamp the grounds level, lock in the portafilter, pull the shot, and judge both the flow and the taste. If you steam milk, that becomes another skill—and another cleanup job. A café barista may repeat this sequence all morning, while you might make one or two drinks before work.
Social video also rewards things you can see: a neat crema, a slow-motion pour, or a white heart in milk. Flavor is harder to film. A thick crema can look impressive without proving the espresso tastes good, and latte art can sit on top of a poorly extracted shot. Focus on what’s in the cup, not only what looks good on screen.
espresso grinder with precise grind settings
As an affiliate, we earn on qualifying purchases.
As an affiliate, we earn on qualifying purchases.
How tiny changes can flip a shot from sour to bitter
Espresso is sensitive to small changes because a compact amount of coffee meets a relatively small amount of water under pressure. Grind size, dose, yield, water temperature, and puck preparation all affect how water moves through the grounds and what flavors end up in your cup.
A useful starting point for many recipes is 18 grams of ground coffee yielding 36 grams of espresso in about 25–35 seconds. That is a starting map, not a law. If the same dose suddenly runs much faster, your grinder setting, beans, or preparation may have changed; if the shot crawls, the grind may be too fine or the puck may be resisting flow too much.
Think of the coffee puck like a small garden bed: water should pass through the whole thing, not carve one shortcut. When grounds clump or sit unevenly, water can find a weak path. This is called channeling, and it can leave one part of the puck under-extracted while another part tastes harsh.
Sourness often suggests under-extraction, while a bitter or dry finish can suggest over-extraction, but treat those flavors as clues rather than a diagnosis. For example, if your shot tastes sharp and thin, try grinding a little finer, then pull another shot with the same dose. Changing only one variable helps you tell whether the adjustment made a real difference.
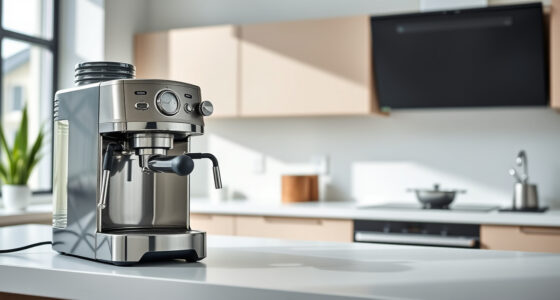
home espresso machine with PID temperature control
As an affiliate, we earn on qualifying purchases.
As an affiliate, we earn on qualifying purchases.
Why your grinder can matter as much as your espresso machine
Your grinder matters as much as your espresso machine because it controls the coffee particles that shape water flow. A capable machine cannot rescue a dose full of uneven grounds, just as a good oven cannot make every ingredient cook evenly if you chop one vegetable into giant pieces and another into tiny bits.
When particle sizes vary widely, water moves through the puck inconsistently. Some grounds may give up their flavor quickly while others contribute too little; the result can taste muddled, sour, or harsh at once. Consistent grinding gives you a better chance of making repeatable adjustments, which is more useful than a machine with features you don’t yet need.
There isn’t one universal espresso grind setting. The right setting depends on the grinder, beans, basket, dose, and recipe. If your shot runs too fast, try a slightly finer setting; if it barely drips, try a little coarser. Make a small move, record what happened, and avoid changing the dose and grind together unless you have a clear reason.
For example, a home barista can spend several minutes trying to fix fast shots by tamping harder, while the real issue is a grind that’s too coarse. A level tamp matters, but tamping harder and harder won’t reliably correct the grind. If you’re choosing where to put your learning effort, start with consistent grinding and preparation before chasing advanced machine settings.
coffee scale with timer for espresso
As an affiliate, we earn on qualifying purchases.
As an affiliate, we earn on qualifying purchases.
How to dial in espresso without guessing
You can dial in espresso without guesswork by keeping your recipe steady, changing one variable at a time, and tasting each result. A timer and scale make the process easier to read, but your tongue decides whether a shot tastes balanced.
- Start with a baseline. Weigh 18 grams of coffee and aim for about 36 grams of espresso. Use roughly 25–35 seconds as a first timing reference, not a final verdict.
- Prepare the puck consistently. Break up clumps if needed, distribute the coffee evenly, and tamp level. A crooked tamp or obvious bare patch can create an easy path for water.
- Pull and record the shot. Note the dose, yield, time, and a few words about taste. “Sharp, lemony, thin” tells you more than “bad.”
- Change one thing. If it tastes sharply sour and runs quickly, try a slightly finer grind while keeping dose and yield the same. Pull another shot and compare.
- Keep the version you prefer. The goal is a cup you enjoy, not a number that looks impressive on a recipe card.
This routine turns trial and error into a small experiment. Suppose your first shot takes 19 seconds and tastes thin. You adjust one step finer and the next takes 27 seconds, with a rounder flavor. That result gives you a useful direction; it doesn’t mean every bean should take 27 seconds.
Recipes are starting points because beans, roast, grinder, and basket differ. A lighter roast may need a different approach than a darker one, and your preferred flavor may not match a café’s. Keep notes for a few sessions, then use them to repeat what worked instead of rebuilding the recipe from memory each morning.
As an affiliate, we earn on qualifying purchases.
Why coffee freshness and water change the result
Freshness and water change espresso because coffee and brewing water both shape extraction. Beans continue to change after roasting, and water’s mineral content can influence how the coffee tastes as well as how your machine performs over time.
“Fresh” does not always mean roasted yesterday. Coffee needs some time to rest after roasting, and the best window varies with the roast, packaging, and your taste. If a bag tastes flat or behaves very differently from your previous one, check its roast date and the roaster’s guidance before assuming your technique suddenly went wrong.
Water isn’t just a neutral delivery system. If your tap water tastes strongly of chlorine or minerals, that character can show up in the cup; unsuitable water can also affect a machine. Use water appropriate for your machine, follow its care instructions, and don’t assume that every filter or bottled water works the same way.
Here’s a practical example: you dial in a bag of dark-roast beans, then open a new bag of lighter-roast coffee and keep the exact grinder setting. The new shot may run differently and taste brighter or sharper. That doesn’t automatically mean the coffee is bad. Start again with your baseline, taste carefully, and adjust the recipe to suit the beans.
Why crema and latte art can fool your eyes
Crema and latte art can make a drink look polished, but neither one proves that the espresso tastes balanced. Crema is the tan foam on top of espresso; it can reflect gas released by freshly roasted coffee, but a thick layer is not a dependable quality score.
That distinction matters when you’re watching espresso videos: visuals arrive before flavor. A dramatic, dark stream or a tall layer of foam may catch your eye, yet the drink can still taste bitter, sour, or stale. Judge the shot by how it tastes, and treat appearance as one small detail rather than the whole review.
Milk steaming adds a separate craft. Smooth, glossy milk with fine bubbles pours differently from milk with large, foamy bubbles, and getting that texture takes control of temperature, pitcher angle, and timing. A novice may spend a week practicing a simple heart while still learning how to extract a balanced shot. That’s normal.
If you want to practice latte art, make milk texture your first target. Aim for silky milk, then work on pouring height and pitcher movement. And keep food safety in mind: clean milk-contact parts promptly, refrigerate milk at 40°F (4°C) or below, and discard milk that has been left out too long. Dairy is a common allergen; use a suitable alternative if you need to avoid it, while remembering that non-dairy milk can steam differently.
What a realistic home espresso routine actually looks like
A realistic home espresso routine includes setup, brewing, tasting, and cleanup—not just the pour. Once you count grinding, weighing, preparing the puck, pulling the shot, steaming milk, and washing the tools, espresso is more involved than a quick social-media clip suggests.
Picture a weekday morning: you weigh coffee, grind it, distribute and tamp the grounds, then pull a shot. If the taste is off, you may need another attempt; if you make a flat white, you also steam milk and clean the wand. A single drink can involve more hands-on work than pressing a button on a drip machine, even when the actual extraction takes under a minute.
That extra effort can be enjoyable if you like the ritual. It can also feel frustrating if you expected café results with zero practice. Choose a workflow that fits your mornings: perhaps you make espresso on weekends, prepare the grinder and cups before bed, or keep a simpler brewer for rushed days.
Cleaning belongs in the routine, not in a future version of your life. Wipe the steam wand after use, clear coffee residue from the basket and group area, and follow the machine maker’s schedule for backflushing or descaling where applicable. Old coffee oils can leave stale, rancid flavors, while mineral buildup can affect machine performance. A quick cleanup protects both the next cup and the equipment.
Which parts of espresso you can simplify—and which you can’t
You can simplify espresso by repeating a basic recipe and skipping advanced features, but you cannot remove the need for consistent coffee preparation. Pressure or flow control can open new ways to experiment; it does not replace good beans, an appropriate grind, even puck distribution, or a clean machine.
Some newer home setups make espresso more accessible, including compact or manual machines and capable entry-level grinders. Used equipment can also lower the cost, though you’ll want to understand its condition and maintenance needs. A more expensive machine may offer temperature stability or extra control, but it cannot fix stale coffee or an uneven grind.
For many beginners, darker roasts can feel more forgiving and offer familiar chocolatey or roasted flavors. Lighter roasts can bring brighter, more varied notes, but may need a different recipe and more careful adjustment. That’s a tradeoff, not a ranking: pick beans you enjoy drinking rather than buying a roast because a video made it look advanced.
Think about your own kitchen. If you want a quick cappuccino before a commute, a complicated pressure profile may add steps without making your morning better. If you enjoy tasting small differences on a quiet Saturday, extra control may be part of the fun. Keep the simple fundamentals steady first; add complexity only when you know what you want it to change.
Frequently Asked Questions
Why does my espresso taste sour or bitter?
Sourness can point to under-extraction, while bitterness or a dry finish can point to over-extraction, but neither flavor has just one cause. Check the grind, dose, yield, and puck preparation, then change one variable and taste again.
How long should an espresso shot take?
About 25–35 seconds is a common starting range for a recipe such as 18 grams of coffee yielding 36 grams of espresso. The right time varies with the beans and setup, so use the timer as a clue and flavor as your guide.
Do I need an expensive espresso machine to make good coffee?
No. A stable machine and a consistent grinder help, but good results also depend on fresh-enough beans, suitable water, careful puck preparation, and practice. A costly machine cannot compensate for an uneven grind or stale coffee.
Does thick crema mean my espresso is good?
No. Crema is the tan foam on top of espresso and can reflect gas released by freshly roasted coffee, but its thickness does not reliably measure flavor. Taste the shot rather than grading it by its appearance.
What is channeling, and how can I reduce it?
Channeling happens when water finds weak spots in the coffee puck and flows through them unevenly. Distribute the grounds evenly, break up clumps if needed, tamp level, and keep your preparation consistent to reduce it.
Conclusion
Remember this: espresso gets repeatable when you control the process, not when you copy a perfect-looking clip. Start with a simple recipe, make one adjustment at a time, and trust your taste more than the timer or crema.
Your first shot may run fast, your next may taste sharp, and the third may finally feel rounded and sweet. That’s not a failure montage. It’s the real craft, one cup at a time.
Fall Picks
fall essentials
As an affiliate, we earn on qualifying purchases.