
TL;DR

Get coffee and tea gear delivered free with Prime
- Fast, free delivery on millions of items
- Prime Video, Amazon Music and more included
- Member-only deals all year
A small amount of water dripping from the group head just after a shot can be normal: water remains in the brew path and may drain as pressure settles. Dripping that continues, grows heavier, appears when the machine is idle, or comes from under the machine is more concerning. Clean the group head and shower screen, check the drip’s location, and follow your manual before descaling or replacing parts.
Your espresso shot ends, the pump falls quiet, and then—drip, drip—water lands in the cup. A few drops can be ordinary runoff, but a puddle under the machine is a different story. Where the water appears and when it drips offer better clues than the mere fact that you see water.
This guide explains why your espresso machine drips after the shot, how to separate normal drainage from a leak, and which checks you can safely try at home. You’ll also learn when cleaning may help, when a worn seal or valve becomes more likely, and when it’s time to stop troubleshooting and contact a repair professional.
Think of the brew path like a wet umbrella after a storm: even when the rain stops, a little water still runs off. The trick is knowing whether you’re seeing that last runoff—or a faucet that never quite shut off.
A few drops from the group head just after brewing can be normal; ongoing drips or water under the machine need closer attention.
Track three clues: where the water appears, when it starts, and how long it continues.
Clean the group head and portafilter sealing surfaces before assuming a part has failed.
Use only the descaling and cleaning methods approved for your machine; descaling does not repair worn seals or internal leaks.
Switch off and seek qualified help if water reaches electrical areas, leaks from inside the case, or continues while the machine sits idle.
When a Few Drops Are Just Normal Runoff
A few drops from the group head right after a shot can be normal because water remains in the brew path and drains after brewing pressure falls. The amount and timing vary by machine design, so a brief drip is less concerning than a stream that continues long after the pump stops.
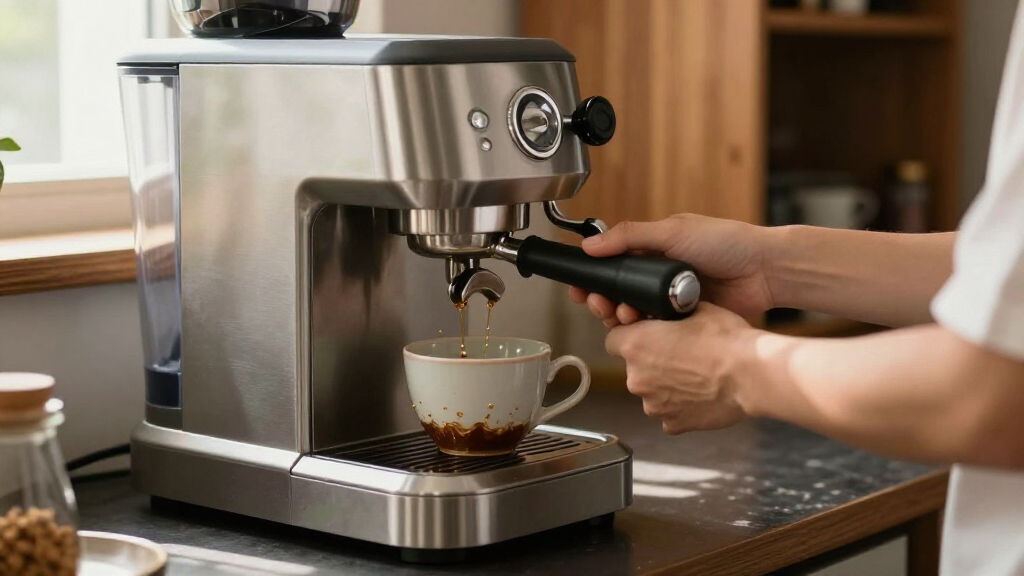
During extraction, the machine sends hot water through the group head and coffee puck. When brewing ends, leftover water can move through the shower screen or portafilter area. It may fall into the cup or drip tray as pressure settles, much like the last drops sliding from a damp umbrella after you’ve stepped indoors.
Try a simple observation: pull your usual shot, remove the cup, and watch the group head for a minute. If you see a couple of drops soon after brewing and then the area stays dry, that pattern is different from steady dripping ten minutes later. Machines with different brew paths may behave differently, so compare what you see with the care instructions for your model.
Location matters as much as volume. Water from the group head immediately after a shot often points to runoff. Water seeping from beneath the machine, running down its side, or appearing while it sits idle deserves closer attention. For example, a damp drip tray after making two coffees may be ordinary; a fresh puddle under a switched-off machine is not the same symptom.
Don’t judge by one shot alone. Note whether the drip changes when you backflush, after descaling, or when the machine has been idle. That little log—“three drops from the group head, stops within 20 seconds”—gives you a useful baseline and makes it easier to describe a real change if you need service.
espresso machine group head cleaning kit
As an affiliate, we earn on qualifying purchases.
As an affiliate, we earn on qualifying purchases.
Use the Drip’s Timing and Location to Find the Cause
The drip’s timing and location narrow the likely cause more reliably than guessing from the puddle alone. Group-head drips after a shot often involve residual water or buildup, while leaks during idle periods or water beneath the case can point to seals, valves, or an internal connection.
Start with a dry machine and a clean, dry counter. Run one normal shot, then note where the first water appears and how long it lasts. After the machine cools as directed by its manual, check again while it sits idle; don’t remove panels or reach near hot components to inspect internal parts.
| What you notice | Possible explanation | Safe first check |
|---|---|---|
| A few drops at the group head, just after brewing | Residual water draining from the brew path | Watch whether it stops quickly; compare with the manual |
| Water around the portafilter during brewing | Dirty or worn group gasket, or a portafilter that isn’t seated correctly | Clean the sealing surfaces and check the basket fit |
| Drips from the shower screen after cleaning is overdue | Coffee oils or grounds may interfere with flow or sealing | Clean the screen and group head as the manual directs |
| Water beneath the machine or during idle time | A tank connection, hose, valve, or seal may be leaking | Switch off, unplug if safe, and contact service if it persists |
This table offers clues, not a diagnosis. A drip under the portafilter, for instance, can result from grounds on the gasket rather than a damaged part. If you clean the contact area and the leak continues during brewing, a worn gasket becomes more plausible.
Keep the machine’s state in your notes. Write down whether it was heating, brewing, or idle when the water appeared. If the machine leaks only while heating, or the drip tray fills unusually fast, share that detail with support. A clear description can save time compared with saying only, “It leaks sometimes.”
espresso machine leak repair parts
As an affiliate, we earn on qualifying purchases.
As an affiliate, we earn on qualifying purchases.
Clean the Group Head Before You Blame a Part
A dirty group head can contribute to drips and uneven flow because coffee oils and fine grounds collect around the shower screen and sealing surfaces. Cleaning is the safest first step for many group-head symptoms, but it won’t repair a damaged valve or a seal that has hardened with age.
After the machine cools enough for safe handling, remove the portafilter and follow the manual’s cleaning directions. Wipe loose grounds from the group-head rim with a clean, damp cloth, and clean the shower screen only as your model permits. A gritty ring of coffee around the gasket can keep the portafilter from seating evenly, much like sand caught in a jar lid prevents a snug close.
On machines designed for backflushing, use the specified basket, cleaner, and cycle. Not every espresso machine supports backflushing, and using a cleaning product or method the manufacturer doesn’t approve can cause trouble. If your machine has a removable shower screen, consult the manual before taking it off; small parts can be easy to misplace and hot components can burn you.
Imagine a morning rush: you make three shots, knock out the pucks, and leave a thin layer of wet grounds around the group head. The next portafilter may not seal cleanly, and water can escape around its edge. Cleaning that coffee residue may solve the problem without any replacement parts.
Clean first, then retest with the same routine. Pull one shot using your usual dose and tamp, then watch the same spot you observed earlier. If a group-head drip improves, residue likely played a role. If you still see water leaking around the portafilter or from the machine’s base, don’t keep repeating cleaning cycles in the hope that they will fix a mechanical fault.
espresso machine descaling solution
As an affiliate, we earn on qualifying purchases.
As an affiliate, we earn on qualifying purchases.
Check the Portafilter Fit, Gasket, and Coffee Prep
A leak around the portafilter during brewing often points to a poor seal, not simple runoff after the shot. Grounds on the gasket, a basket that doesn’t sit properly, or a worn group gasket can leave a gap for pressurized water to escape.
First, wipe the portafilter rim and the group-head sealing area. Seat the empty portafilter gently to check whether it locks in smoothly; don’t force it beyond the position your machine normally allows. If it suddenly feels unusually loose, unusually tight, or sits at a different angle, mention that change when checking the manual or contacting service.
Coffee preparation can affect what happens at the group head, but it is rarely the only explanation for an idle leak. A very fine grind or excessive dose can make a shot run slowly and put more resistance in the puck; grounds left on the basket rim can prevent a clean seal. That’s why consistent dosing and a clean rim help you separate brewing variables from machine faults.
For example, if water sprays from the portafilter edge only when you use a heaped basket, try the dose recommended for that basket and brush loose grounds off the rim. If it still leaks with a correctly seated, clean portafilter, the gasket may need inspection or replacement. Check the manufacturer’s instructions for the correct part and procedure rather than prying at a hot group head.
Don’t overtighten the portafilter to compensate. Forcing it can strain the handle or make a damaged gasket harder to spot. If a gasket replacement requires tools or access you’re not comfortable with, a repair shop can inspect it safely and confirm whether the gasket, basket, or another component is responsible.
As an affiliate, we earn on qualifying purchases.
Treat Idle Leaks and Water Under the Machine as Warning Signs
Water that keeps appearing while the machine is idle or beneath its case is more concerning than a brief group-head drip after brewing. A tank connection, internal hose, valve, or seal may be involved, and the machine’s design determines which parts can be checked by an owner.
Turn the machine off and let it cool before checking accessible areas. Look for a cracked or poorly seated removable water tank, a wet counter directly under its connection, or water collecting in the drip tray faster than usual. Don’t open the casing: boilers and electrical components can remain hot, and internal troubleshooting belongs to a qualified technician.
Pressure-release behavior also depends on the machine. Some machines release or redirect water as brewing pressure changes; a faulty valve can behave differently and may leak repeatedly. If water appears from a seam, the underside, or an area near the power cord, stop using the machine and follow the manufacturer’s safety guidance.
Consider a practical example: you wipe the counter, leave the machine switched off, and return an hour later to find a new puddle. That is not explained by the last drops draining from the group head. Avoid running more shots to “see what happens”; continued operation can worsen a leak or expose electrical parts to water.
Safety rule: If water reaches the power cord, outlet, or electrical controls, don’t touch wet electrical surfaces. Switch off power only if you can do so safely, keep clear, and get qualified help.
Note when the leak happens, how much water appears, and whether the tank level drops. Those observations help a technician distinguish a tank connection issue from a pressure-path leak without you dismantling the machine.
Descale Only When the Manual Says It Fits the Problem
Descaling can help with mineral buildup, but it is not a universal fix for dripping. Scale can affect water flow in some machines, while coffee oils and worn seals need different care. Using the wrong descaler or an unapproved cycle can damage components or leave cleaner where it shouldn’t be.
If your machine gives a descaling alert, has a history of hard-water use, or shows other signs described in its manual, follow the manufacturer’s procedure and use the approved product. Don’t assume that every drip means scale. A few post-shot drops with otherwise normal operation may simply be drainage, while water leaking from the base calls for a different response.
Water hardness matters because dissolved minerals can build up over time, but the right maintenance schedule depends on your water and machine. If you use filtered water, that may change how often descaling is needed; it doesn’t automatically mean you can ignore the machine’s indicator or service directions. Think of descaling like removing kettle scale: useful when deposits are present, not a way to fix every loose seal.
After an approved descale, follow the manual’s rinsing instructions before making coffee. Keep cleaning and descaling products away from food, children, and pets, and don’t mix chemicals. If the machine continues to leak after the correct cycle, stop repeating it and contact the manufacturer or a qualified repairer.
Maintenance prevents some problems, not all of them. Regularly cleaning accessible coffee-contact areas and following the water-care schedule can reduce buildup. It cannot restore a cracked hose or a gasket that has lost its shape, so match the remedy to the symptom instead of treating every drip with another cleaning cycle.
Follow These Safe Steps Before Calling for Service
A short, repeatable check can tell you whether the drip is probably routine or needs service. Start with visible, user-accessible areas, change one thing at a time, and stop if water reaches electrical parts or comes from inside the machine.
- Switch off and cool the machine. Follow its manual before touching the group head, shower screen, or portafilter.
- Dry the outside and counter. A clean starting point helps you see where fresh water first appears.
- Check the water tank and drip tray. Reseat accessible removable parts and look for cracks, overflow, or unusual water accumulation.
- Clean the group head and portafilter rim. Use only the cleaning steps and products approved for your model.
- Run one normal shot and observe. Record the leak’s location, timing, and whether it stops after brewing.
- Stop and seek support if the leak persists. Don’t open the casing or run the machine if water appears near electrical parts.
This process is useful because it avoids the common troubleshooting trap of changing several things at once. If you clean the screen, descale, change grind size, and adjust the dose all in one morning, you won’t know which change affected the drip—or whether it changed at all.
Keep the machine’s model number, age, and a brief symptom note ready for customer support. “The group head releases two or three drops after each shot and stops within half a minute” is more actionable than “it drips.” A short video can also help, provided you film from a safe distance and don’t touch the machine while it operates.
Call for service when a leak is persistent, internal, or worsening. That includes water from beneath the case, dripping while idle, repeated leaks after cleaning, or a sudden change in pressure or brewing behavior. A technician can inspect valves and seals without putting you near hot or energized components.
Know When a Drip Has Become a Repair Problem
A drip deserves professional attention when it persists after basic cleaning, appears at idle, or comes from inside or beneath the machine. A small, brief runoff after brewing is one pattern; a growing puddle or a leak near electrical parts is another.
Pay attention to changes rather than trying to diagnose every internal component yourself. A drip that suddenly becomes a thin stream, a portafilter that no longer seals, an unusually full drip tray, or a machine that struggles to brew can all help describe the issue. None of these signs identifies one specific failed part on its own, but together they give a repairer a better starting point.
Before contacting service, gather the model and serial information, note when the leak occurs, and describe any maintenance you recently performed. If the machine began dripping after descaling, for example, mention the product and cycle you used. That detail may help support distinguish a maintenance question from a mechanical fault.
Modern machines may include maintenance reminders, diagnostic messages, or connected troubleshooting features, but alerts don’t replace a visual safety check. A warning light can guide routine care; it cannot make a leak near a cord safe to ignore. Likewise, a machine that still makes good espresso can have a seal problem that needs attention.
Use the manual and manufacturer support for model-specific instructions. Gaskets, valves, and cleaning procedures differ, and a part that looks similar may not fit your machine. If the repair requires opening the casing, working around a boiler, or handling electrical connections, leave it to a qualified professional.
Frequently Asked Questions
Is it normal for an espresso machine to drip after a shot?
A few brief drops from the group head can be normal as leftover water drains after brewing. If dripping continues for a long time, grows heavier, happens while the machine is idle, or comes from beneath the case, investigate further and follow the manual’s safety advice.
Why does water drip from the portafilter while my espresso is brewing?
A leak around the portafilter during brewing often means the seal isn’t closing cleanly. Coffee grounds on the rim, an incorrectly seated basket, or a worn group gasket can contribute. Clean the contact surfaces and reseat the portafilter; if it still leaks, check the manual or arrange service.
Can a dirty shower screen cause my espresso machine to drip?
Coffee oils and grounds can interfere with flow and sealing around the group head. Clean the shower screen and nearby surfaces using the method approved for your model, then test one shot. Cleaning can remove residue, but it won’t fix a damaged valve, hose, or gasket.
Should I descale my machine if it drips after every shot?
Not automatically. Descale when the machine’s manual or maintenance alert calls for it, using the approved product and rinse procedure. Descaling may address mineral buildup, but a leak from the base or a worn seal needs a different remedy.
When should I stop using the espresso machine and call for repair?
Stop using it if water appears beneath the case, leaks while the machine is idle, reaches electrical areas, or keeps flowing after basic cleaning. Switch it off and let it cool without opening the casing. Contact the manufacturer or a qualified repair professional with notes about the leak’s location and timing.
Conclusion
Don’t judge a drip by its existence alone; judge it by its pattern. A few drops from the group head after a shot can be ordinary runoff, while water that keeps coming, appears at idle, or collects beneath the machine calls for action.
Dry the counter, clean the accessible brew area, and watch one shot from start to finish. If the water keeps finding its way out, let a qualified repairer follow the trail—before a coffee-machine drip becomes a kitchen puddle.
Halloween Picks
halloween
As an affiliate, we earn on qualifying purchases.