TL;DR

Get coffee and tea gear delivered free with Prime
- Fast, free delivery on millions of items
- Prime Video, Amazon Music and more included
- Member-only deals all year
Roasting espresso at home is achievable but demands precise control over green bean quality, roast development, and post-roast resting. Unlike filter coffee, espresso requires beans that have off-gassed sufficiently to allow even extraction under 9 bars of pressure, often necessitating a 5-14 day resting period.
You buy a bag of home coffee roasters equipment, excited to craft the perfect shot. You roast a batch, grind it fresh, and pull your first espresso. It tastes… wrong. Sour, thin, or oddly harsh. You adjust the grind. You tweak the dose. Nothing works. The problem isn’t your machine. It’s the roast.
Espresso places unique demands on coffee beans that filter coffee simply doesn’t. It needs density, even development, and time. If you’re thinking about roasting coffee at home specifically for espresso, you need to understand the science behind pressure extraction before you turn on the heat.
This guide cuts through the noise. We’ll cover exactly what you need to know about green beans, roast profiles, and resting times to make your home-roasted espresso shine. Skip the guesswork. Let’s get technical, but keep it practical.
Espresso requires beans with uniform cell structure to prevent channeling under pressure; aim for a development time ratio of 20-25% after first crack.
Resting time is non-negotiable for espresso; allow 5-14 days for CO2 to off-gas to ensure even extraction and sweet flavor.
Green bean quality dictates the ceiling; choose fresh (under 12 months), dense, and traceable beans stored in cool, airtight conditions.
Purpose-built roasters offer necessary control and repeatability; popcorn poppers lack the precision needed for consistent espresso-grade beans.
Troubleshooting starts with the roast; sourness often indicates under-development or insufficient resting, while bitterness signals over-roasting.
Roasting for Espresso What to Know First
Home-roasted espresso depends on more than bean color: green-coffee quality, roast development, and resting all shape how evenly a shot extracts.
Start with the green beans
Good roasting starts with fresh, traceable coffee and careful storage.
Choose quality coffee
Origin, variety, processing, and crop age affect both flavor and roast behavior.
Protect the beans
Keep green coffee cool, dry, away from sunlight, and clear of strong odors.
Keep batches small
Change one variable at a time and record what you did so a good roast can be repeated.
Control the roast, not just the color
Roast landmarks help guide decisions, but color alone cannot tell you whether a coffee will suit espresso.
Note drying, color change, first crack, and the development period that follows.
Record batch size, time, heat or temperature, airflow, and sensory observations.
Lighter roasts can be harder to extract; very dark roasts can taste smoky or bitter.
Give fresh coffee time
Carbon dioxide released after roasting can interfere with espresso extraction.
- Excess gas can disrupt water flow through the coffee.
- The shot may be harder to dial in evenly.
- Several days of rest can make coffee easier to dial in.
- The useful window varies by coffee, roast, and preference.
Match the setup to your needs
Roasters differ in control and repeatability; every setup also needs a safe place to handle smoke and heat.
| Consideration | What to expect | Practical response |
|---|---|---|
| Basic equipment | Can teach the fundamentals | Expect less control and consistency |
| Purpose-built roaster | Generally offers more control and roast data | Check current features and reviews |
| Roasting environment | Produces smoke, chaff, and heat | Follow instructions and provide suitable ventilation |
Why Espresso Beans Are Different from Filter Coffee
Espresso is a concentrated extraction method that uses high pressure (typically 9 bars) to force water through finely ground coffee in 25-30 seconds. This process amplifies both the best and worst qualities of a roast. A slightly under-developed bean that tastes fine in a pour-over might taste sharply sour or astringent in espresso. Conversely, a dark roast that tastes burnt in a French press might offer pleasant chocolate notes in a short shot.
The key difference lies in solubility. Under high pressure, water extracts compounds much faster. If the bean structure isn’t uniformly porous, water finds the path of least resistance. This causes channeling, where water bypasses dense parts of the puck and over-extracts the loose parts. The result? A cup that is simultaneously sour and bitter.
Home roasters often fail at espresso because they treat espresso beans like filter beans. They aim for a specific color or flavor profile without considering how the bean will behave under pressure. Espresso requires a roast that promotes uniform cell structure breakdown. This ensures the water flows evenly through the compacted coffee bed. You aren’t just roasting for flavor; you’re roasting for physical structure.
Consider this: A light roast might retain more origin character, but if the internal structure remains too dense, it resists extraction. The water can’t penetrate the center of the particle. You get a thin, sour shot. A medium-dark roast breaks down more of that structure, allowing for a fuller body and sweeter extraction. Understanding this physical reality is step one.
Products Worth Considering

Breville Barista Express Espresso Machine with Built-In Grinder, Black Sesame

Vitamix 5200 Blender with 64 oz. Container, Black

De'Longhi Magnifica Start Fully Automatic Espresso Machine with Milk Frother, Silver
As an affiliate, we earn on qualifying purchases.
Choosing Green Beans That Can Handle the Pressure
You can’t roast a bad green bean into a great espresso. The starting material dictates the ceiling of your final cup. For espresso, you want beans that are dense, fresh, and consistent. When you shop for green coffee, look for traceability and crop age. Beans harvested within the last 6-12 months roast more predictably. Older beans (over 18 months) often lose moisture and density, leading to flat, papery espresso shots.
Processing method matters too. Natural (dry) processed beans often produce heavier bodies and fruitier notes, which can mask slight extraction imperfections. Washed (wet) processed beans offer clarity and acidity, but they expose any roast flaws more brutally. If you’re new to home roasting for espresso, start with a washed Central American or Brazilian bean. These are forgiving, consistent, and widely available.
Storage is critical. Green beans are hygroscopic; they absorb moisture and odors from the air. Store them in a cool, dark place in airtight containers. If your beans smell like garlic or old cardboard, your espresso will taste like it too. Never store green beans in the fridge or freezer unless you have vacuum-sealed, professional-grade packaging. Condensation will ruin them.
Buy small quantities. Green coffee doesn’t last forever. A 1-pound bag is perfect for a beginner. It lets you experiment with different origins without committing to a massive inventory. Check the moisture content if the supplier provides it. Ideal moisture content for roasting is between 10% and 12%. Beans outside this range may roast unevenly or taste stale.
Mastering the Roast Curve for Even Extraction
Roasting isn’t just about turning beans brown. It’s a thermal process that changes the bean’s chemistry and structure. For espresso, you need to pay close attention to the development time after first crack. First crack is the audible popping sound beans make as they expand. It marks the point where the bean structure begins to break down significantly.
If you stop roasting immediately after first crack, the beans are likely under-developed. The sugars haven’t fully caramelized, and the cellulose structure is still too tight. This leads to sour, grassy espresso. You need to extend the time after first crack to allow for even heat penetration. This is called the development time ratio (DTR). A common target for espresso is a DTR of 20-25%. This means if your total roast time is 10 minutes, the time from first crack to drop should be 2-2.5 minutes.
Use a thermometer if your roaster allows it. Track the bean temperature. You want a steady rate of rise (RoR) that slows down as you approach the end of the roast. A erratic RoR leads to uneven roasting. Some beans might be over-roasted while others are under-roasted in the same batch. This inconsistency kills espresso quality.
Listen to the beans. Second crack is a quieter, crackling sound. It indicates the bean structure is breaking down further. For most espresso profiles, you’ll drop the beans before or just as second crack begins. Going too far into second crack can result in oily, smoky beans that taste burnt and lose all origin character. Find your sweet spot by tasting small batches at different drop points.
The Critical Resting Period: Why Fresh Isn’t Always Best
This is the most common mistake home roasters make: pulling espresso too soon. Freshly roasted coffee is full of carbon dioxide (CO2). This gas is a byproduct of roasting. When you grind fresh beans and tamp them, the CO2 escapes rapidly during extraction. This creates bubbles that disrupt water flow. The result is channeling and a sour, weak shot.
Espresso needs time to off-gas. Unlike filter coffee, which can be brewed 24 hours after roasting, espresso often requires 5-14 days of resting. During this time, the CO2 escapes slowly, and the oils stabilize. The coffee becomes more soluble and easier to extract evenly. You might find that day 3 is too gassy, day 7 is perfect, and day 14 is starting to fade. This varies by roast level and bean density.
Store your rested beans in an airtight container with a one-way valve. This lets CO2 out but keeps oxygen out. Oxygen stales coffee quickly. Keep the container in a cool, dark place. Do not refrigerate roasted beans. Condensation will ruin the flavor and texture.
How do you know when your beans are ready? Pull a shot. If it pours in a thin, fast stream and tastes sour, it needs more time. If it pours in a steady, honey-like stream and tastes sweet and balanced, it’s ready. Keep a log. Note the roast date and the day you pull the shot. This helps you dial in your resting period for future batches.
Equipment Reality: Poppers vs. Purpose-Built Roasters
You can roast coffee in a popcorn popper or a stovetop pan. But can you roast consistent espresso beans with them? Probably not. Espresso demands repeatability. If you can’t reproduce a roast profile, you can’t dial in your espresso machine. You’ll be chasing a moving target.
Popcorn poppers and pans lack precise temperature control and airflow management. They roast unevenly. The beans on the outside might burn while the inside remains under-developed. This inconsistency is fatal for espresso. You need a roaster that provides even heat distribution and allows you to control the rate of rise.
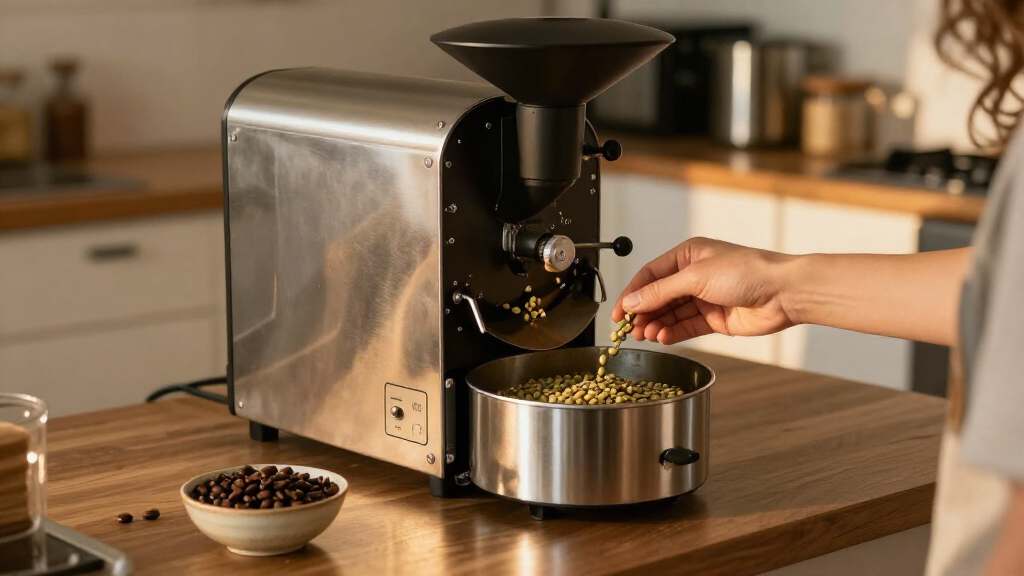
Consider investing in a purpose-built home coffee roaster. Look for features like variable speed fans, precise temperature probes, and small batch sizes (100-250g). These machines allow you to log data and repeat successful profiles. Some even connect to apps for real-time monitoring. This level of control is what separates hobbyist roasting from espresso-grade roasting.
Ventilation is another factor. Roasting produces smoke and chaff. If you live in an apartment, a roaster with a built-in smoke suppression system or a small footprint is essential. Outdoor roasting is an option, but wind and ambient temperature can affect your roast profile, making consistency harder to achieve.
Troubleshooting Your Home-Roasted Espresso
Even with the best equipment, things go wrong. Here’s how to diagnose common issues based on your roast.
| Problem | Possible Roast Cause | Possible Resting Cause | Fix |
|---|---|---|---|
| Sour/Sharp | Under-developed (stopped too soon after first crack) | Beans too fresh (high CO2) | Extend development time; rest beans 7+ days |
| Bitter/Burnt | Over-developed (too long after first crack) | Beans stale (too old) | Drop roast earlier; use fresher beans |
| Thin/Weak | Under-roasted (low density) | Beans too fresh | Roast longer; extend resting period |
| Channeling | Uneven roast (hot spots in roaster) | High CO2 causing puck disruption | Improve roast consistency; rest longer |
Remember, espresso is a system. The roast is just one variable. Grind size, dose, yield, and water temperature all interact with the roast. If you change the roast, you must re-dial your espresso recipe. Start with a medium grind and adjust from there.
Keep detailed notes. Record the roast profile, resting time, grind setting, dose, and yield for every shot. This data is invaluable. It helps you identify patterns and correct mistakes quickly. Without data, you’re just guessing.
Frequently Asked Questions
Can I use any green coffee bean for espresso?
While you can technically use any bean, not all are suitable. Espresso benefits from beans that are dense and have a balanced sugar-to-acid ratio. Lighter, delicate beans might taste thin or sour under pressure, while very soft beans may lack body. Start with medium-density washed coffees from Brazil or Central America for the most forgiving results.How long should I rest home-roasted beans before pulling espresso?
Most home-roasted beans need 5 to 14 days of resting. Unlike filter coffee, which can be enjoyed within 24-48 hours, espresso requires significant off-gassing to prevent channeling. Test your beans daily starting on day 3 to find the peak window where extraction is even and flavor is sweet.Do I need a dark roast for espresso?
No. While traditional espresso was dark, modern specialty espresso often uses medium or even medium-light roasts. The key is development time, not just color. A well-developed medium roast can offer complex flavors and sweetness, whereas an under-developed dark roast will still taste burnt and bitter.Why does my home-roasted espresso taste sour?
Sourness usually indicates under-extraction, often caused by two roast-related issues: under-development (beans not roasted long enough after first crack) or insufficient resting time (too much CO2 causing channeling). Extend your roast development time and ensure beans rest for at least 5-7 days before brewing.Is home roasting cheaper than buying roasted coffee?
It can be, but not always. Green beans are cheaper per pound, but you must account for equipment costs, energy usage, and time. For casual drinkers, it might not save money. For enthusiasts who value freshness and customization, the cost-per-cup can be lower, especially if you roast in larger batches.Conclusion
Roasting espresso at home is a rewarding challenge that rewards precision and patience. It’s not just about making coffee; it’s about engineering a specific physical and chemical state in the bean. You control the input, the process, and the time. That control is your superpower.
Start small. Buy 100g of green beans. Roast them. Wait a week. Pull a shot. Adjust. Repeat. The perfect shot is out there, waiting for you to find the right curve. Don’t let the learning curve discourage you. Every bad shot teaches you something valuable. Now, go fire up that roaster.